Cape Canaveral, FL | Water Damaged Popcorn Ceiling From Tropical Storm Debby

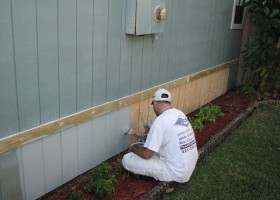
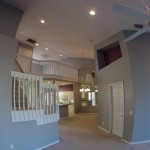
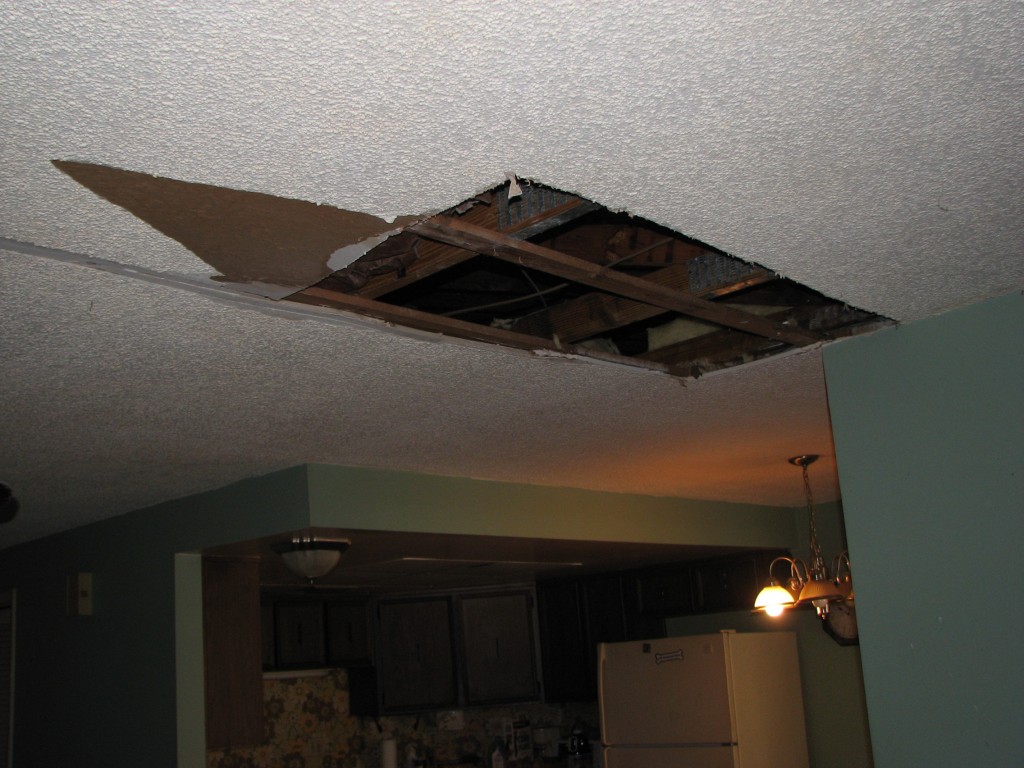
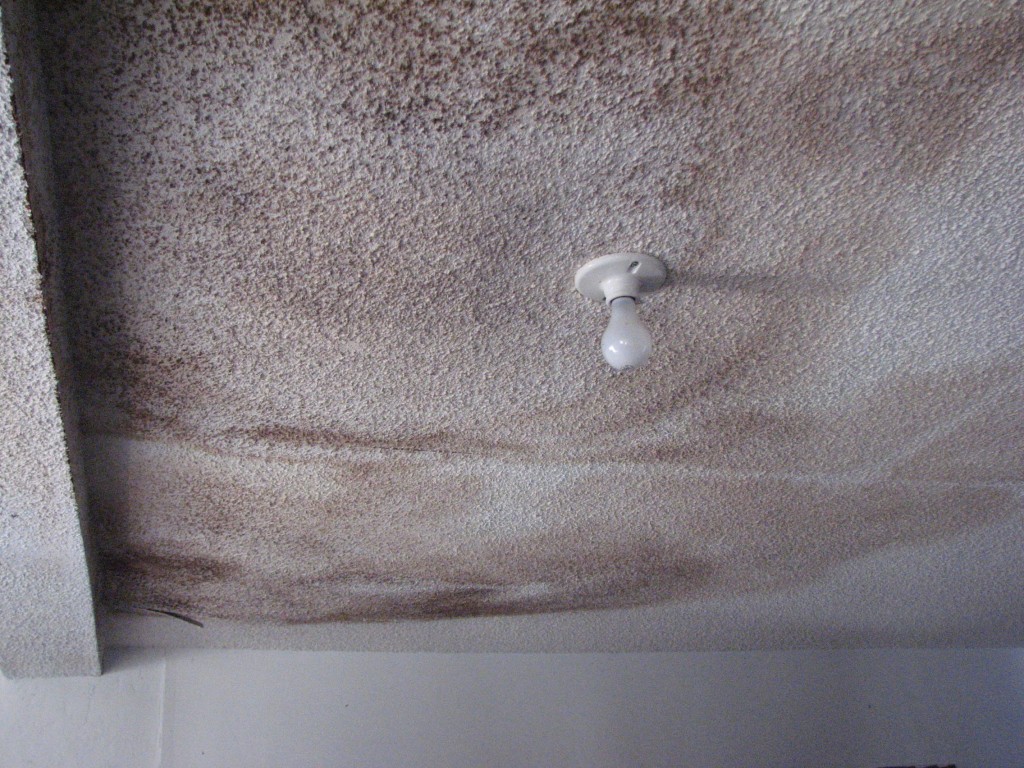
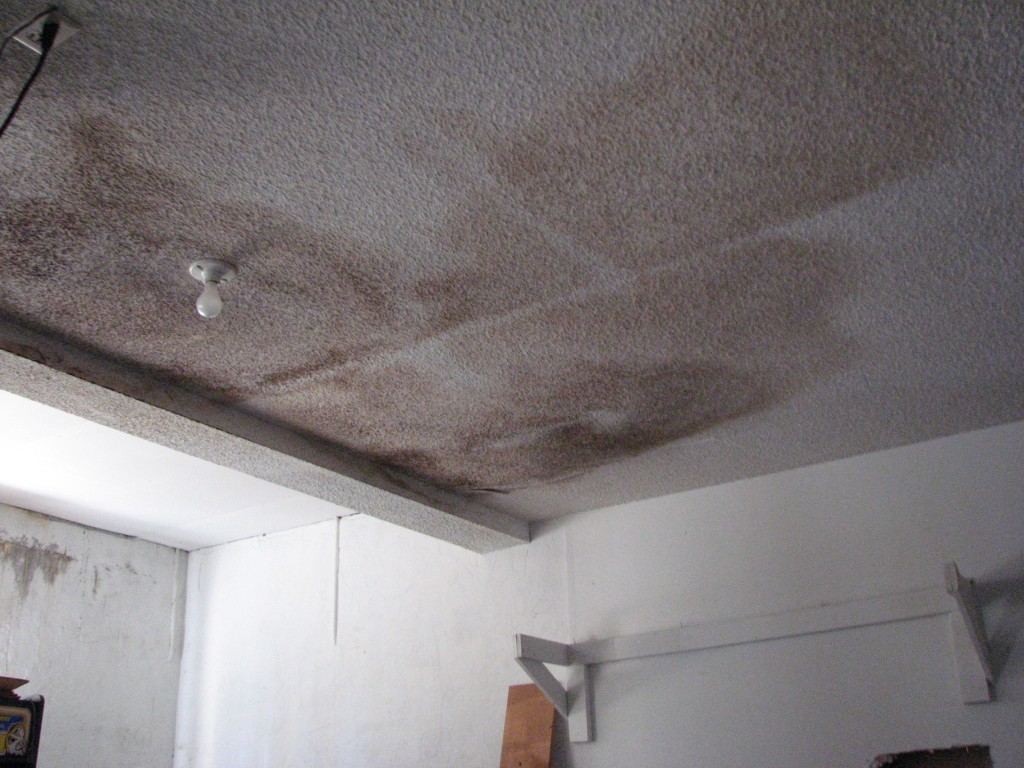
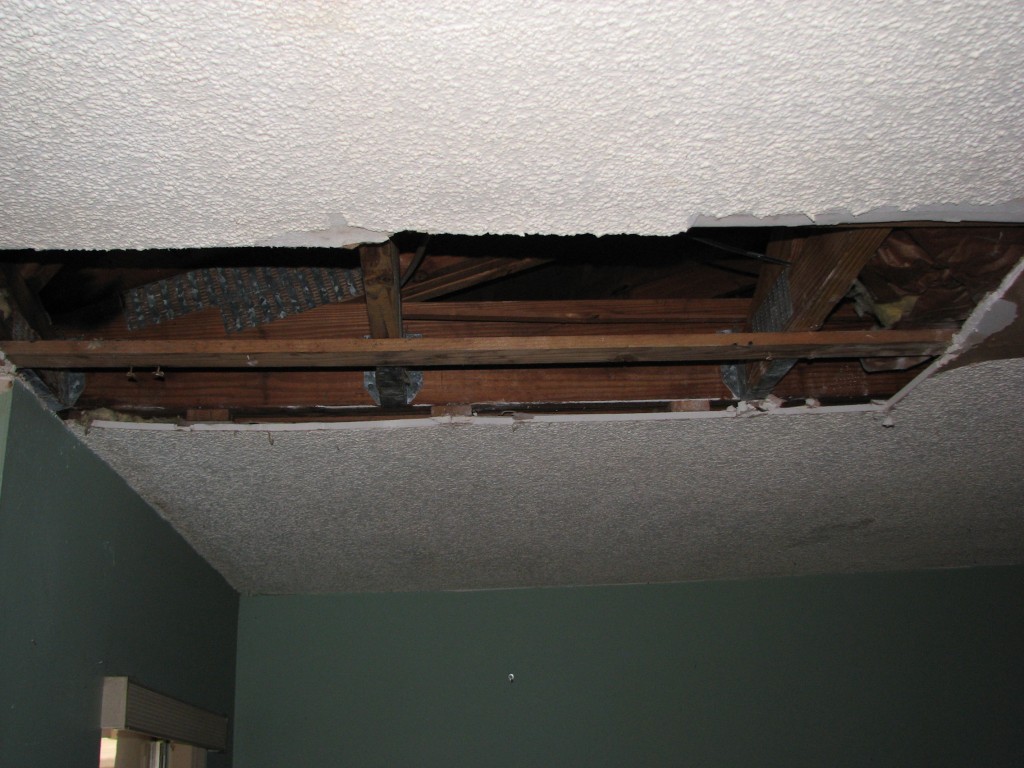
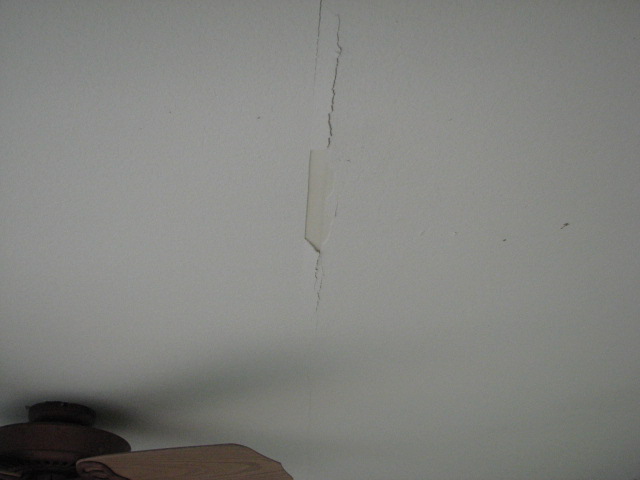
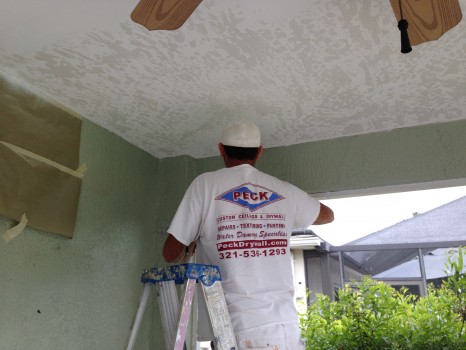
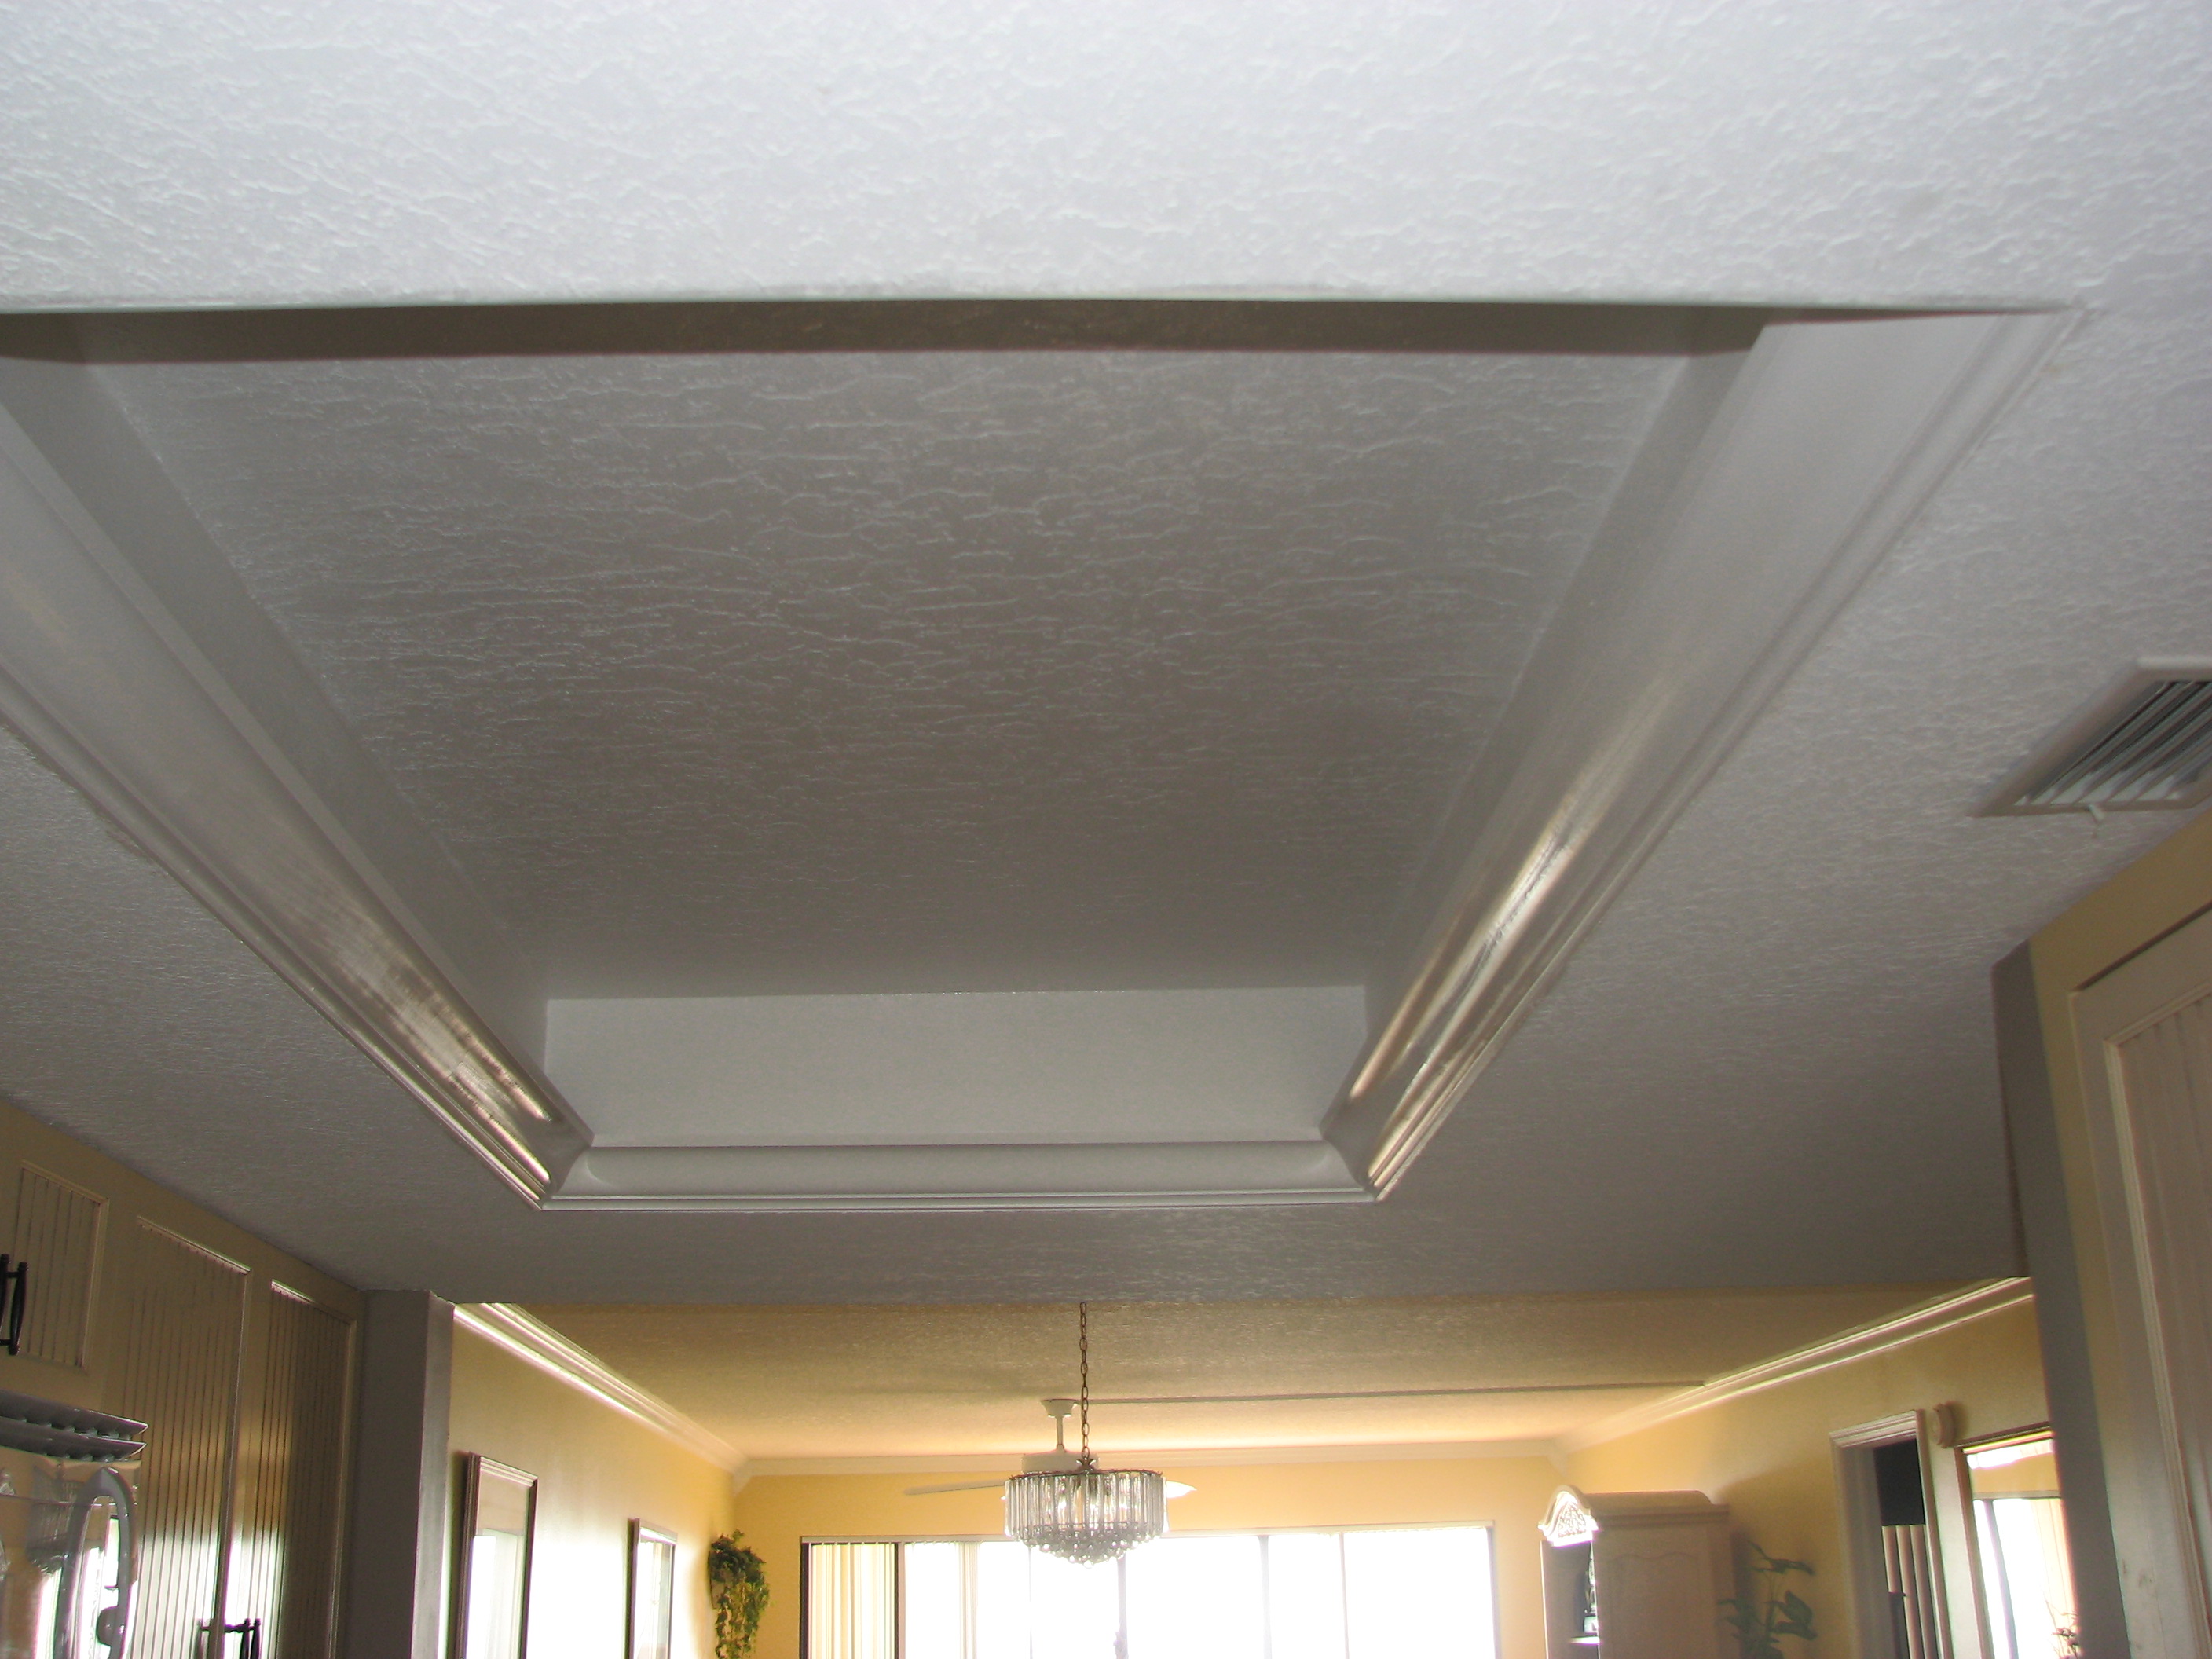
Here’s a repair I did on a water damaged popcorn ceiling at a condominum complex that I have the contract to do all of their drywall and painting work in Cape Canaveral, FL. The water damage was caused by a roof leak during Tropical Storm Debby.

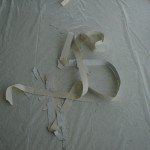
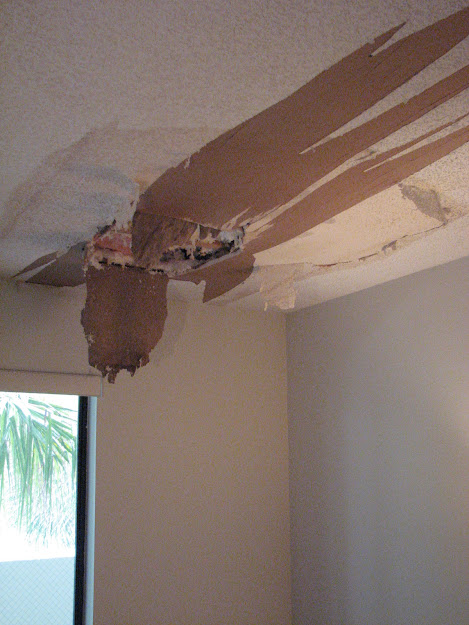
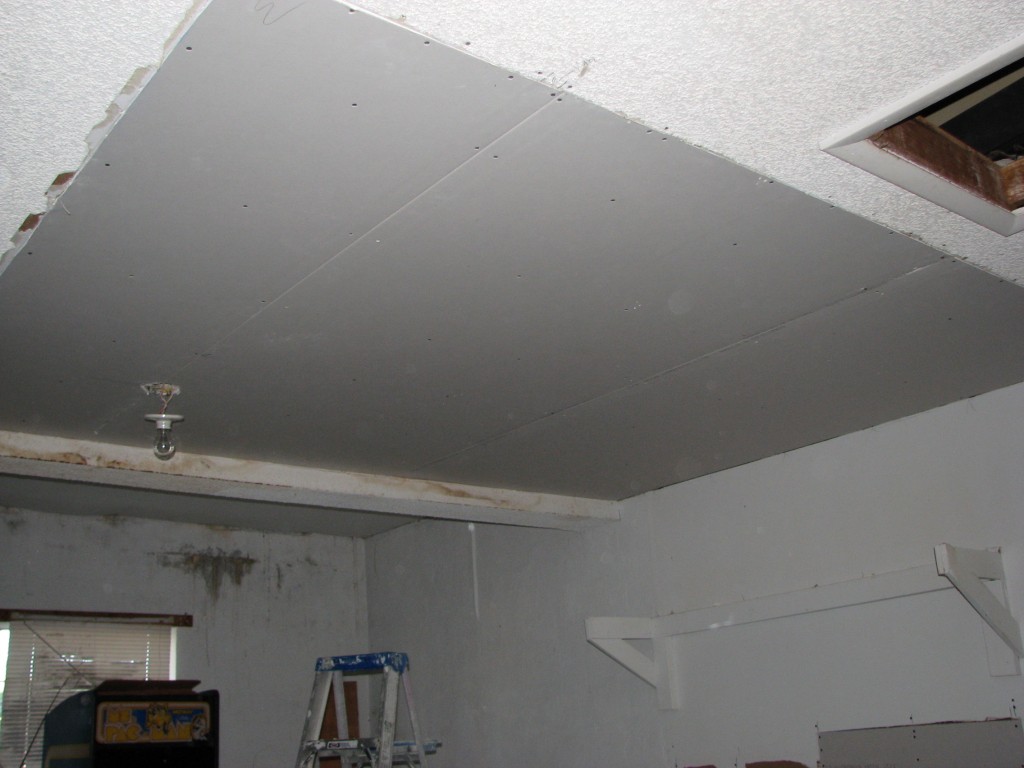
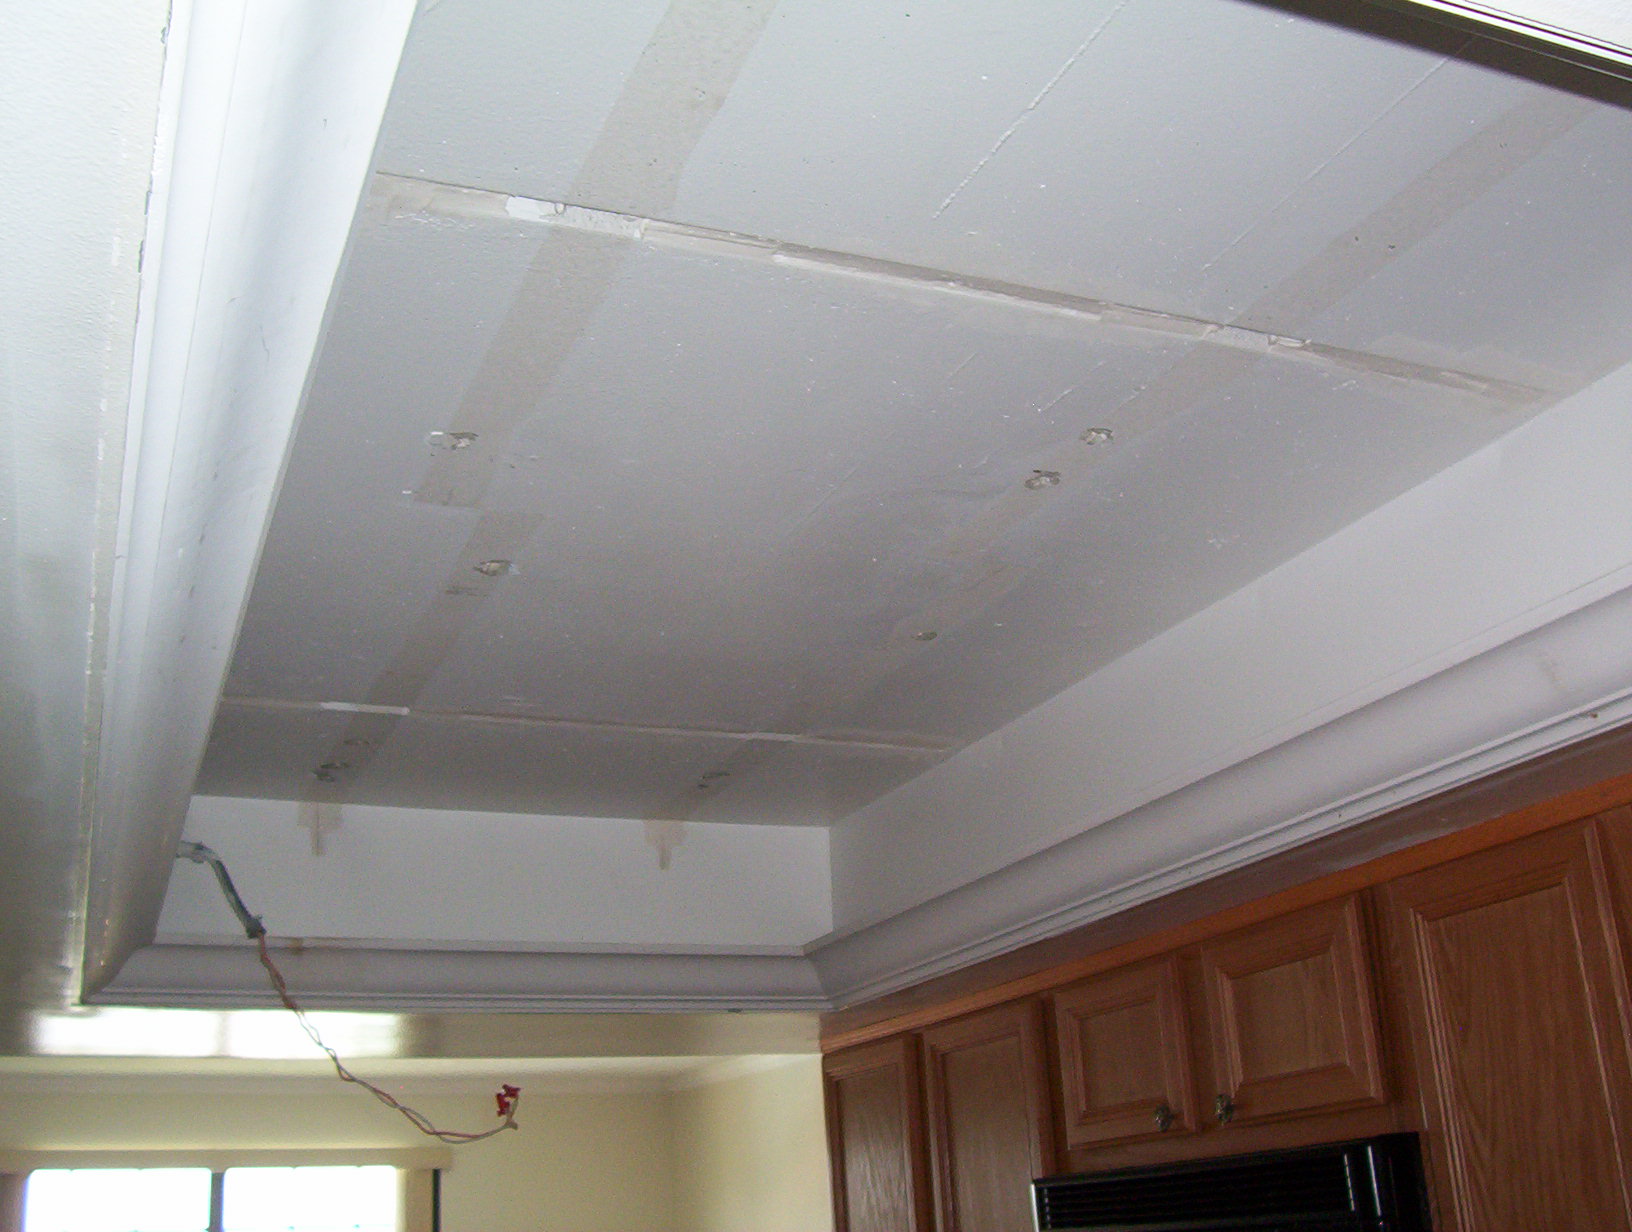
Water Damaged Popcorn Ceiling:


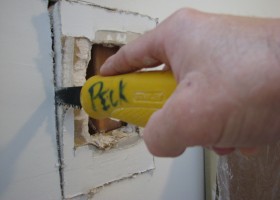
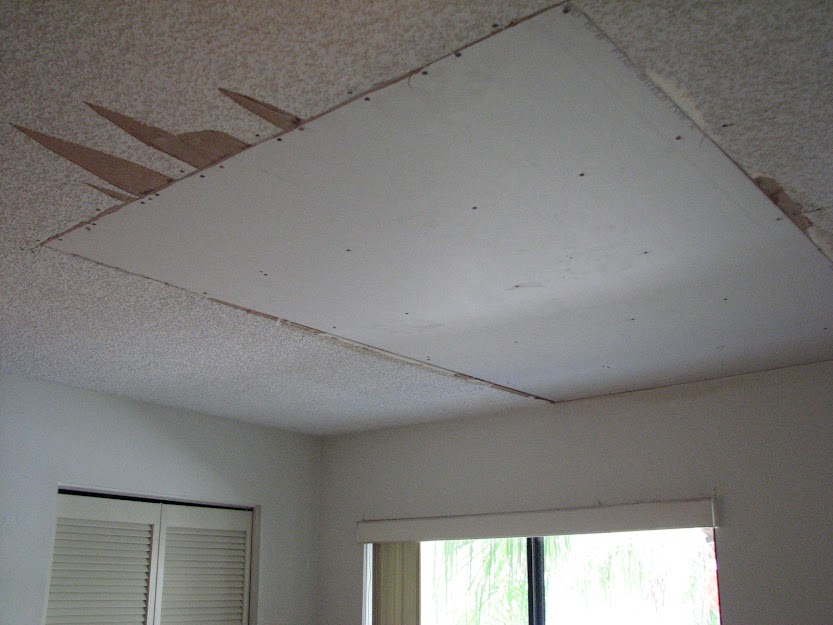
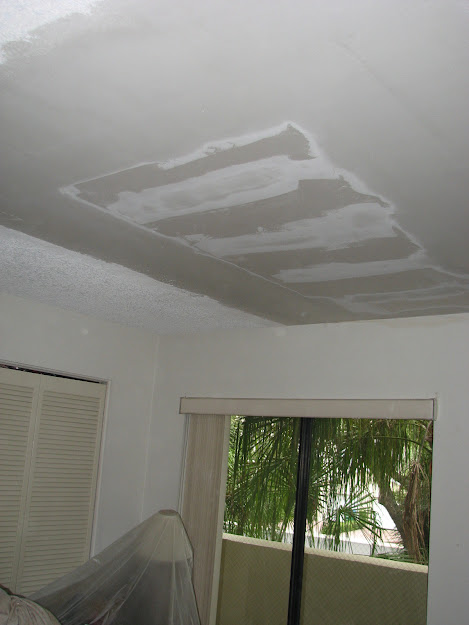
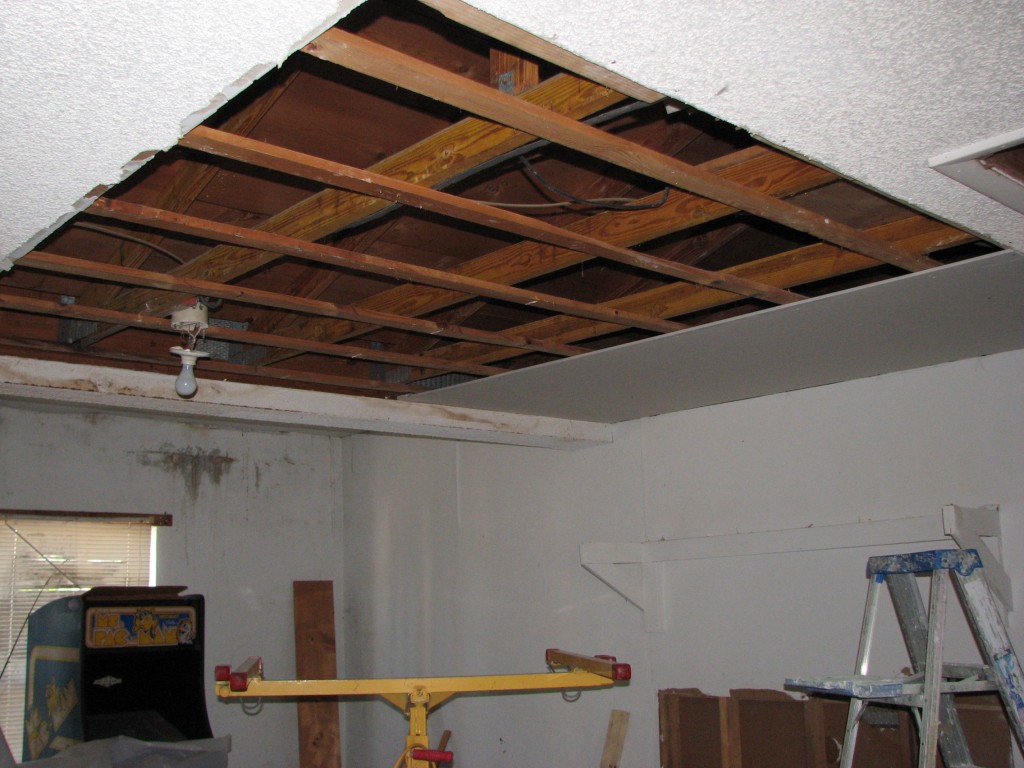
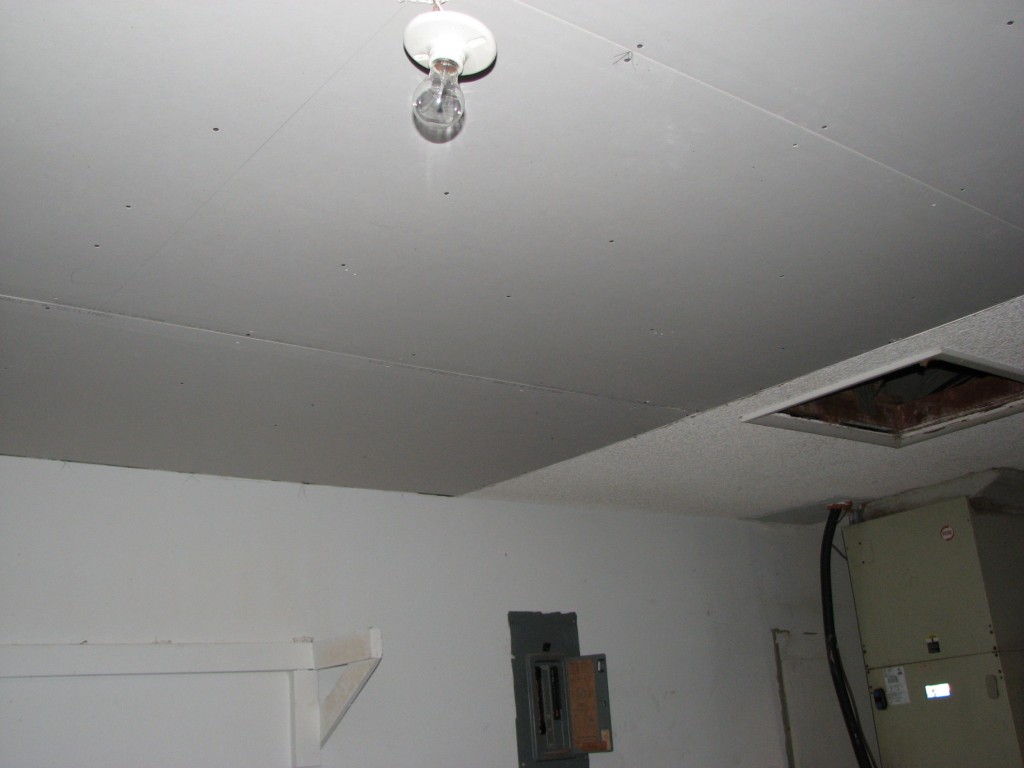
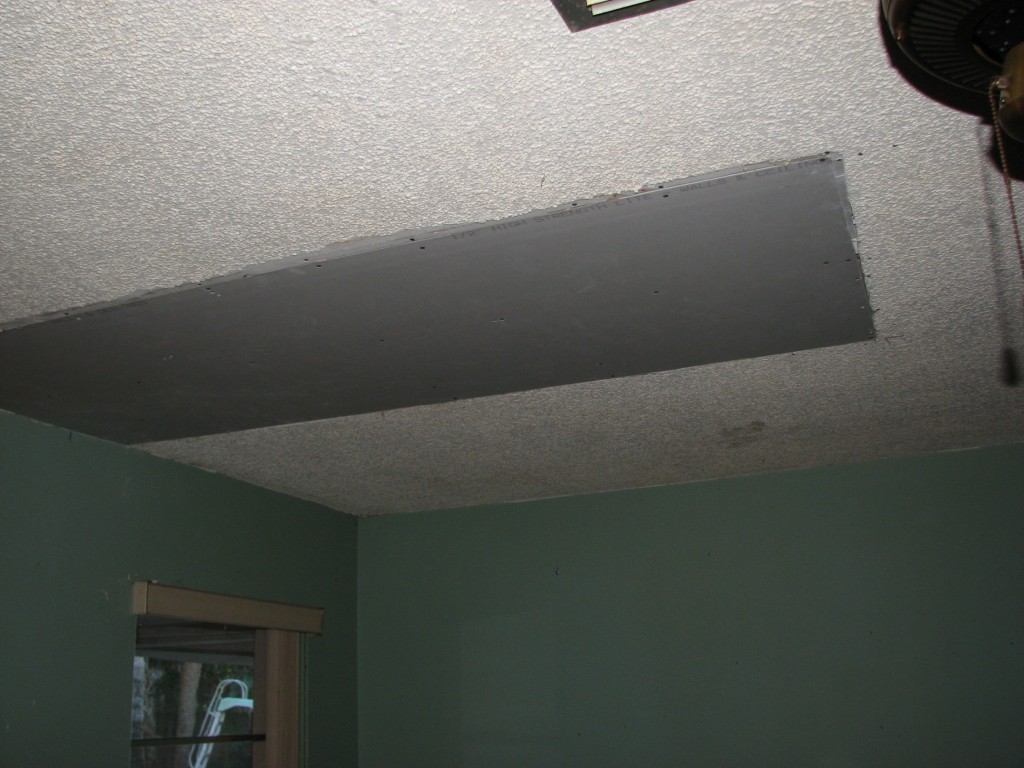
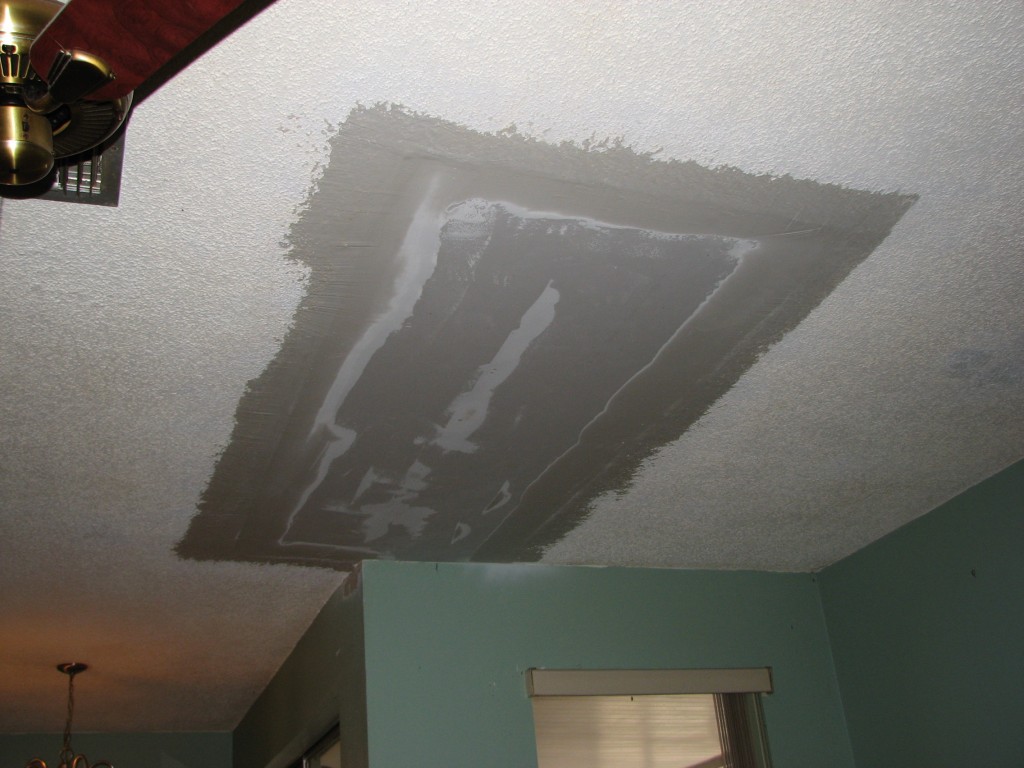
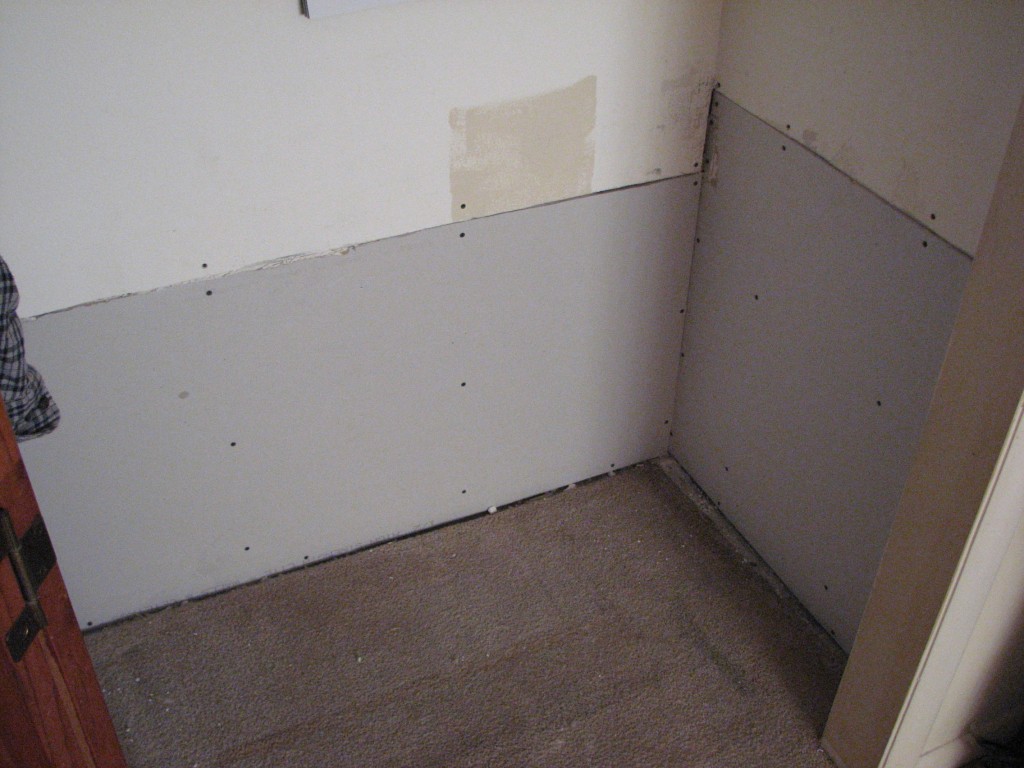
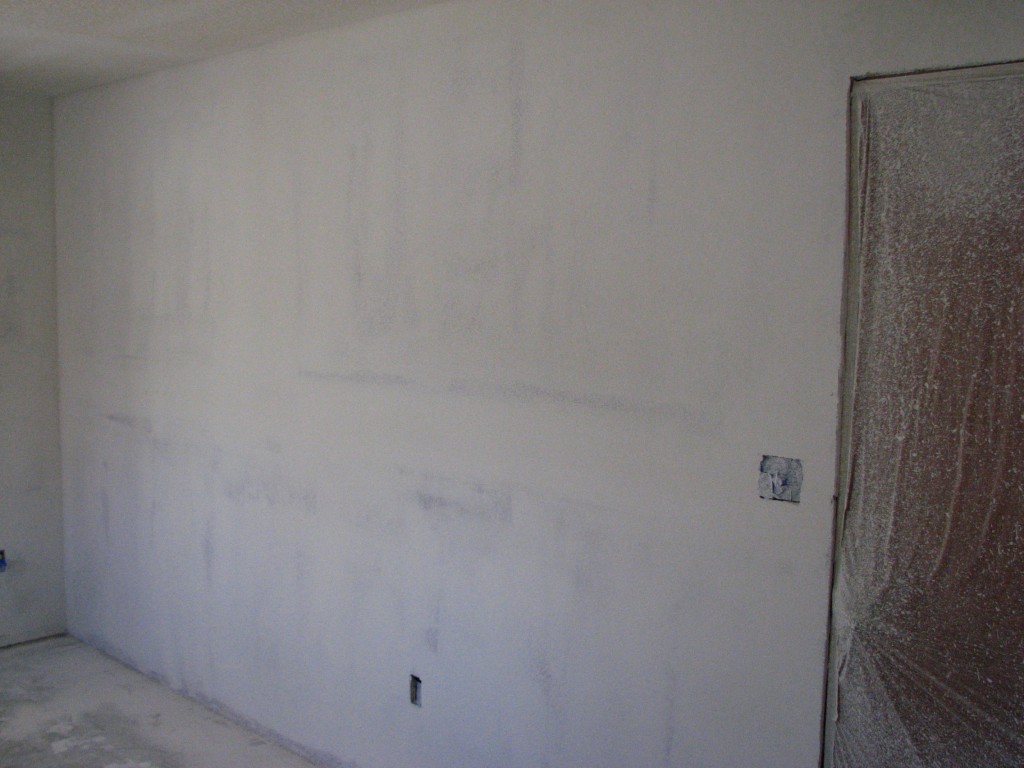
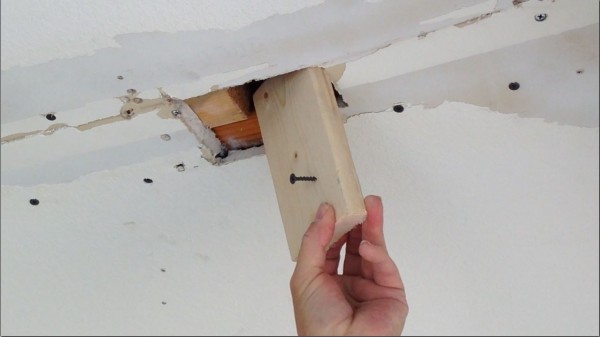
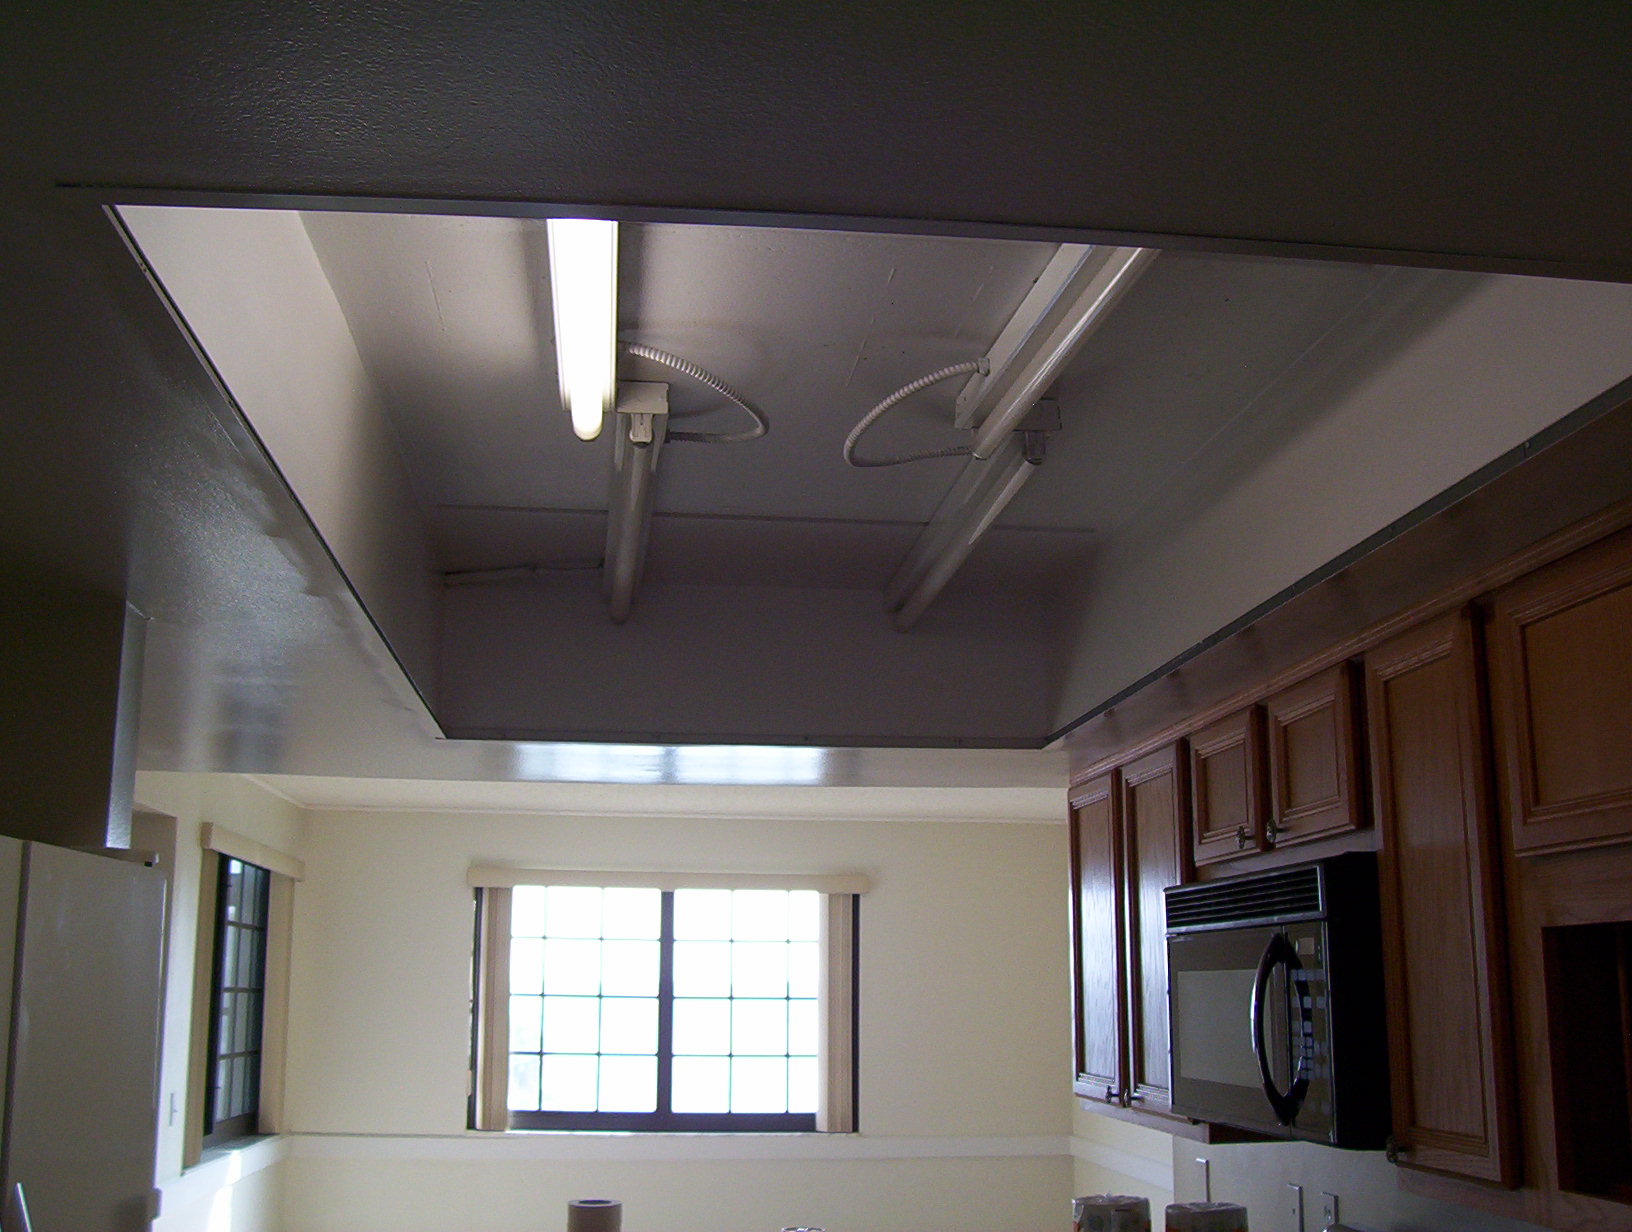
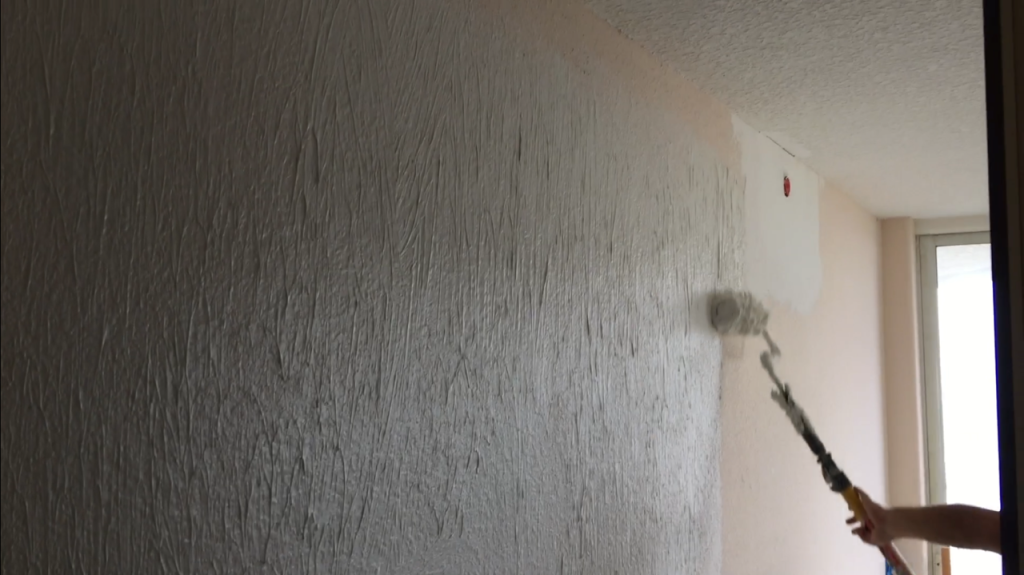
Water damaged area cut out and new drywall installed.

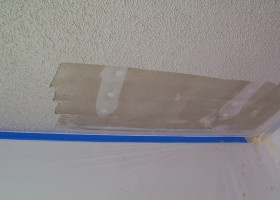
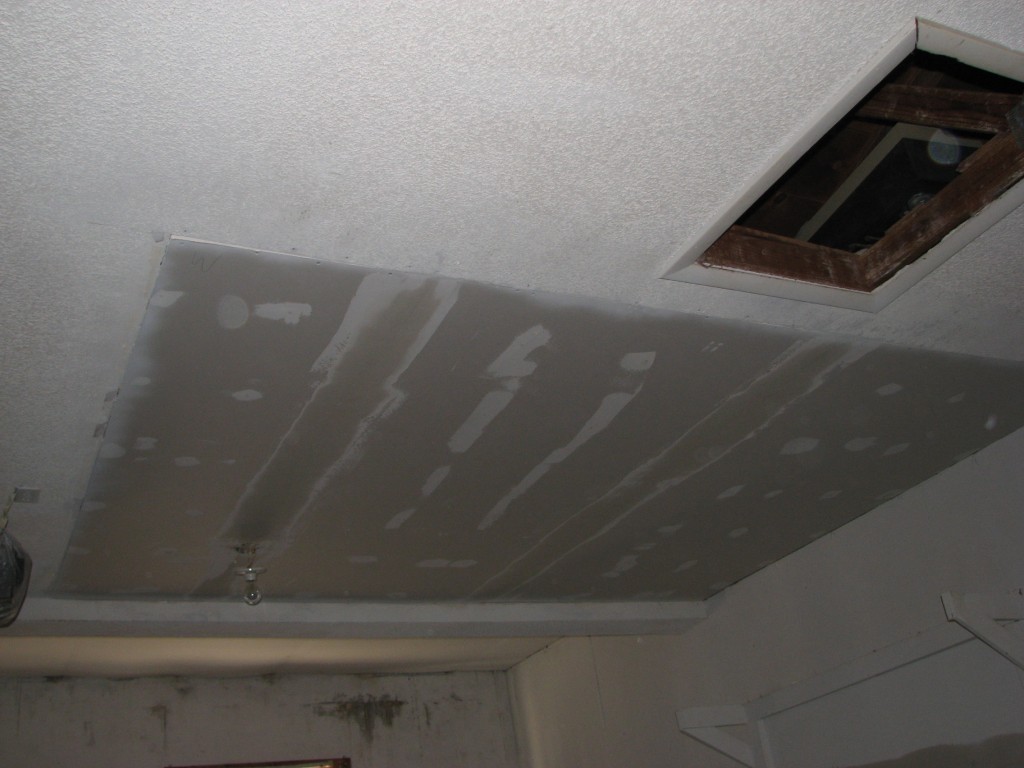
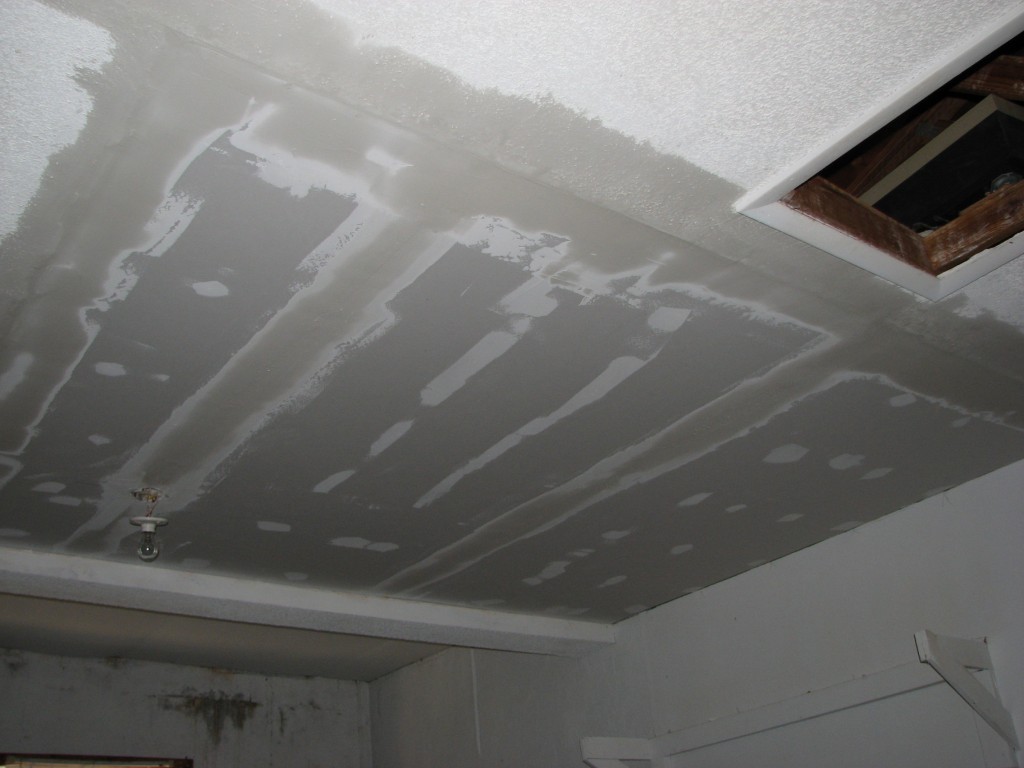
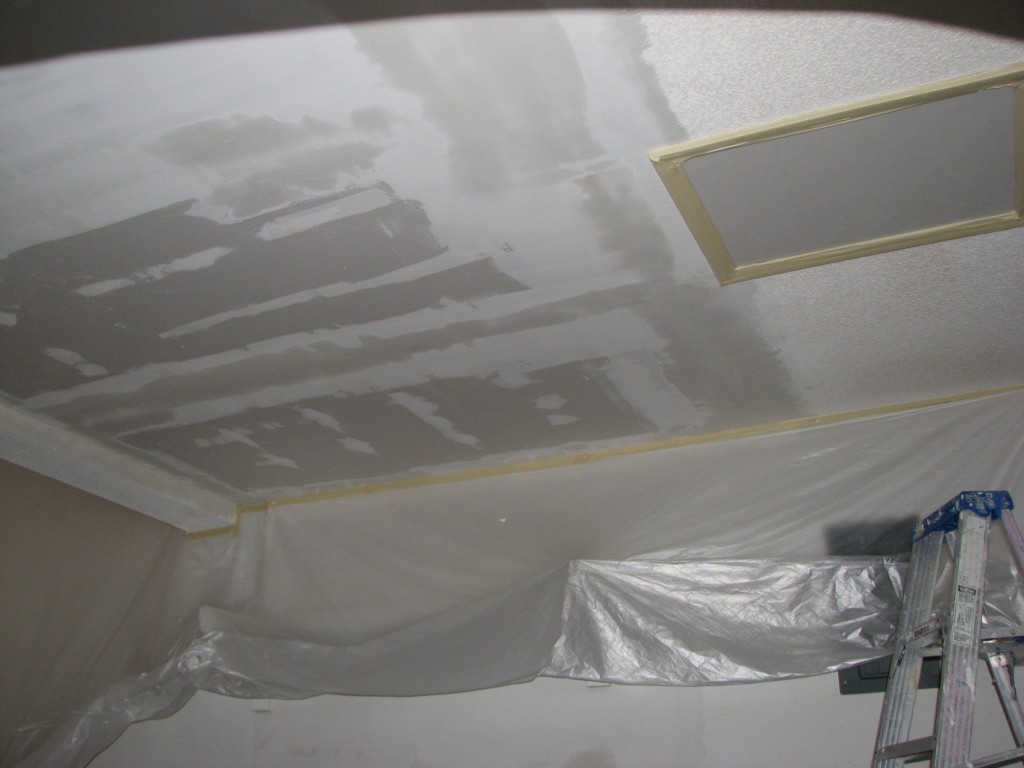
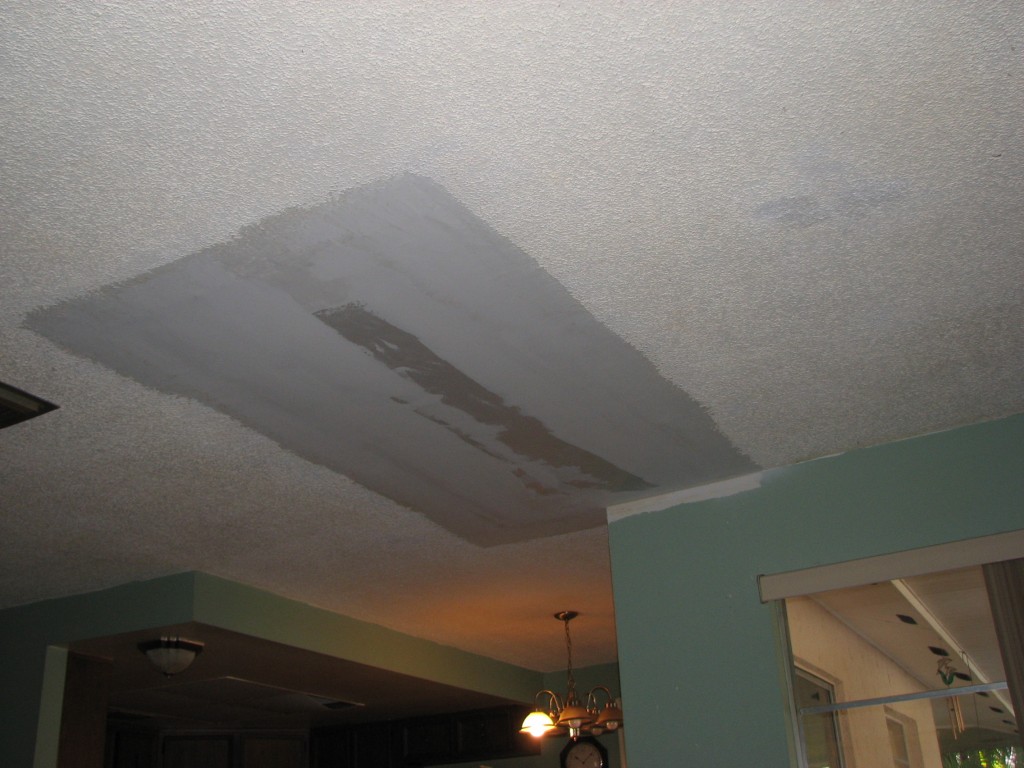
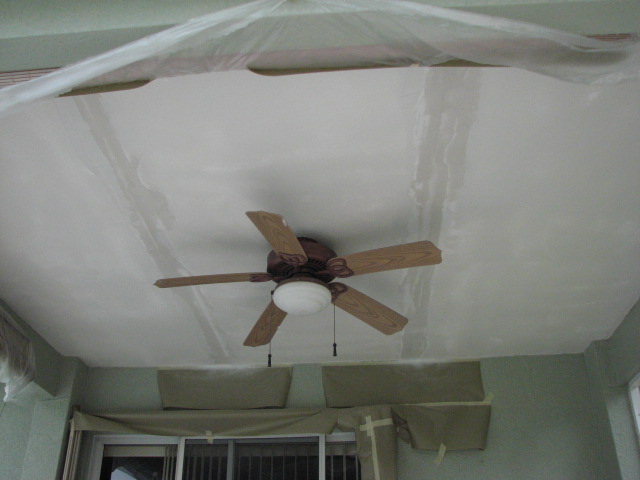
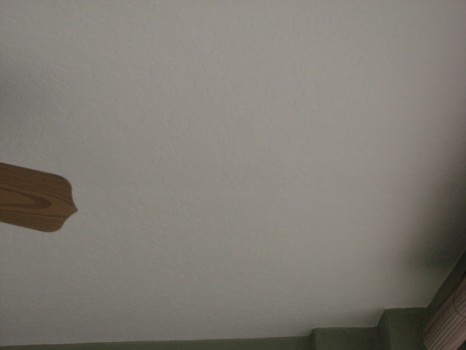
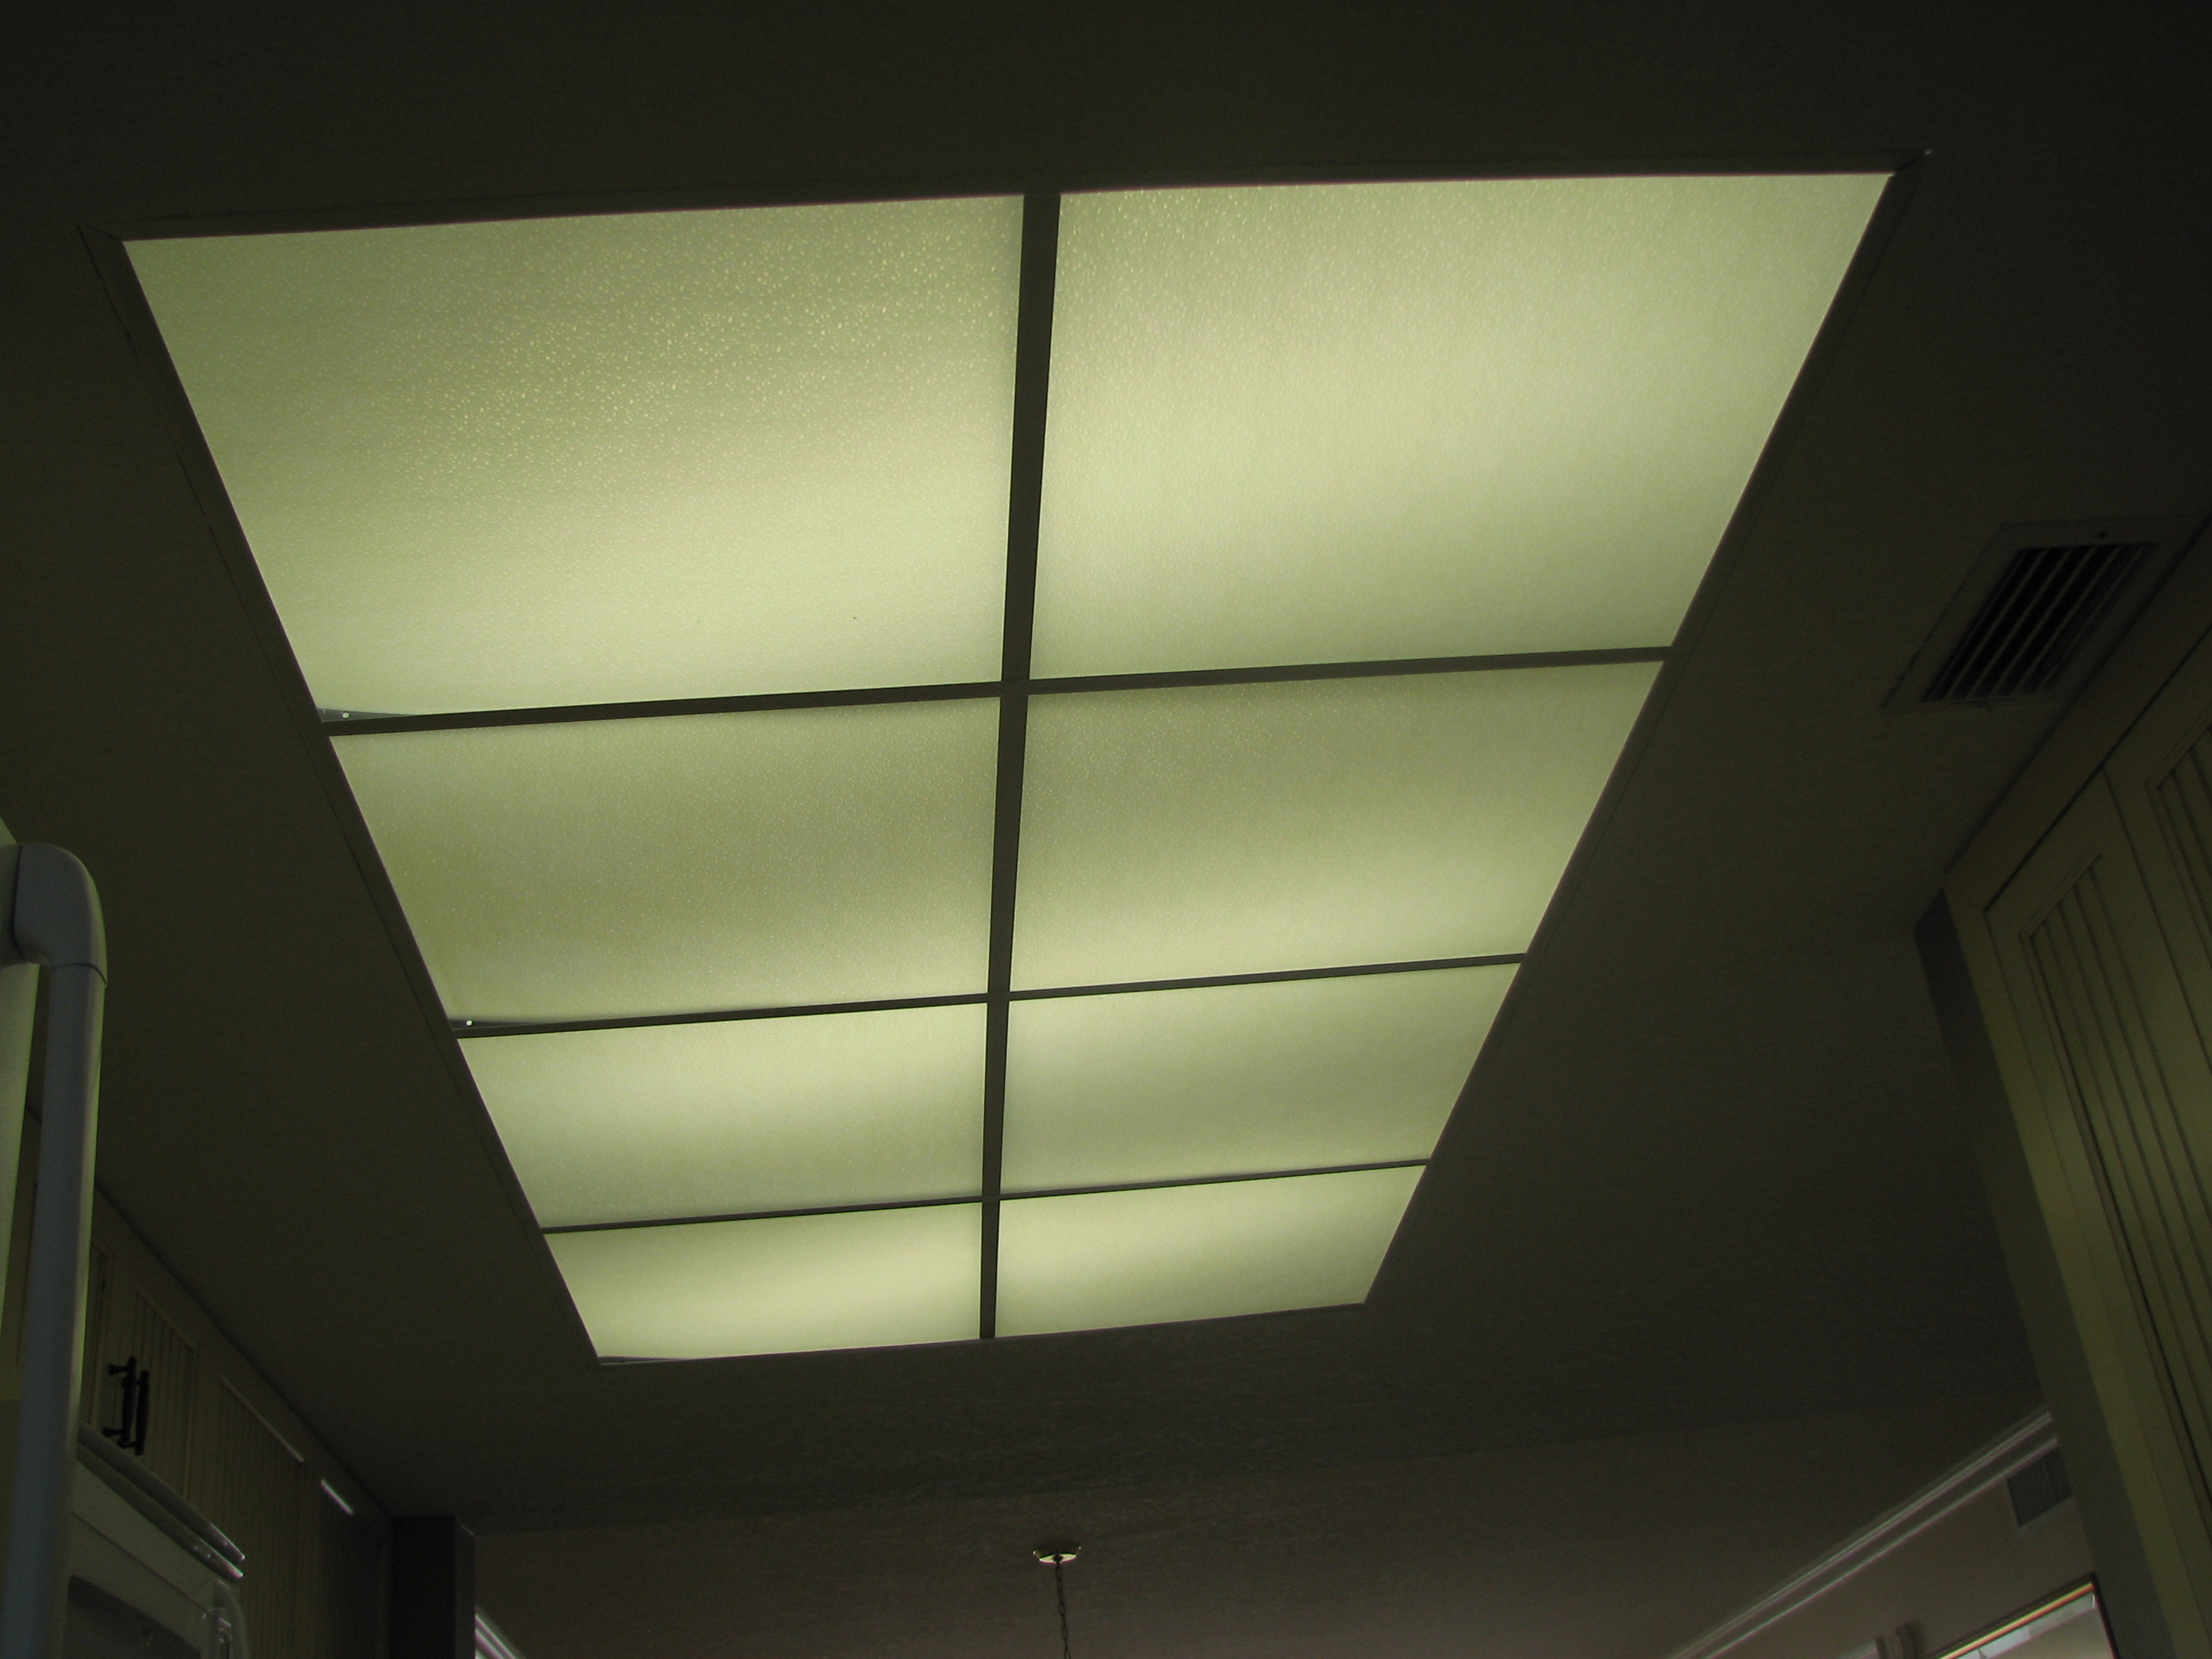
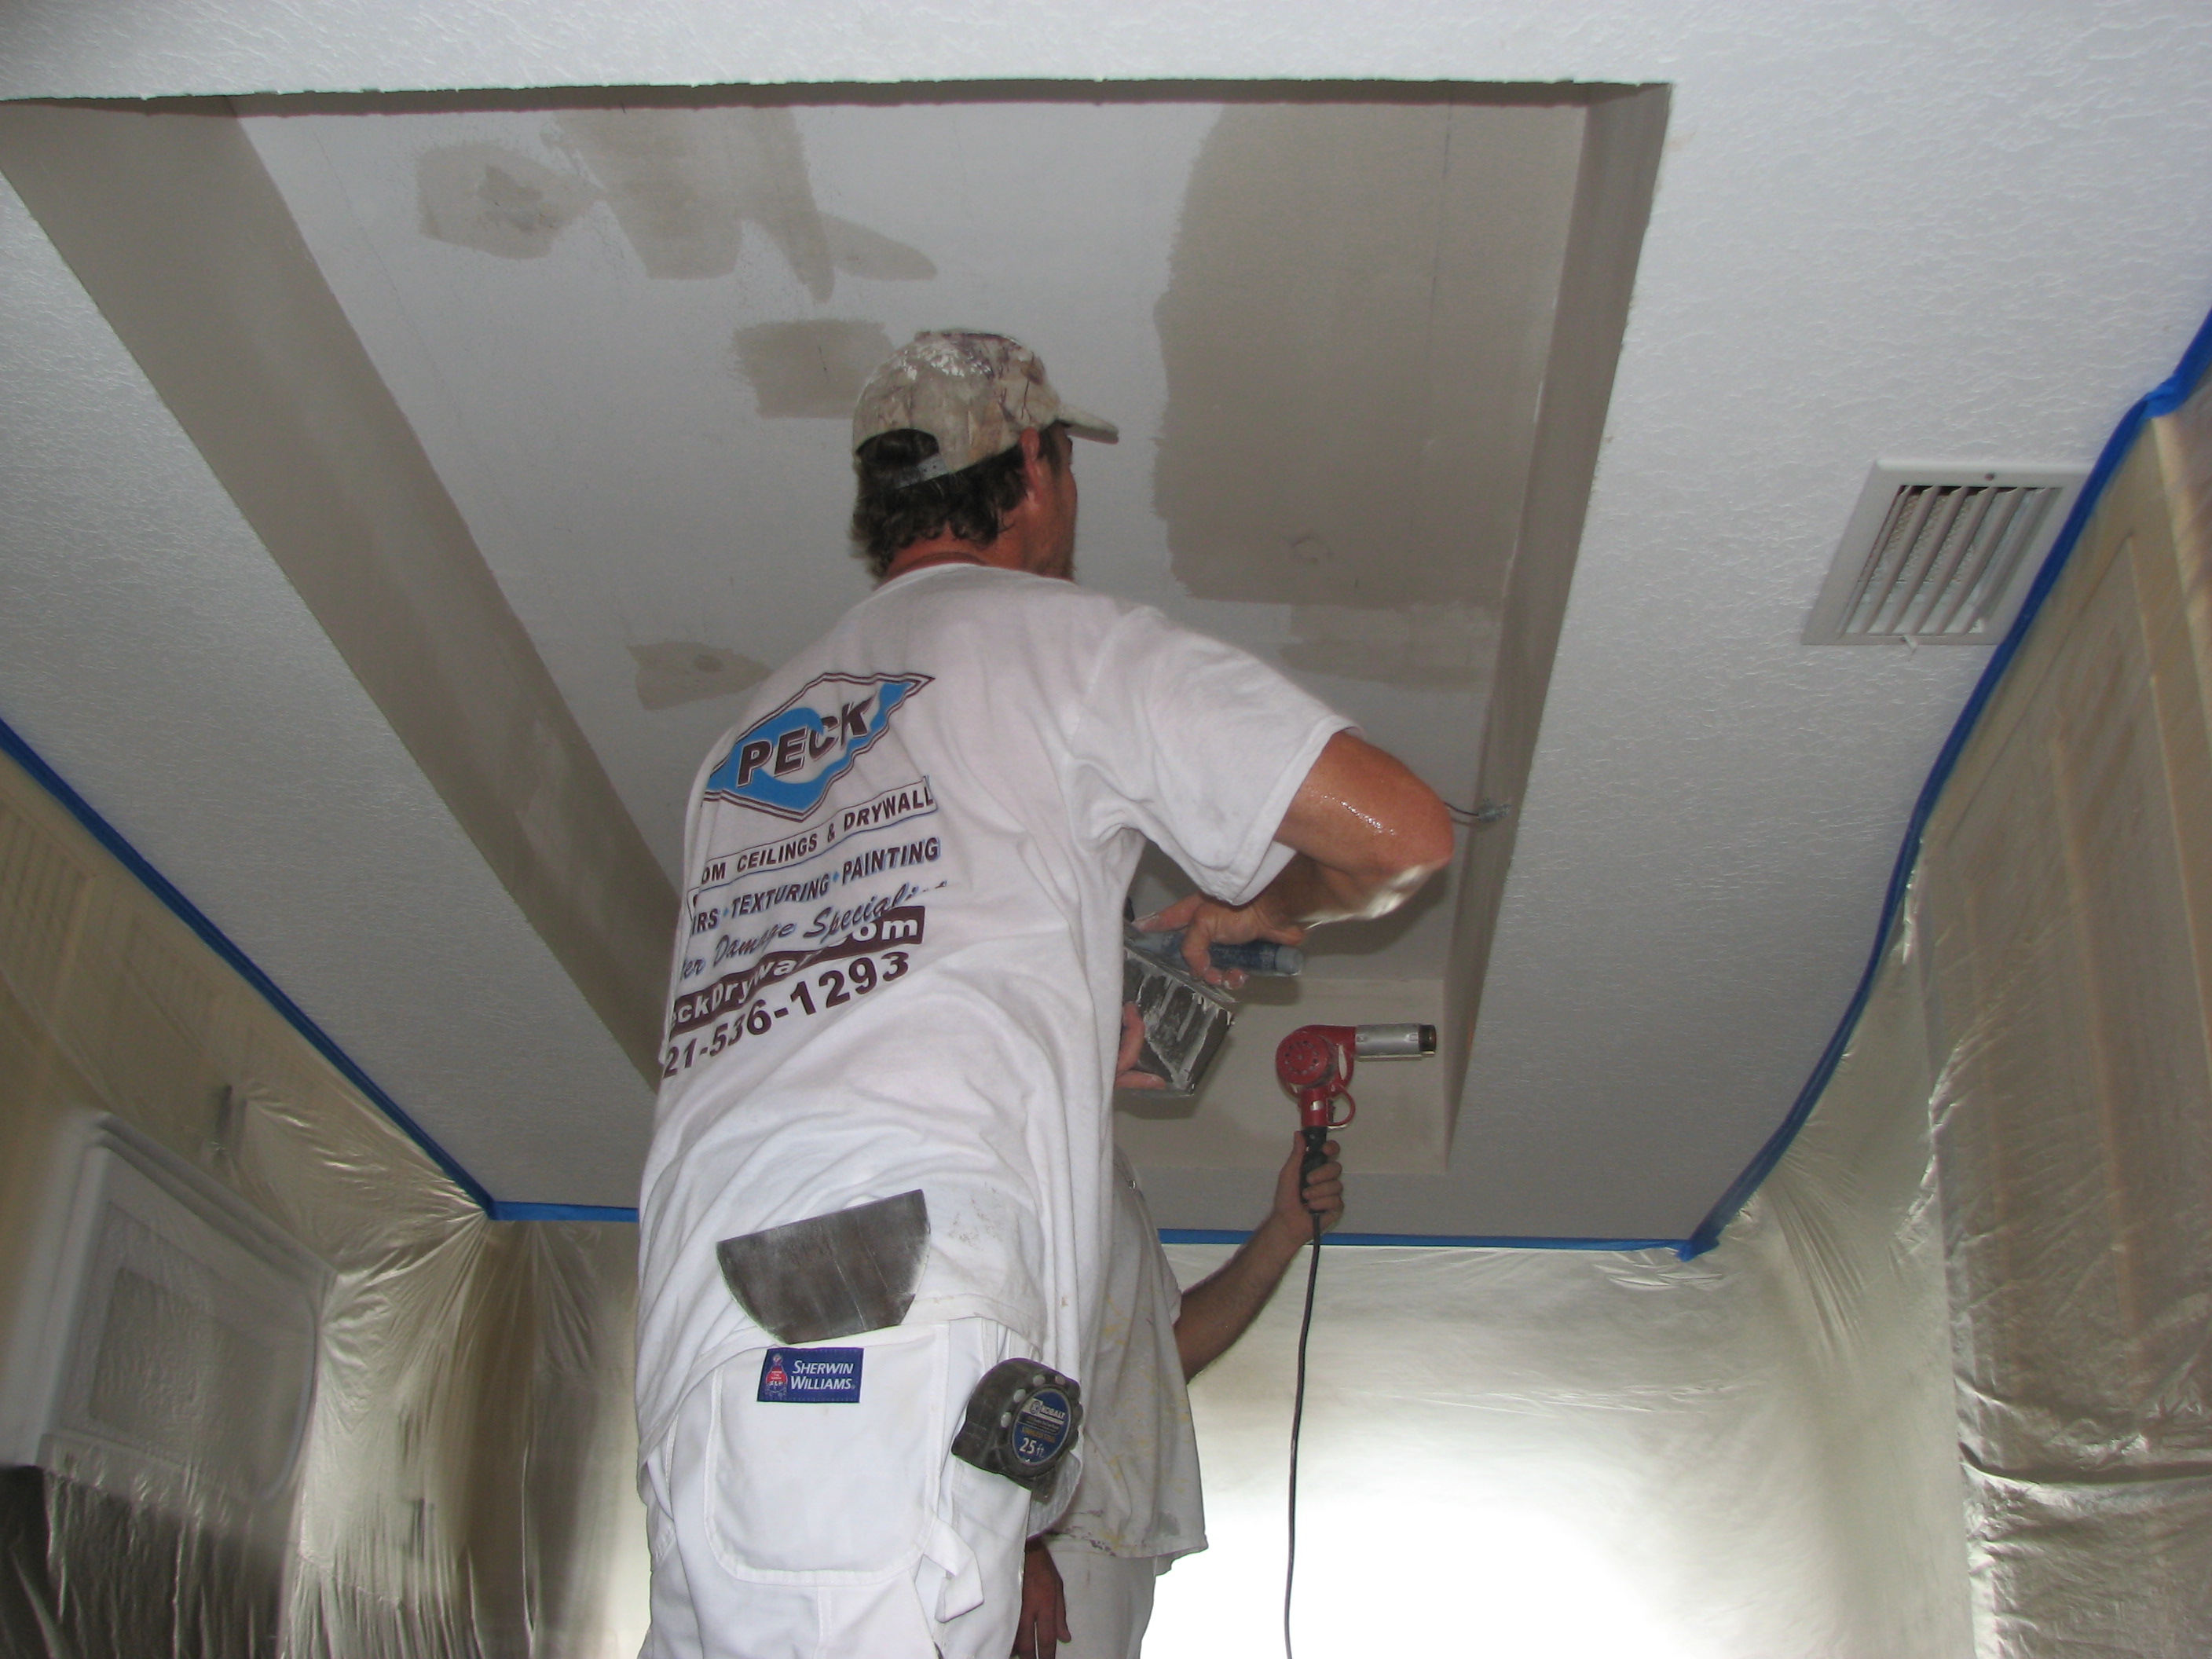
Ceiling repair taped, mudded and skim coated.


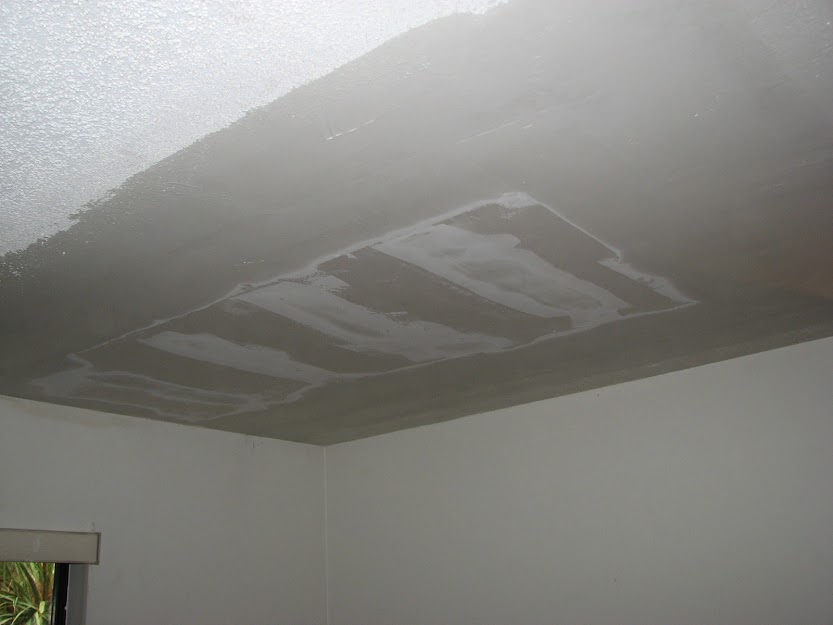
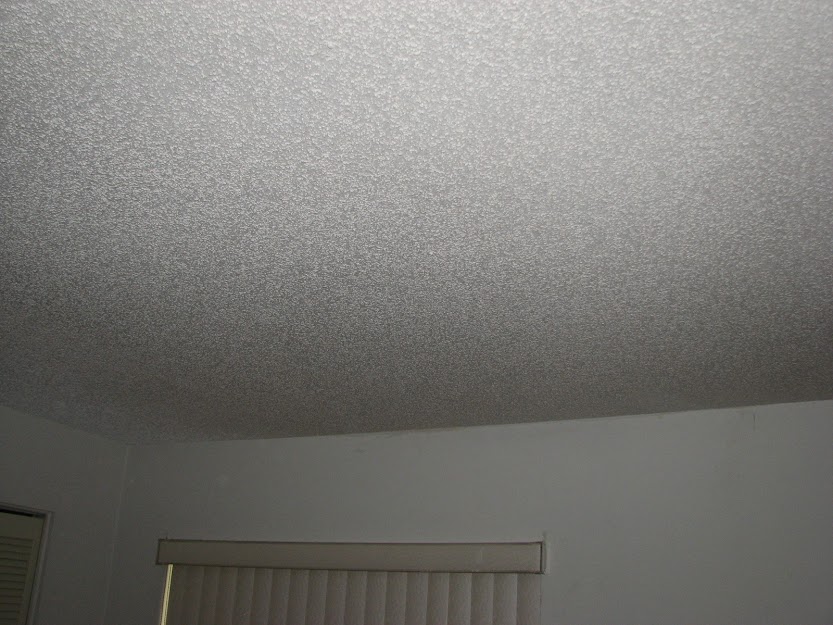
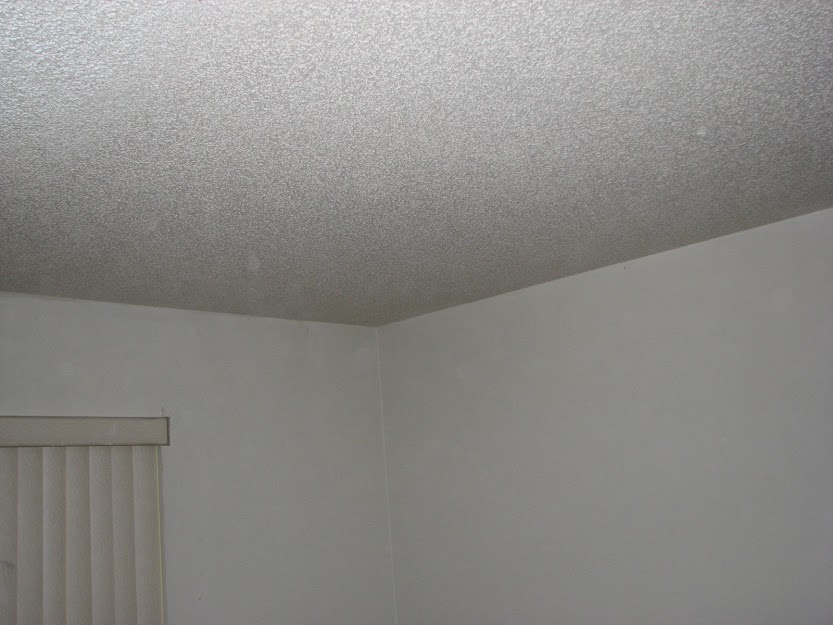
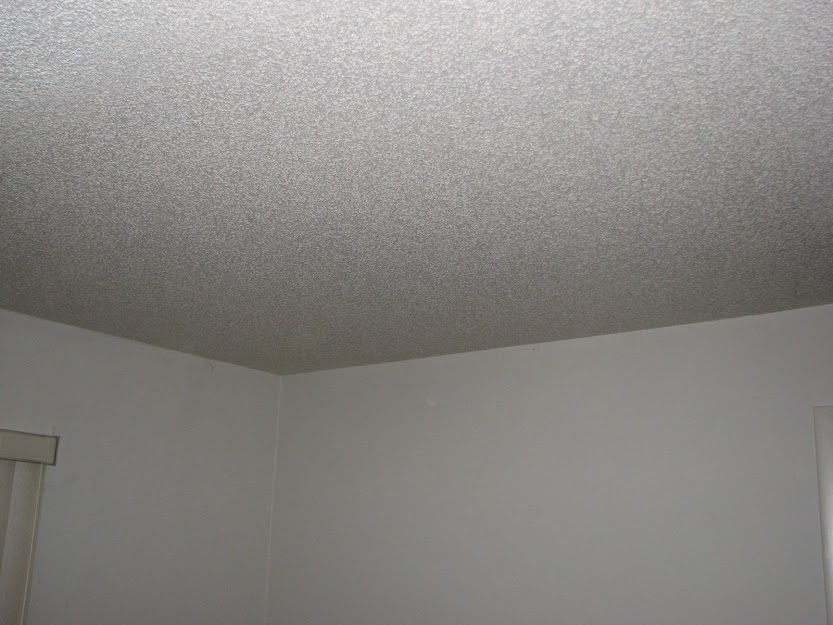
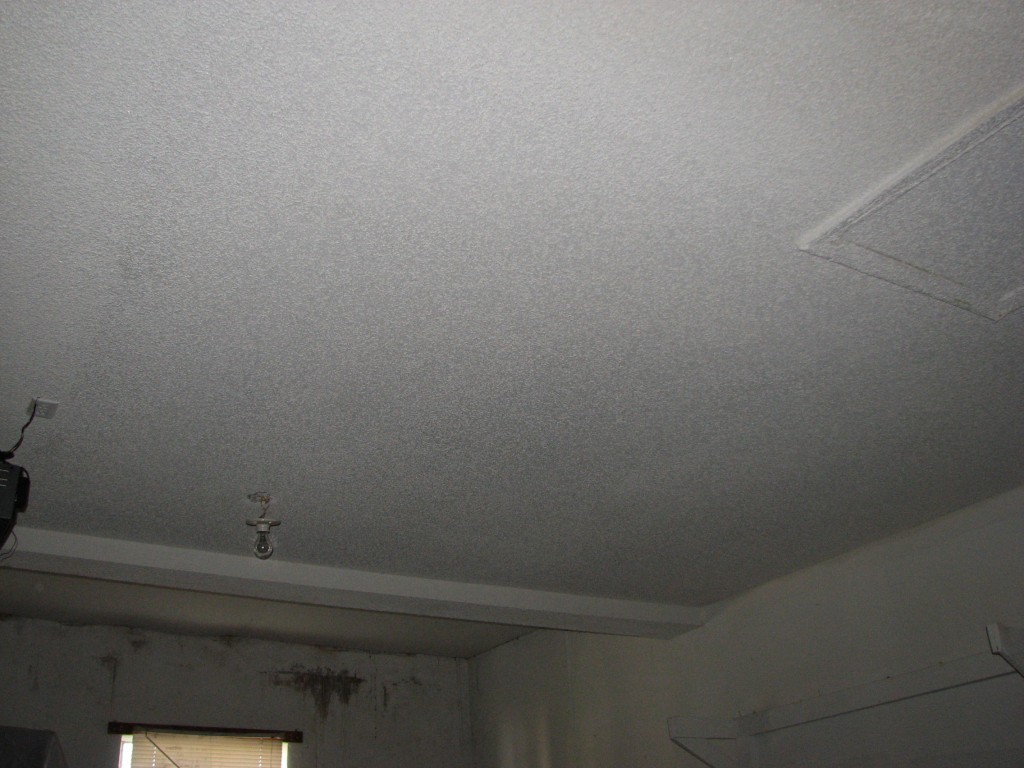
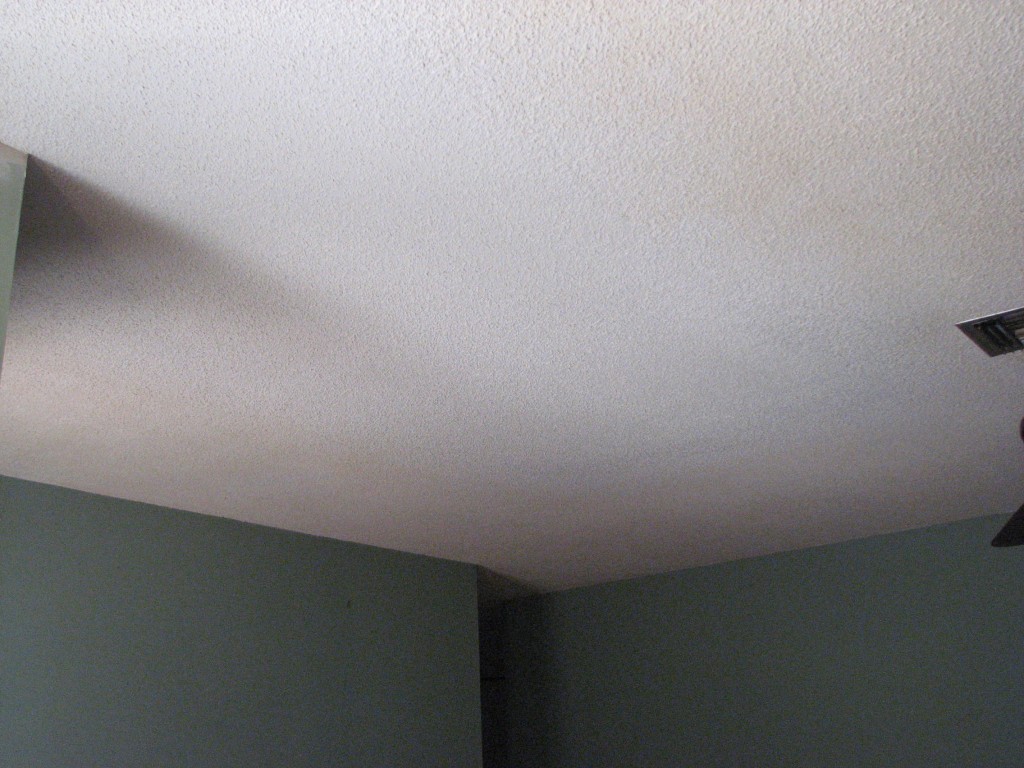
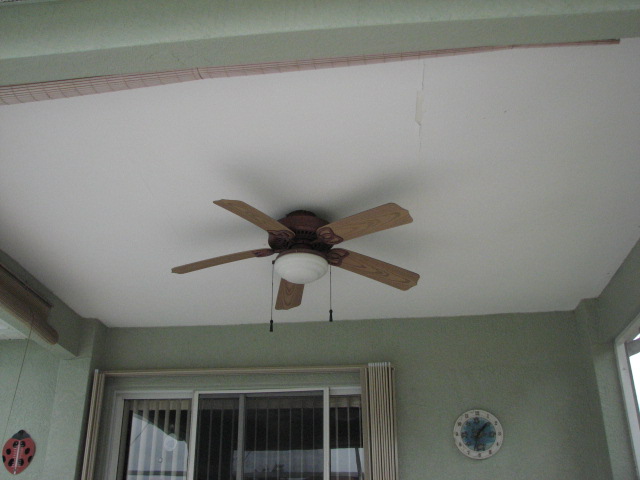
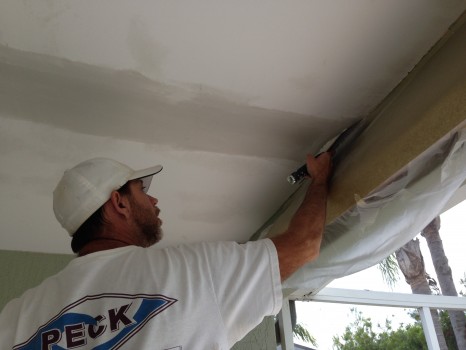
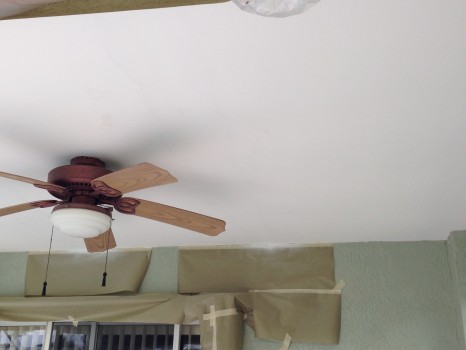
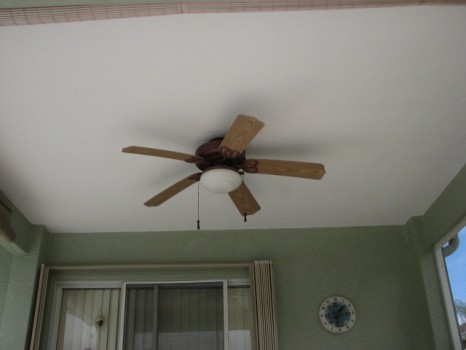
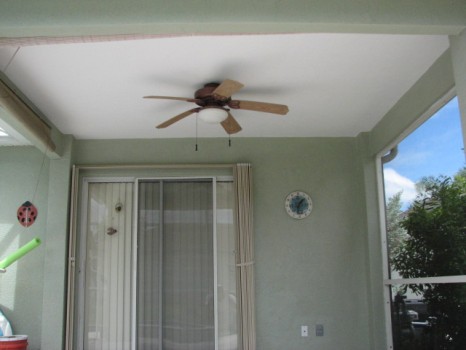
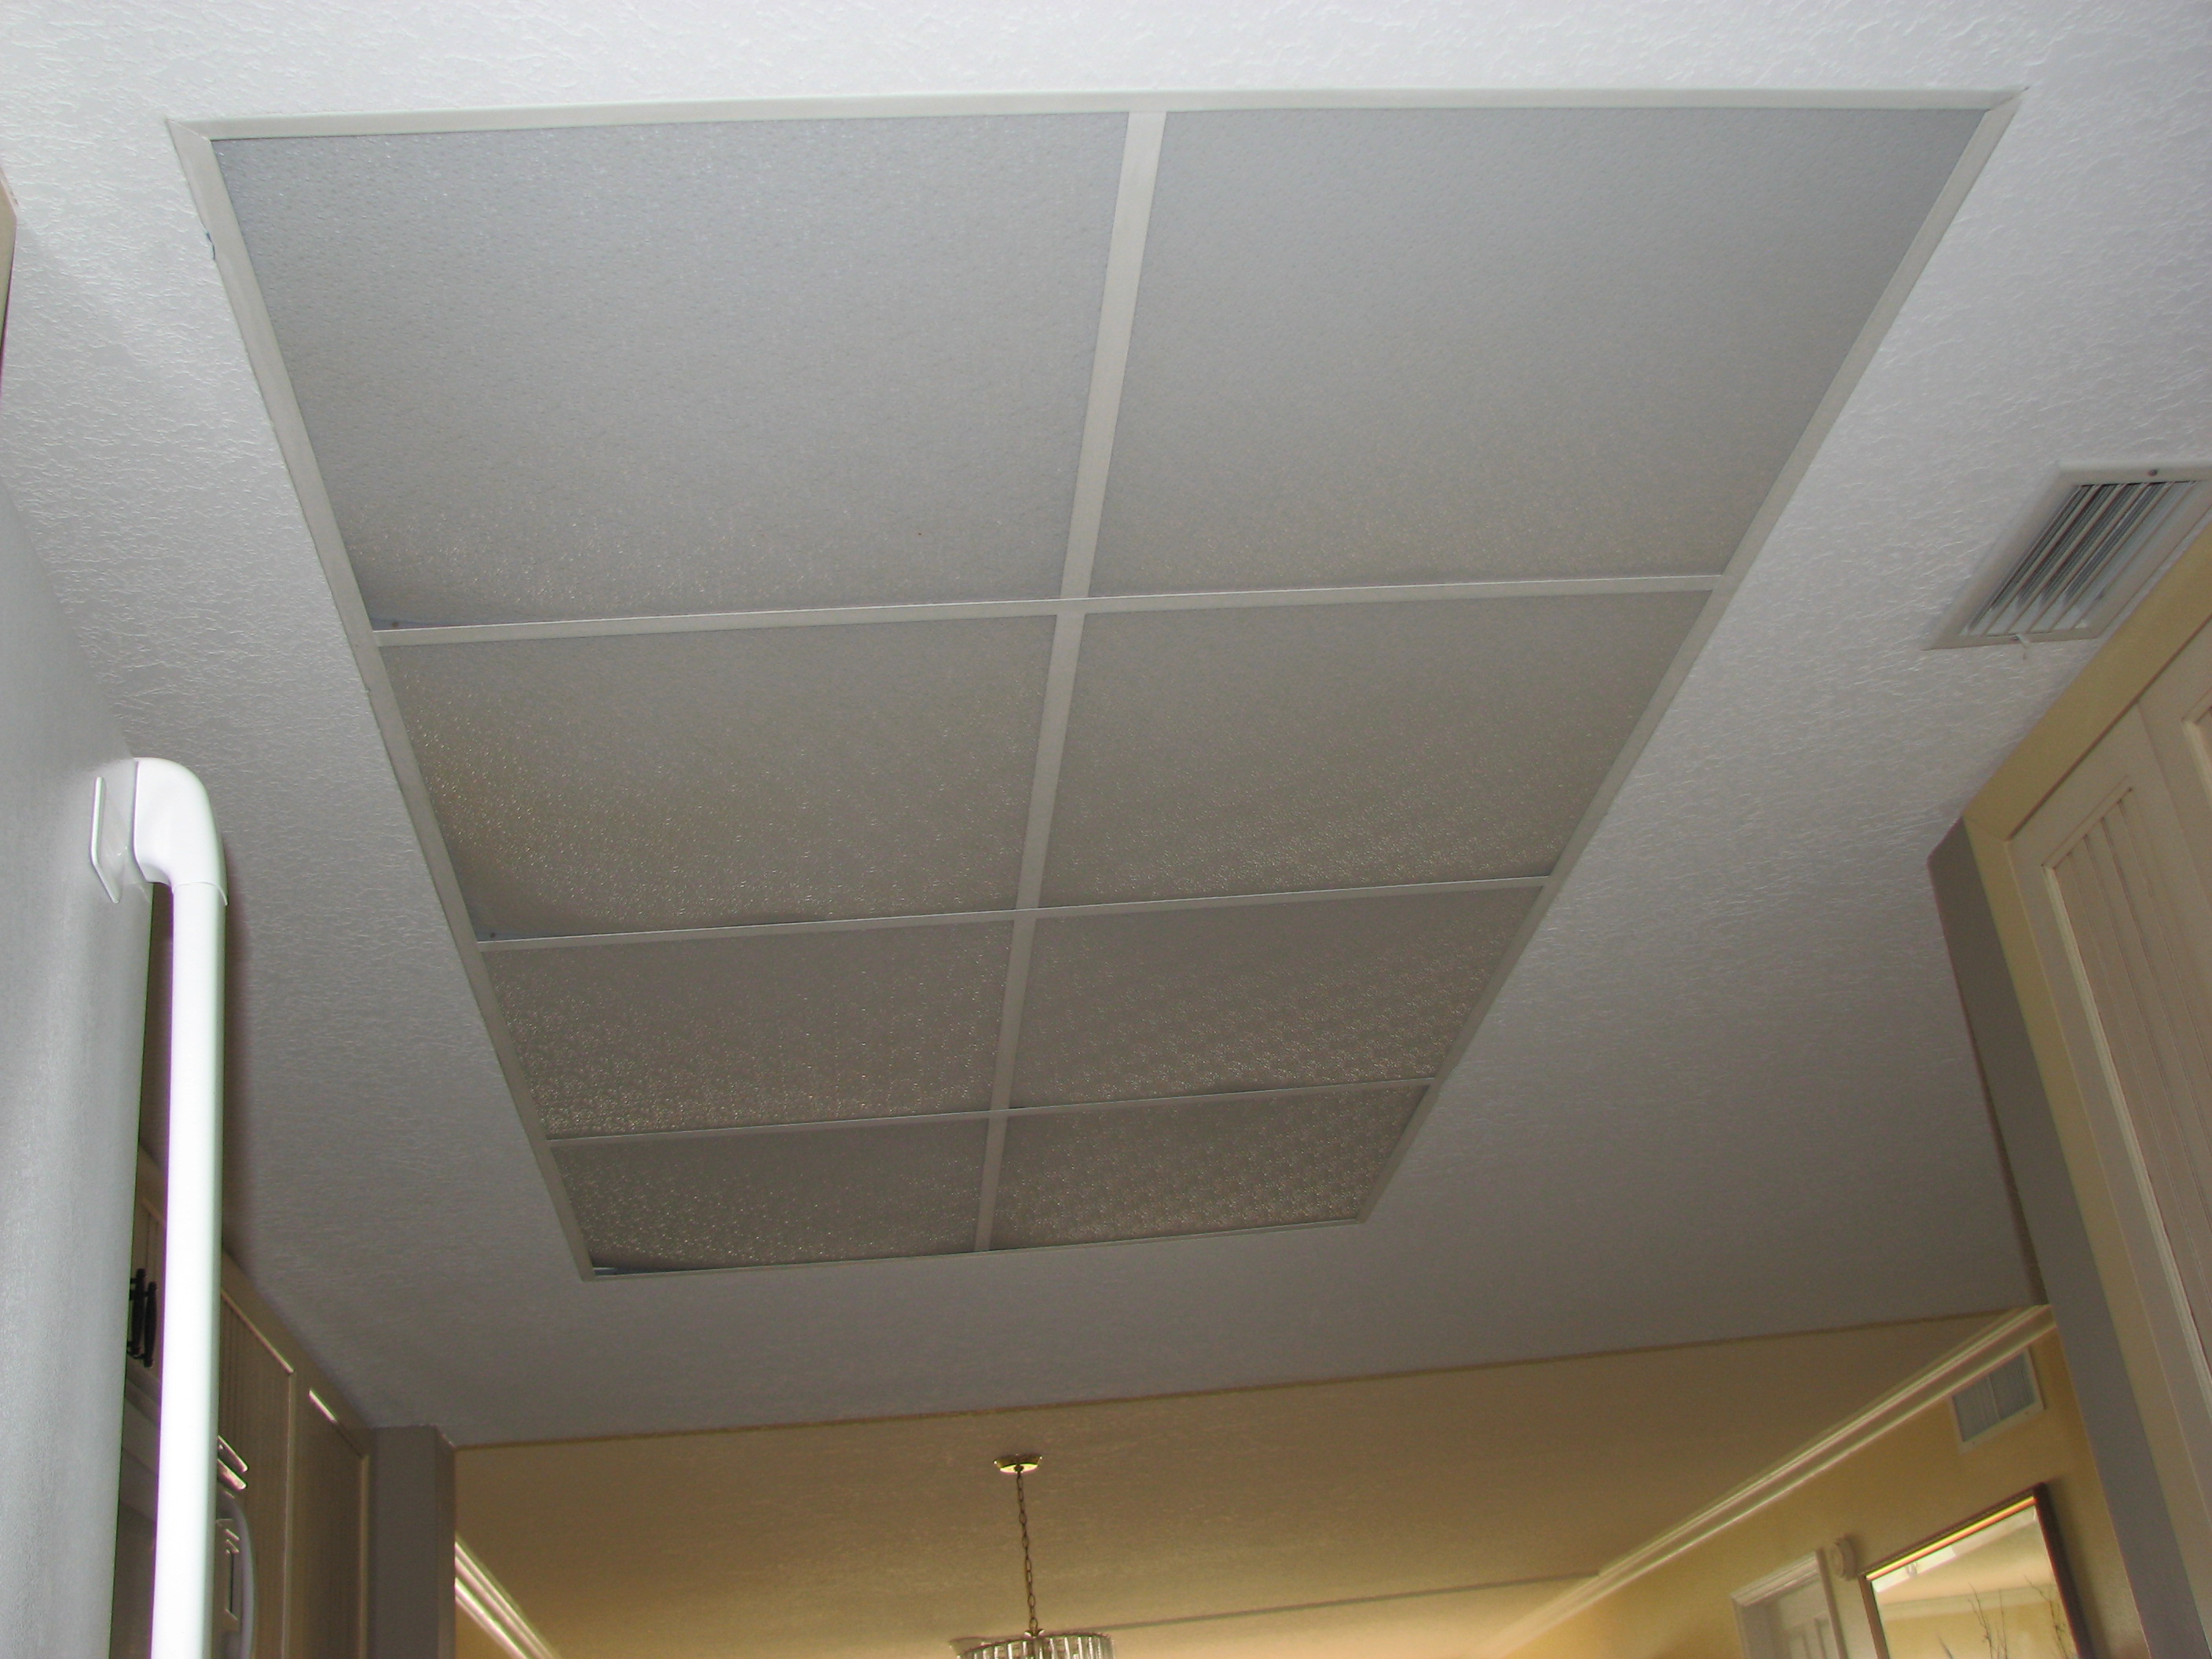
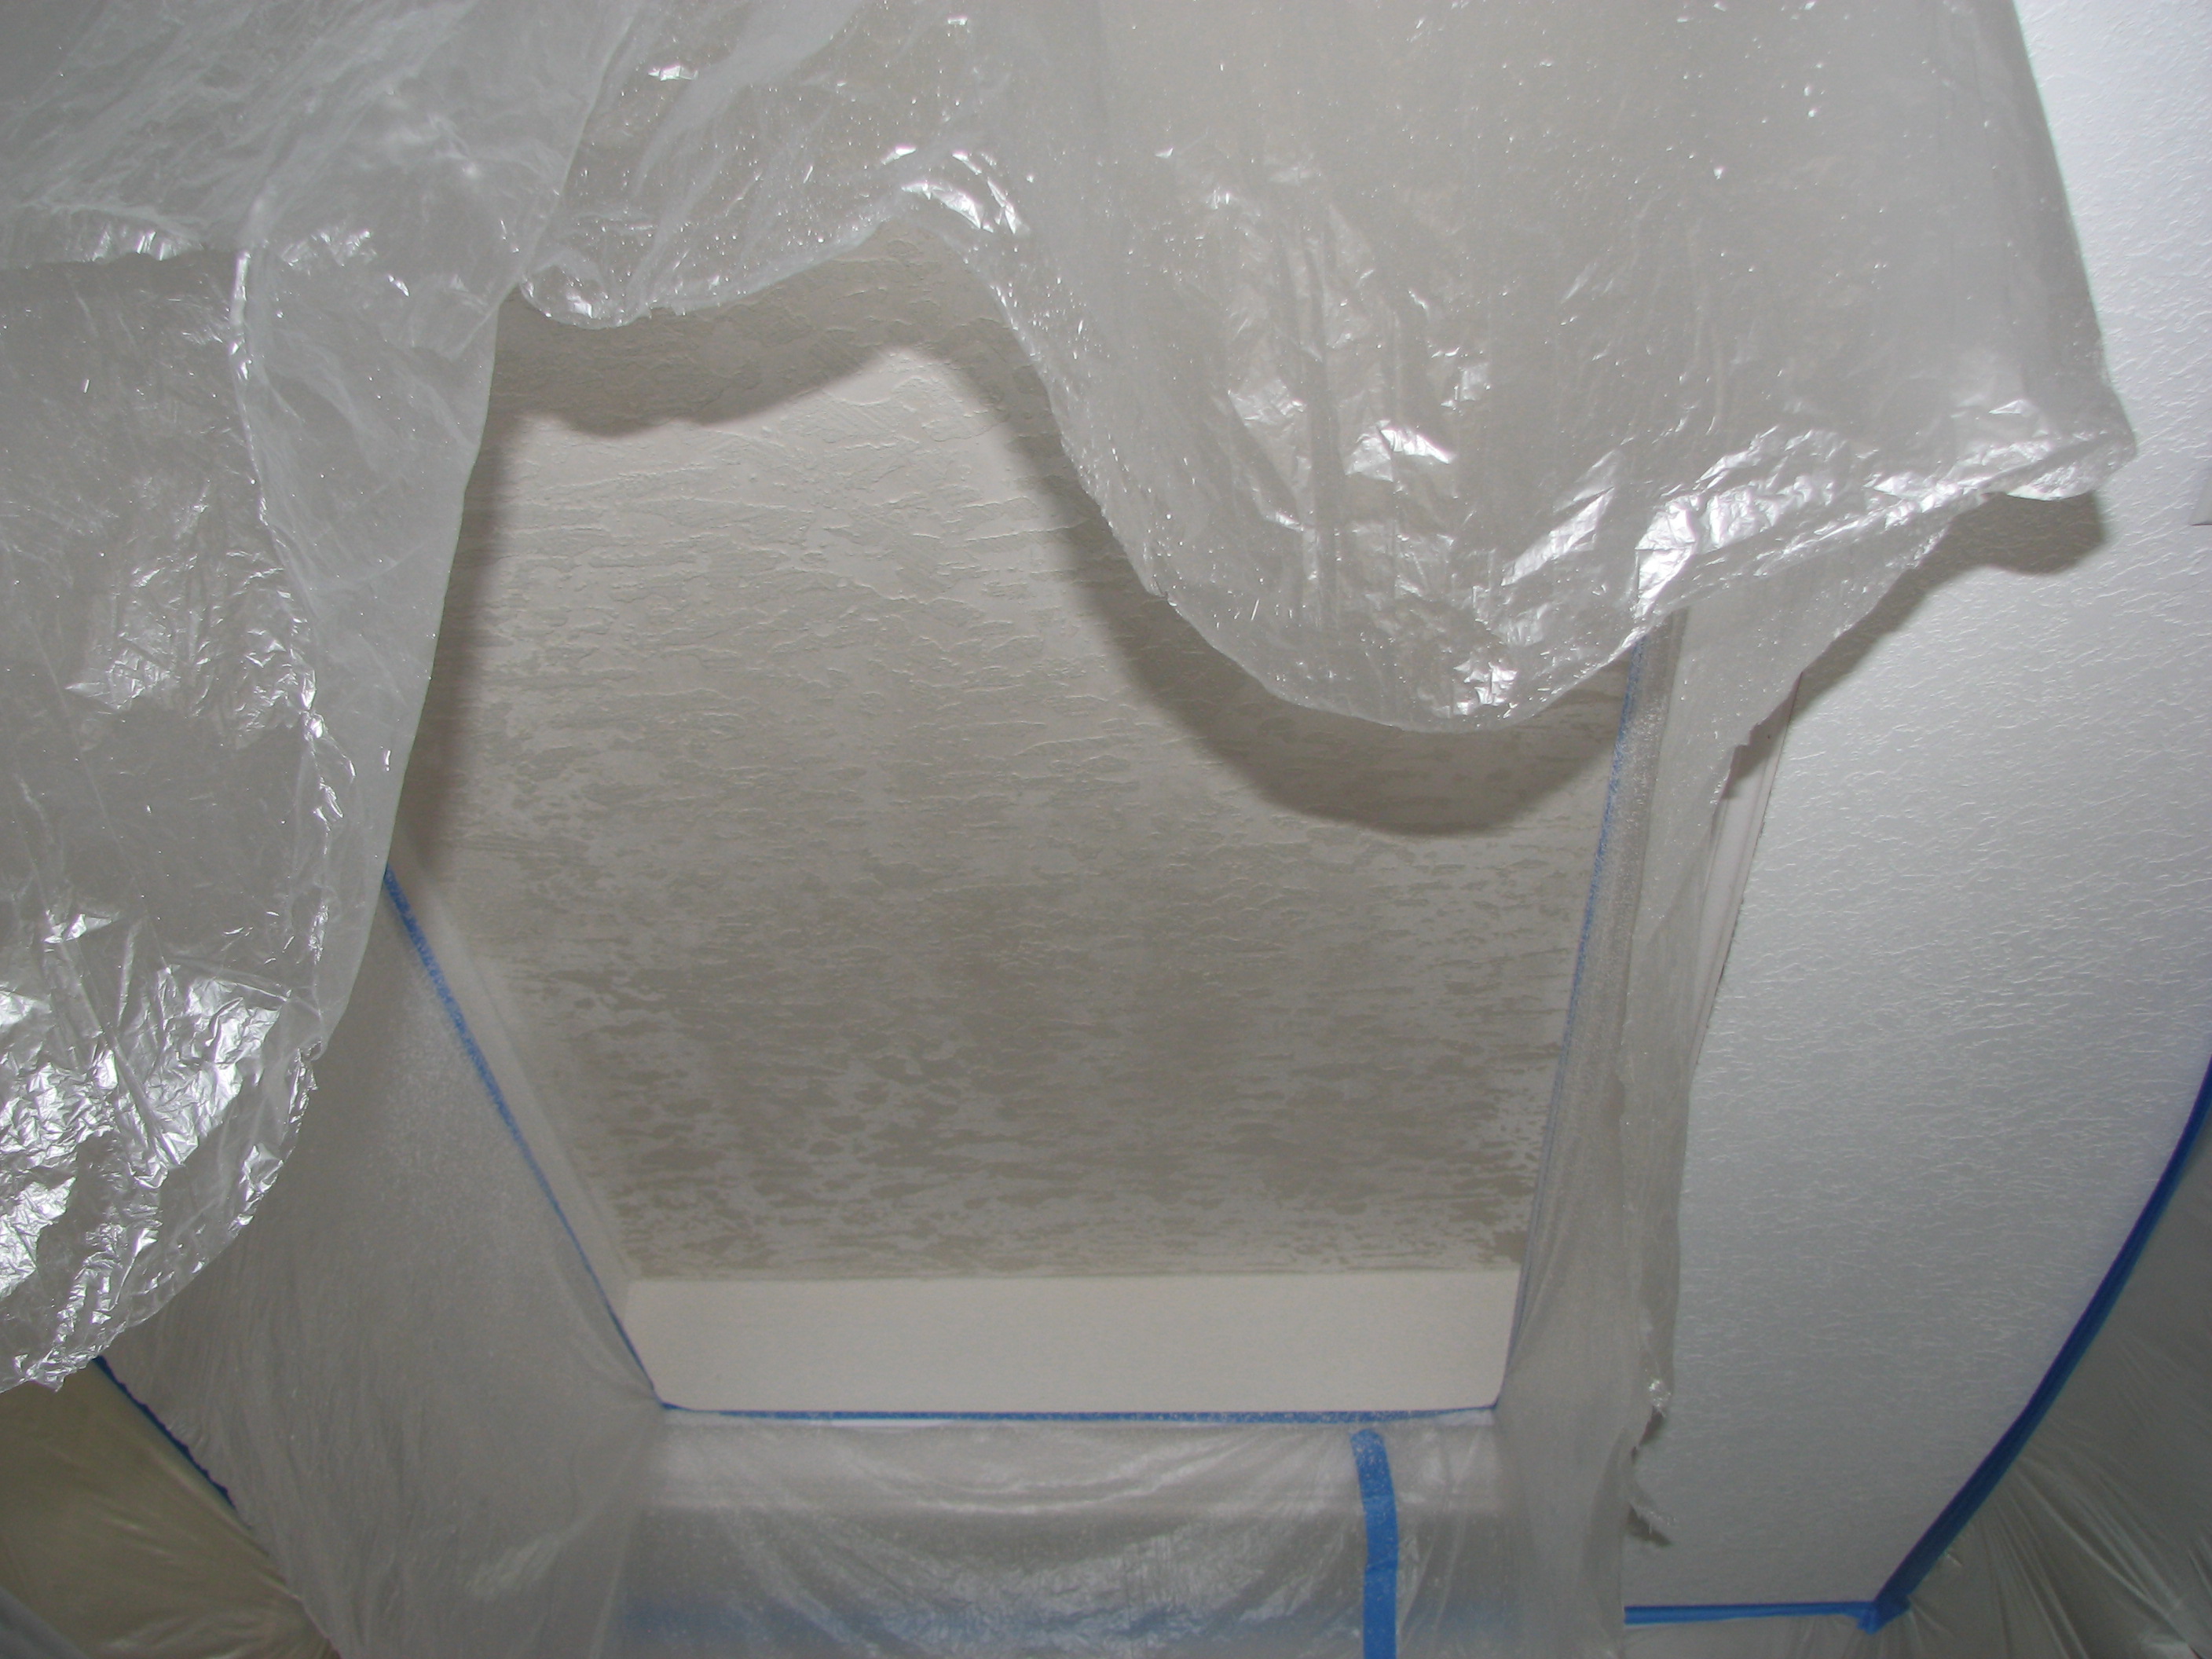
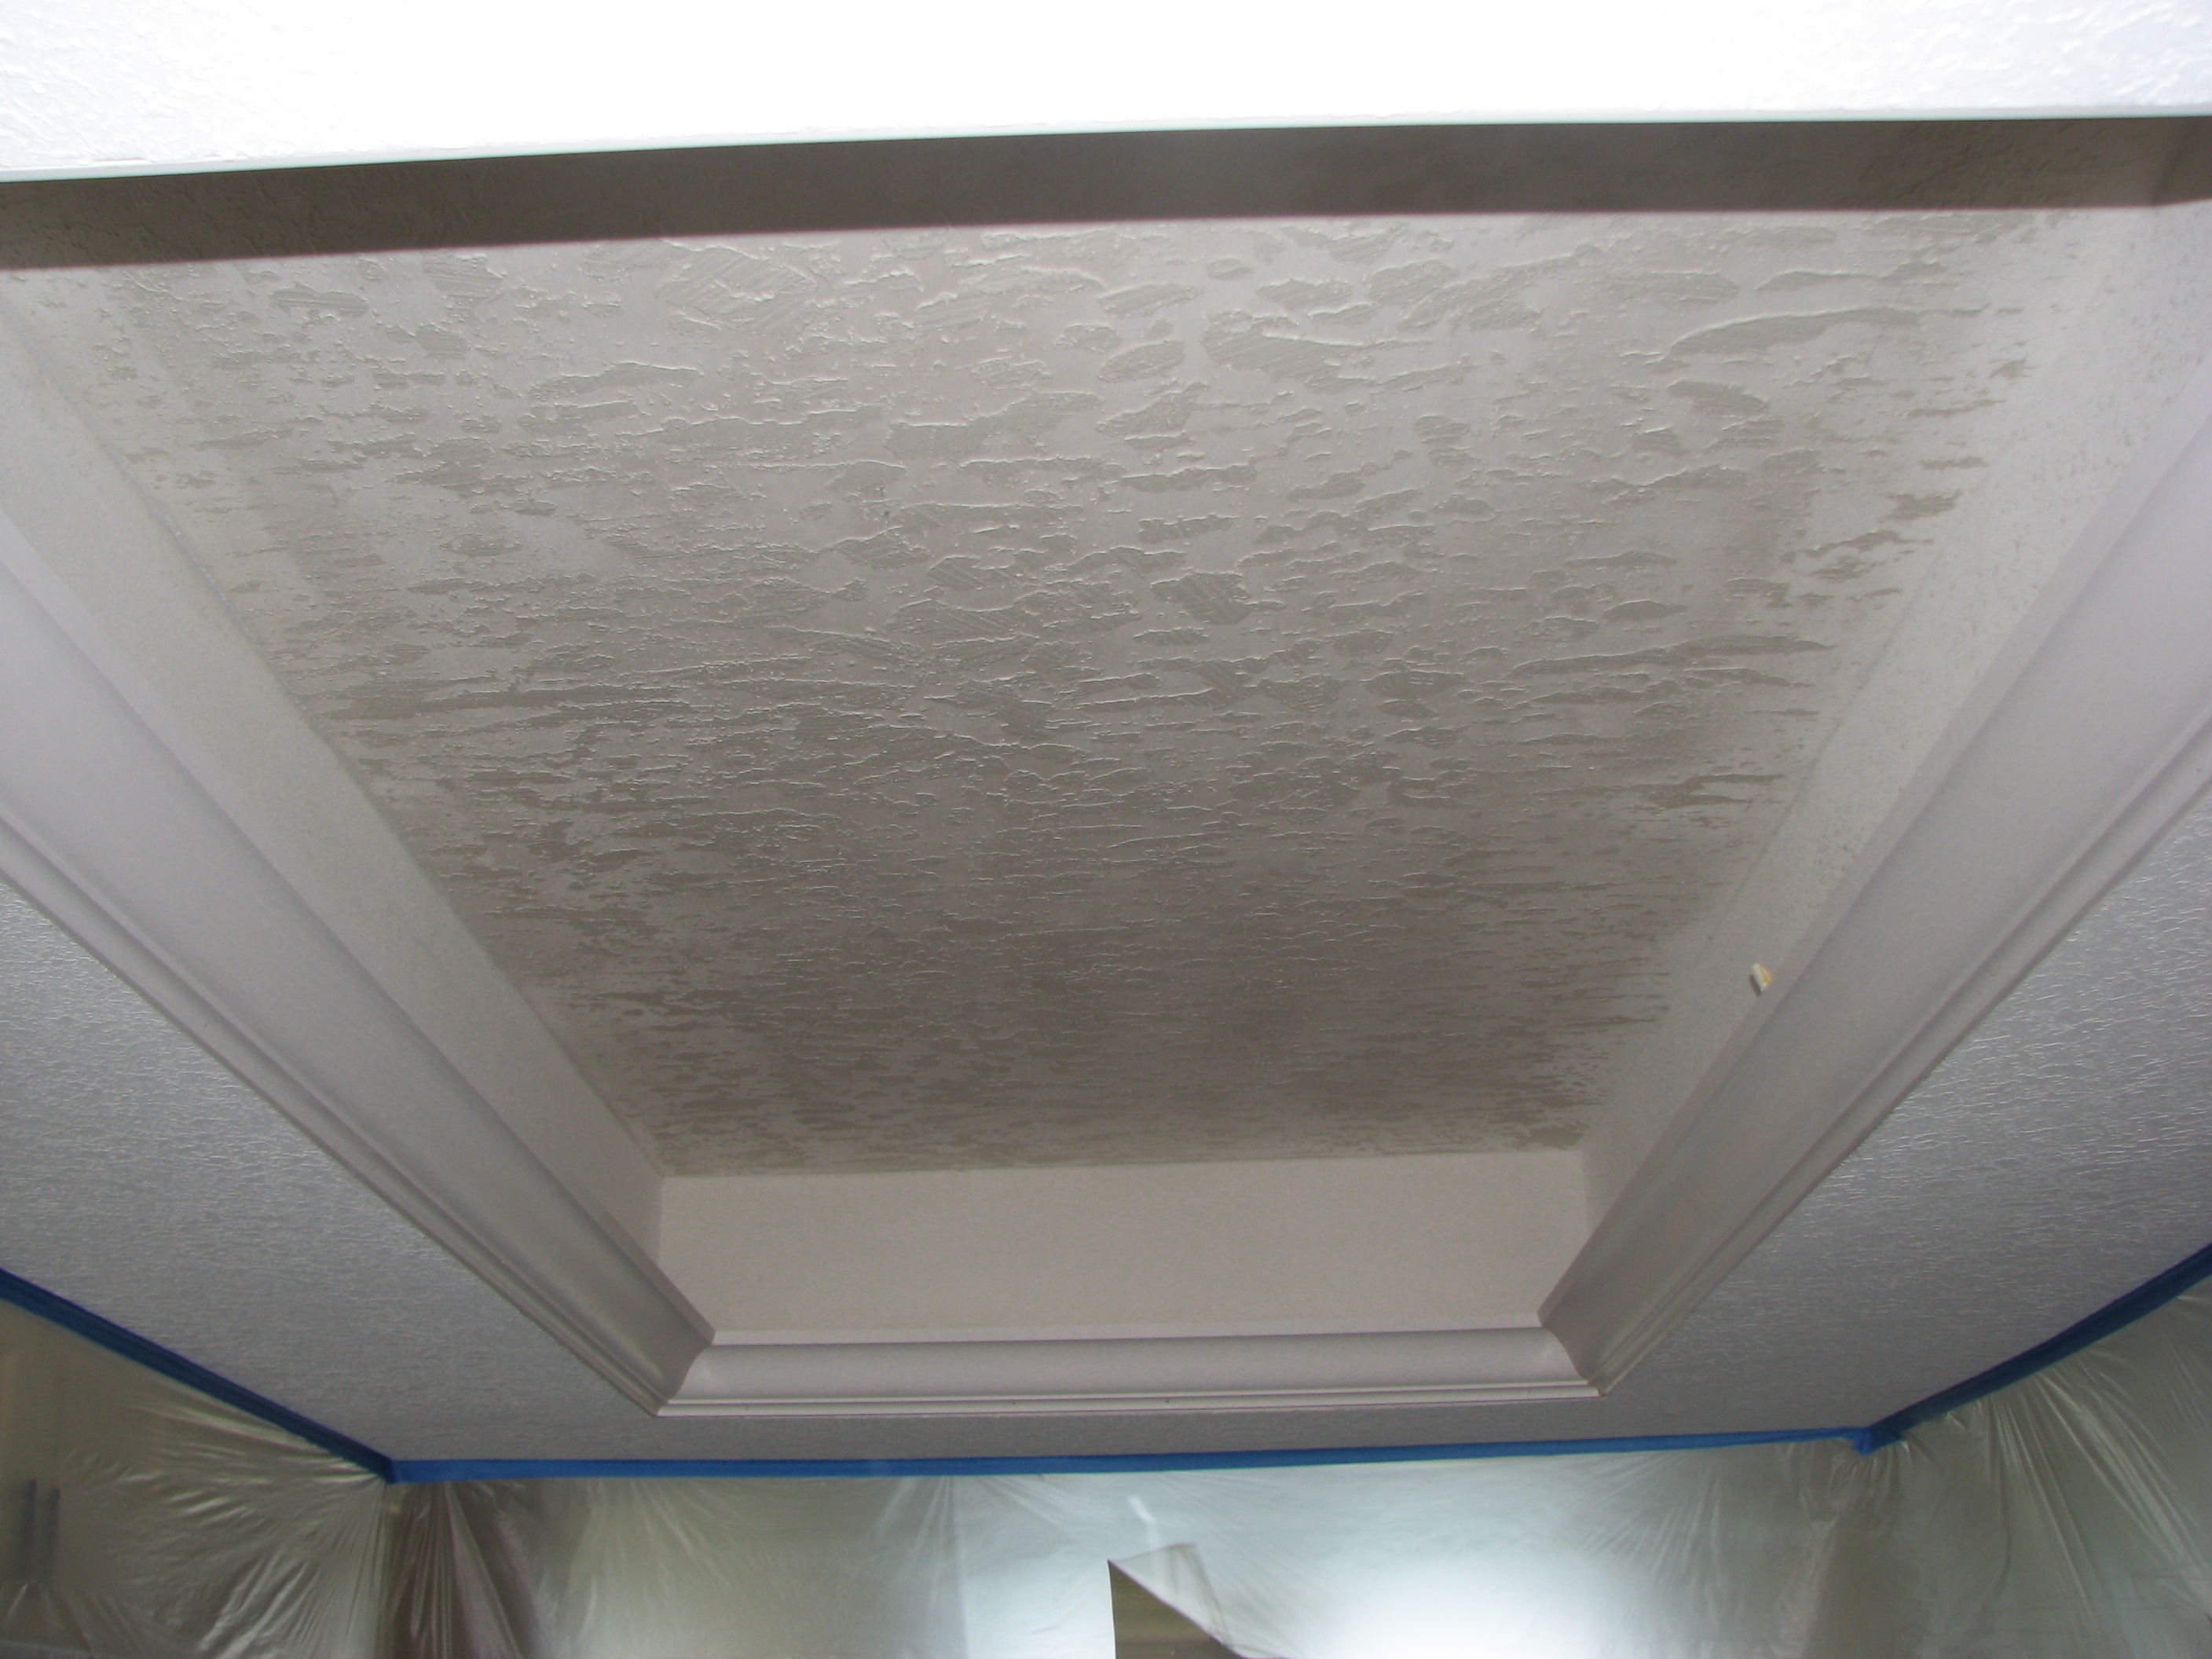
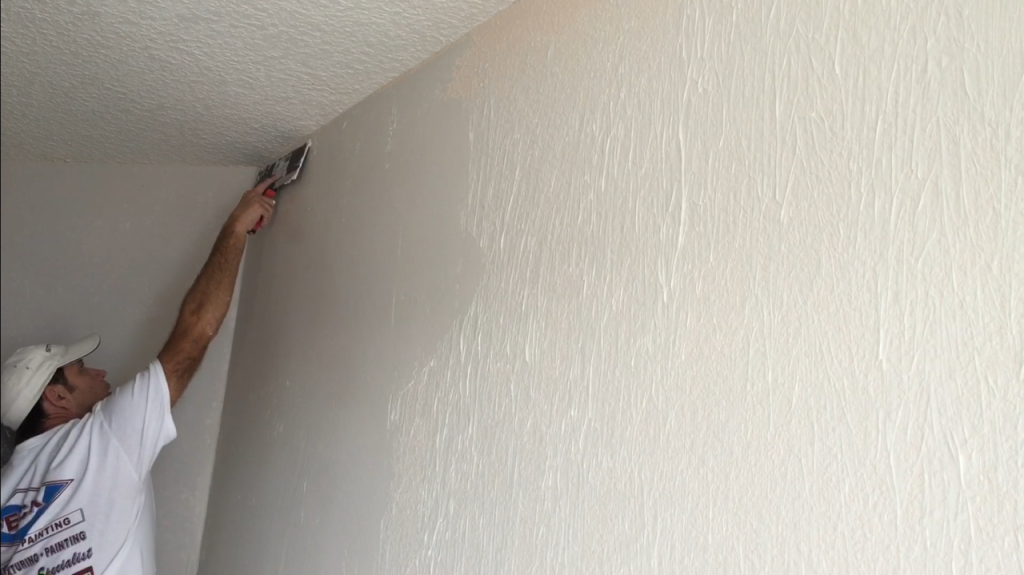
New popcorn texture applied and feathered out to blend into existing popcorn texture on the ceiling.


Water Damage Specialist’s

Please feel free to call or Email us for more information about our Interior and Exterior Painting services!

Or simply just

Click to schedule an Estimate Here

Brevard County Painting License #PT393

State License # RX11066969

Please give us a call for a prompt and accurate quote for allyour popcorn ceiling repair needs!

South: 321-777-9337

Central: 321-453-6233

water damaged popcorn ceiling repairs

Melbourne Beach water damaged drywall and popcorn ceiling repair

On this water damaged drywall and popcorn ceiling repair project in Melbourne Beach. The homeowners were looking to put their beach home on the real estate market to sell. But before they could, they needed to do several home repairs.

Doing just a few of the basics like ceiling repairs, drywall repairs, pressure washing, exterior painting and interior painting can make your home more appealing to potential buyers. But can also triple or even quadruple the home sellers ROI (return on investment) that was put into getting your home improvements done by a licensed contractor.

First on the list after getting their roof repaired. Next they had contracted me to repair a portion of the living room’s water damaged drywall ceiling that had fallen down and another larger section on the garage ceiling and a 4’x 6′ section of the garage wall. The garage ceiling had really bad dark brown water stains on about a 66 square feet of the popcorn ceiling that had occurred from a heavy rain storm causing the barrel tiled roof to leak causing all of this water damaged drywall and popcorn ceilings.

Living room water damaged drywall ceiling

Living room water damaged drywall ceiling


Melbourne Beach water damaged drywall popcorn ceiling

Garage’s water damaged drywall and popcorn ceiling texture in Melbourne Beach

Chances are if you’re looking at this page, you probably have some type of water damage issue with your walls or ceilings. Rest assured that we can repair the damaged area with confidence, that it will be the best water damage repair you can get here in the Brevard County area.

Garage water damaged drywall and popcorn ceiling repair:

Melbourne Beach water stained popcorn ceiling

Melbourne Beach water stained popcorn ceiling


Water damaged drywall ceiling removed

Water damaged drywall ceiling removed


Drywall installed

Drywall installed


Sheetrock installed

Sheetrock installed


Drywall finishing first coat 45 minute mud fiberglass mesh tape

Drywall finishing first coat 45 minute mud fiberglass mesh tape


Second coated with 45 minute hot mud

Second coated with 45 minute hot mud


Third coated with usg all purpose joint compound

Third coated with usg all purpose joint compound and plastic bubble put up to protect while sanding the new drywall and spraying the popcorn texture


Popcorn sprayed and blended in the garage

Popcorn sprayed and blended in the garage. It will be completely dry in 24 hours

Living room water damaged drywall and popcorn ceiling repair:

Water damaged drywall popcorn ceiling

Water damaged drywall popcorn ceiling from a roof leak

Living room water damaged drywall removed new drywall installed

After removing the living room water damaged drywall, I had to use my carpentry skills and install some new furring strips due to the way the truss’s switched direction because of the wood framing for the hip roof above. Next I installed the 1/2″ ceiling drywall. new drywall installed


Living room first coated with 45 minute mud over self adhesive fiberglass mesh tape

Living room first coated with 45 minute mud over self adhesive fiberglass mesh tape


New drywall second and third coated and blended into the existing drywall ceiling

New drywall second and third coated and blended into the existing drywall ceiling


Popcorn texture sprayed and feathered into the existing popcorn ceiling

Popcorn texture sprayed and feathered into the existing popcorn ceiling


Living room water damaged drywall ceiling repaired and textured. Ready for primer and paint.

Living room water damaged drywall ceiling repaired and textured. Ready for primer and paint.


There also was of an area in one of the guest bedrooms closet that had to have all three walls cut out at 2′ up from the floor. the closet main wall sat behind the guest bathroom bath tub/shower that had leak caused by the shower valve leaking down the back of the drywall of the bedroom wall.
Remove and replace closet drywall

Remove and replace closet drywall

Water Damage Drywall Repairs and Popcorn Ceiling Texture Matching Experts

The Peck Drywall and Painting Company has been providing our expertise on water damage repairs and water restoration projects from hurricane, wind, storm and flood damage, plumbing leaks, water heater and roof leaks for over 19 years here in Melbourne Beach. For you as a drywall contractor and painting contractor we can provide expert water remediation. drywall cut out and removal, drywall installation, drywall finishing,texturing,texture matching, stain blocking priming and interior painting and the skills to turn any damaged home or business into a newer looking, updated and better than before the disaster for you. Whether it needs minor ceiling repair and painting, or a complete renovation, we can get it done on time and within your budget.

Are you looking for a Water Damage Specialist in Melbourne Beach to repair your ceilings or walls from some type of water damage at your home or business? Please call 321.777.9337 or complete our online request form.

Brevard County Painting Contractor Certification # PT393

Florida Drywall Contractor License # RX11066969

Melbourne Beach: 321-777-9337

Chinese Drywall Inspection Confirms Toxic Chinese Drywall in Palm Bay

Chinese Drywall confirmed in a Palm Bay, FL neighborhood

Toxic Chinese Drywall

I was called out to do a Chinese drywall inspection on a home that was built in 2006. This beautiful home was located in a gated community neighborhood in the Melbourne / Palm Bay area on the Space Coast of Florida.
The concerning thing is that this paticular home was the model home when this entire was in the construction phase. So this mean that the whole neighbor hood could potentially have the toxic Chinese Drywall!
The home was all set for closing when the final home inspection came back as “Possible Chinese Drywall” due to the home being built in the timeframe when Chinese drywall was being shipped here to the East Coast of the United States by the container and ship load…

When I arrived to the home for the Chinese drywall inspection there was a strong odor that smelt like rotten eggs (sulphur). And there was also black corrosion on any copper and also on the the a/c coils. The mirrors in the bathrooms had pitting and desilvering. These are all are the classic symptoms of a toxic Chinese drywall.

Toxic Chinese Drywall Confirmed!


Unfortunately the only remedy for this home is to gut the entire interior from the band new hardwood, carpet, tile, cabinets, ceiling fans, light fixtures, air conditioning system, drywall, metal framing, tubs, showers, baseboards and doors.

Pretty much the home will be back down to only a cement block shell!


Get your Chinese Drywall inspections

by Florida Drywall Contractor- Paul Peck Lic.#RX11066969

Schedule your Chinese Drywall Inspection here

Give us a call for a prompt and accurate quote!

Melbourne/Beachside: 321-777-9337

Merritt Island/Cocoa Beach: 321-453-6233

Titusville: 321-383-3574

or

E-mail us for more information about our Chinese drywall inspection services.

Toxic Chinese Drywall Identification Method

(1) An initial or threshold inspection to find visual signs of metal corrosion and evidence of drywall installation during the relevant time period, and

(2) The identification of corroborating evidence or characteristics.

The identification process is two steps:

Step 1: Threshold Inspection

(a) Blackening of copper electrical wiring and/or air conditioning evaporator coils; and

(b) The installation of new drywall (for new construction or renovations) between 2001 and 2008. A positive result for this step (including both criteria) is a prerequisite to any further consideration.


Visual inspection must show:

Step 2: Corroborating Evidence

Because it is possible that corrosion of metal in homes can occur for other reasons, it is important to obtain additional corroborating evidence of problem Chinese Drywall. Homes with the characteristic metal corrosion problems must also have at least 2 of these corroborating conditions if the new drywall was installed between 2005 and 2008.
For installations between 2001 and 2004, at least 4 of the following conditions must be met. Collecting evidence of these corroborating conditions will in some cases require professional assessors and/or testing by analytical laboratories.

(a) Corrosive conditions in the home, demonstrated by the formation of copper sulfide on copper coupons (test strips of metal) placed in the home for a period of 2 weeks to 30 days or confirmation of the presence of sulfur in the blackening of the grounding wires and/or air conditioning coils;

(b) Confirmed markings of Chinese origin for drywall in the home;

(c) Strontium levels in samples of drywall core found in the home (i.e. excluding the exterior paper surfaces) exceeding 1200 parts per million (ppm);

(d) Elemental sulfur levels in samples of drywall core found in the home exceeding 10 ppm;

(e) Elevated levels of hydrogen sulfide, carbonyl sulfide and/or carbon disulfide emitted from samples of drywall from the home when placed in test chambers using ASTM Standard Test Method D5504-08 or similar chamber or headspace testing;

(f) Corrosion if copper metal to form copper sulfide when copper is placed in test chambers with drywall samples taken from the home.
Florida Department of Health

Always contact your local building department to see if a building permit is required for the work you need and if a state or locally licensed contractor is required to do the job.


For more Project Videos, Drywall Tool Review Videos and How To Videos

Visit my –> Youtube Channel

Soundproofing an existing wall to help reduce noise from home theater

On this master bedroom and bathroom remodeling project in Merritt Island, FL I’ll be adding some sound reduction drywall w/ Green Glue compound and sealant to try and reduce the noise in a master bedroom coming from a home theater entertainment system on the other side of the existing master bedroom wall.

Soundproofing a wall

Gold Bond® BRAND 5/8″ SoundBreak® XP® Gypsum Board with Sporgard™

Do you have noisy neighbors or a kickin home theater system and want to reduce some of the noise?

I can help You with some of my state of the art soundproofing techniques and noise reducing products!

I’ll also be removing all of the popcorn ceiling texture, replacing a sheet of drywall on the master bathroom ceiling, skim coating all of the walls and spraying an orange peel texture to match the texture in the rest of the home.

The bedroom entry door and jamb will be replaced with a solid core door and the jamb will have to be custom made because the extra layer of drywall changes the width of the opening. Once the new door jamb is installed, I will apply the acoustical sealant around any gaps for added noise reduction.

Soundproofing shared wall between living room and master bedroom

Soundproofing shared wall between living room and master bedroom after I removed the popcorn ceiling texture

Soundproofing Contractor

The plan is to add a second layer of Gold Bond® BRAND 5/8″ SoundBreak® XP® Gypsum Board with Sporgard™ noise reducing drywall to the shared wall that all of the thumping bass and loud voices are being heard from.

Soundproofing with purple soundbreak 5/8"

Soundproofing with purple Soundbreak 5/8″ drywall

Perfect where sound transmission between rooms or dwelling units is a concern!

How to Tips for enhancing soundproofing on an existing wall:

1) The first step is to locate and mark all of the wood studs that we will be attaching the soundproof drywall to.

2) Add the appropriate mud ring extenders for the existing outlet and switch boxes.

3) Layout the wall for the least amount of drywall seams while staggering the drywall seams as well.

4) Cut the Soundbreak drywall to fit, keeping in mind that a 1/4″ gap around the whole perimeter of the wall will be needed in order to be able to apply the acoustical sealant.

5) Lay the drywall flat and apply the Green Glue compound- 2 tubes for a 4″x8′ sheet of drywall or 3 tubes for a 4’x12′ sheet of drywall.

soundbreak-xp-green-glue-compound

Applying Green Glue Noiseproofing Compound

Applying Green Glue Noiseproofing Compound


6) Next, I installed the soundproofing drywall with 1 5/8″ drywall screws with screw spacing in accordance with my local building codes. Repeat steps until all drywall is installed.

Installing Soundbreak XP drywall with Green Glue noise reducing compound

Installing Soundbreak XP drywall with Green Glue noise reducing compound


Installing Soundbreak XP with GreenGlue
Sound board installed

Sound board installed

Checkout——>My Amazon Top 100 Drywall Tool Picks

7) Once all of the soundproof drywall has been installed, fill the 1/4′ gap around the perimeter with the Green Glue sealant. Allow 48 hours for the sealant to dry completely before finishing the drywall with joint compound and paper or fiberglass mesh tape. Just like you would finish regular drywall.

Apply the Green Glue Noiseproofing Sealant in the 1/4" gap around the perimeter of the new drywall

Green Glue Noiseproofing Sealant


8) Finish the new soundbreak drywall just like regular drywall using joint compound and drywall tape.

Soundbreak drywall finishing- Level 3

Soundbreak drywall finishing- Level 3

Sound dampening drywall finishing

Sound dampening drywall finishing

Soundproofing- Mud work

Soundproofing- Mud work

9) 8) Wall skim coated to a level 4 finish

soundproofing drywall skim coated

soundproofing drywall skim coated

soundproofing drywall skim coated-2

soundproofing drywall skim coated-2

soundproofing drywall skim coated-3

soundproofing drywall skim coated-3

sound dampening drywall- level four finish

sound dampening drywall- level four finish

soundbreak xp drywall- level-four finish

soundbreak xp drywall- level-four finish

10) Lastly, I applied an orange peel texture to match the existing textured walls of the home.

master bedroom remodel- soundproofing- orange peel texture-1

master bedroom remodel- soundproofing- orange peel texture-1

master bedroom remodel- soundproofing- orange peel texture-2

master bedroom remodel- soundproofing- orange peel texture-2


Soundproofing products used on this remodeling project:

Gold Bond® BRAND 5/8″ SoundBreak® XP® Gypsum Board with Sporgard™– Has an acoustically enhanced, high density fire resistant Type X gypsum core encased in a heavy, abrasion and mold/mildew/moisture resistant, 100% recycled, National Gypsum PURPLE® paper on both sides. Used in the construction of high rated STC (Sound Transmission Class) wall assemblies, this 5/8″ thick gypsum board consists of a layer of viscoelastic damping polymer sandwiched between two pieces of high density mold resistant gypsum board, providing constrained layer damping.
5/8″SoundBreak XP panels may be used where Type X gypsum panels are specified in some fire-rated wall and floor-ceiling assemblies

Green Glue Noiseproofing Compound– Independent lab tests prove that using Green Glue Noiseproofing Compound dissipates up to 90 percent of noise. Green Glue is ideal for dissipating low frequency noise common with home entertainment and theater systems.

Green Glue Noiseproofing Sealant– Seals the cracks and gaps to prevent unwanted noise from entering a room. It is non-hazardous, has practically no odor, and it resists drying out or cracking with age.
Adding Green Glue Noiseproofing Sealant to your soundproofing project can reduce noise transmission by 100 times or more. Green Glue Noiseproofing Sealant exceeds LEED green building requirements and has been independently tested by Underwriters Laboratories for fire safety and environmental impact.


Painting Contractor License # PT393

Drywall Contractor License # RX11066969

Feel free to call or Email us for more information about soundproofing and noise dampening services!

Please give us a call for a prompt and accurate quote!

Melbourne/Viera: 321-777-9337

Merritt Island/Cocoa Beach: 321-453-6233

Titusville: 321-383-3574

Soundproofing Specialists here in Brevard County:
Soundproofing Contractor serving the Space Coast since 1995

Soundproofing Company serving the Space Coast since 1995

Proudly servicing these areas of the Space Coast: Melbourne-Melbourne Beach-Palm Bay-Indialantic-Indian Harbour Beach-Satellite Beach-Viera-Cocoa Beach-Rockledge-Merritt Island-Cape Canaveral-Suntree-Port St. John-Cocoa-Titusville


Drywall paper tape joints cracking and falling down?

Exterior ceiling repair-paper tape cracking and falling down

Exterior ceiling repair-paper tape cracking and falling down

This type of problem is very common on interior and exterior drywall ceilings

.

Over time the paper drywall tape begins to crack and fall down due to the heat and humidity from our harsh Florida climate.

The extreme weather changes cause the wood framing to expand and contract on a daily basis in turn causing just enough movement of your ceiling to crack and pop the paper tape joints. Especially if the ceiling was nailed or not enough screws were added during the drywall installation process when your home was built. Due to the drywall crew trying to move to fast!

That’s why I always re-secure the drywall joints with screws and check the entire ceiling to make sure it was secured properly during the construction phase. A lot of times the ceiling needs to be completely re-screwed.

The paper tape joints were cracking and starting to fall down on this pool patios drywall ceiling in Viera.

exterior ceiling repair Viera

Exterior ceiling repair in Viera

After I removed the tape and while securing the ceiling and joints with screws. I figured out that one section of a drywall seam was sagging in an area where there was no wood framing member to attach the drywall to and had popped the paper tape from movement.

Paper tape joints removed

Paper tape joints removed

So I cut out a small 4″x6″ section of the ceiling and added a furring strip to span over both sides of the sagging drywall tape joint. Which I attached to the backside of the ceiling by screwing four screws into the furring strip from the finished side of the ceiling.

Adding a furring strip

Adding a furring strip


Checkout——>My Amazon Top 100 Drywall Repair Tools


Then, I re-attached the same piece of drywall that I had cut out for a perfect fit.

Next, I installed the self adhesive fiberglass mesh tape and applied three coats of 20 minute Easy Sand quick setting joint compound to the exposed seam and completed the drywall finishing by skim coating the entire ceiling with USG Sheetrock all purpose joint compound (green lid).

This way when I do the skip trowel texture, it will all be one consistent texture. Instead of trying to blend the new texture from a repair into the old texture. Which sometimes can still be noticeable depending on several different factors. Such as painted surfaces absorb differently even after priming.

Exterior ceiling repair-skim coated

Tape joints second coated and remainder skim coated

Applying the final coat to the tape joint

Applying the final skim coat to one of the repaired tape joints

Ceiling repair-skim coated-ceiling-viera

Skim coated ceiling dry and ready for texture

I then applied a skip trowel texture to the entire ceiling and let it dry for 24 hours.

Applying skip trowel texture to the ceiling

Applying skip trowel texture to the ceiling

Lastly. I primed the entire ceiling with quality exterior water based primer and top coated the newly skip troweled ceiling with two coats of a quality flat white water based exterior paint.

Close up of the new skip trowel ceiling

Close up of the new skip trowel ceiling

Primed and Painted

Primed and Painted

Completed ceiling renovation

Completed ceiling renovation

Here’s a Speed Video of the entire process:
Drywall Tape Joint Ceiling Repair, Skip Trowel Texture, Prime and Paint
:

Peck Drywall and Painting 5 out of 5 based on 1 ratings. 1 user reviews.
Peck Drywall and Painting
They repaired several drywall cracks and were able to match our drywall texture. They arrived promptly, worked steadily and with very little disturbance to the surrounding areas. I would recommend them and would hire them again in the future.
05/12/2013


[ebs_seo_cp_map_only]


Click Here for more information about our drywall ceiling tape joint repair services

Schedule Your Ceiling Repair Estimate Here

Serving all of Brevard County

Please give us a call for a prompt and accurate quote!

Melbourne/Viera: 321-777-9337

Cocoa Beach/Merritt Island: 321-453-6233

Indialantic Drywall and Painting Contractor since 1995

Brevard County Drywall Contractor and Painting Contractor since 1995


Get Your Expert Ceiling Repair and Skip Trowel Texture Quote:


    Your Name

    Address

    City

    Phone

    Email

    Project Description

    What year was your home built?
    Before 19781978 - 2013

    I understand that there is a $35.00 estimate fee that will be refunded upon completion of my project.

    How To and Product Review – Strait Flex Uno-Bead

    Strait Flex Uno-Bead - Corner bead on a roll

    Strait Flex Uno-Bead – Corner bead on a roll


    In this product review and demonstration video, I will be using the Strait flex Uno-Bead for the first time ever. This will enable you to see how easy the Strait Flex Uno-Bead is to work with without ever have used it before. Or what might be a bit of a learning curve when it comes to using a product you have never used before. Thanks for watching and if you have any questions about the Strait Flex Uno-Bead please feel free to ask me in the comments section of my video on Youtube.

    I’ll be replacing the old corner bead from a closet modification with the Strait Flex composite corner bead on a roll. The closet had already been taken apart by the homeowner that had just purchased this home.The plan was to make a computer/gaming area for their son where the closet was. Since their new to them home was having several remodeling projects going on anyways they wanted to have me take care of this extra job while I was there.

    My conclusion after trying Uno-Bead for the first time on this remodeling project is that whether you’re a contractor, handyman or even a home improvement DIY’er. This product will be a fast and easy way to install corner bead on new drywall and drywall repairs. And the Strait Flex Uno-Bead is much stronger the traditional corner beads which means it’s great for drywall corners in high traffic areas.

    Another benefit is Uno-Bead requires less joint compound than the traditional metal corner bead or vinyl corner bead. Which speeds up drying time as well. So you can save time, the amount of materials needed to finish outside 90 degree drywall corner. All of this means you make more money while also getting a better and stronger end result. Also since this corner bead product comes on a roll, it’s easily stored eliminating the need to have a special place to store it from getting damaged before getting to the job where you’ll be doing your drywall finishing.

    I would definitely use Strait Flex Uno-Bead Again again!

    Here some stats about Strait Flex Uno-Bead 222:

  • This composite corner bead provides outside 90 degree corners for drywall, plaster and EIFS applications and perfectly replaces damaged metal corner bead.
  • Works on all inside and outside corners
  • Drywall, thin coat plaster, EIFS and kitchen remodels, bathroom remodels, home renovations and new construction.
  • High traffic areas where bumps and dents commonly occur.
  • Reduces waste and is easily transported.
  • Uno-Bead 222 is sized to be a permanent replacement to damaged corner bead.
  • Installs using all standard methods: Drywall compound, Plaster, EIFS, glue, staples, nails or screws.
  • Available in 2.22″ and 3″ widths.
  • Mold proof, Rust proof and Alkali resistant.
  • Slots insure quick drying time and unmatched bonding strength.
  • PVC/Nylon composite material ensure straight corners every time and prevents mold and rust.
  • What to do with my old kitchen drop ceiling lighting?

    Cocoa Beach condo kitchen ceiling light- Before

    Cocoa Beach condo kitchen ceiling light- Before

    It’s a common dilemma among home and condo owners that I’m sure most of you have seen before.

    That Ugly, outdated grid lighting system in the kitchen of a Home!

    Whether you’re thinking about doing a new kitchen remodel or your just looking to modernize and open up your kitchens feel and get rid of that outdated kitchen drop ceiling and kitchen lights.
    This process that I developed many years ago will turn any of these eyesore ceilings into a show piece that you will love and your neighbors will envy. I’ve installed close to one hundred of these types of trey ceilings here in the Brevard County area over the years.

    Here some photo’s of the process:

    Kitchen drop ceiling light Before:

    1980's style kitchen Light- Before

    1980’s grid style kitchen Light- Before

    Kitchen drop ceiling removed:

    Cocoa Beach condo kitchen grid ceiling removed

    Makes the kitchen feel bigger already.

    Fluorescent kitchen lights removed:

    Kitchen ceiling light removed

    Concrete ceiling exposed.

    After the Kitchen drop ceiling and lighting is removed. It’s time for a little drywall repair and mud work:

    Doing some drywall and mud work

    Doing some drywall repair and mud work.

    After the drywall was repaired, It was time to apply a new and more modern texture called Skip Trowel:

    Skip Trowel texture applied

    Skip Trowel texture applied.


    After the Skip Trowel was applied we added crown molding around the perimeter of the new kitchen trey ceiling:

    Crown Molding installed.

    Crown Molding installed.

    Ceiling primed and painted with two coats of Sherwin Williams Super Paint semi-gloss extra white:

    New trey ceiling primed and painted

    New trey ceiling primed and painted.


    Florescent or LED lights can be installed behind the crown molding for an elegant look:

    Custom trey ceiling

    Custom trey ceiling with LED lighting- After


    By: Peck Drywall and Painting

    Feel free to call or Email us for more information about our custom trey ceiling and kitchen remodeling services!

    Schedule Your Estimate Here

    Serving all of Brevard County

    Licensed kitchen remodeling contractor

    Kitchen Remodel Specialists

    State License # RX11066969

    State Qualified # QB61508

    County certification # PT393

    Please give us a call for a prompt and accurate trey ceiling or kitchen remodel quote!

    Melbourne/Beachside: 321-777-9337

    Merritt Island/Cocoa Beach: 321-453-6233

    How to skim coat using the paint roller trick

    In this Blog video two part series I’ll show you how to do the first coat and second skim coats on a wall to get rid of an ugly poorly done knockdown texture. This how to skim coat trick is a great way for anyone from DIYers to contractors to apply a skim coat to drywall and plaster walls or ceilings.

    Skim Coating to get rid of ugly texture

    I’ll be using the paint roller method with a 1 1/4″ roller nap (cover) and I thinned down the all purpose joint compound with water.

    How to skim coat dtywall with the paint roller method

    How to skim coat dtywall with the paint roller method

    For skimming I’m using a 14″ drywall taping knife and mud pan to smooth out the mud that was applied.

    Skimming out the rolled on mud with a 14" drywall taping knife

    Skimming out the rolled on mud with a 14″ drywall taping knife

    How to skim coat- Paint roller trick on Youtube (Part 1)

    How to skim coat- Paint roller trick (Part 2)

    This How to Skim Coat Trick is a must when skim coating walls and ceilings for DIY’ers!

    Once the first skim coat is complete, let the joint compound dry for 24 hours. Day 2- scape any high spots with your 6″ drywall knife and then apply another skim coat to the area. This skim coat will be much easier and smoother than the first skim coat and it will also dry a lot faster too.

    Once the second coat is dry:
    1) Sand entire wall with 100 grit sandpaper
    2) Remove sanding dust from walls by using a half of a bucket of water and a yellow grout sponge rinsing the sponge often in the bucket of water.
    3) Prime with a quality latex acrylic primer.
    4) Paint on two coats of a quality paint and you’re done!

      Subscribe to my Youtube Channel

    to see more of my videos that I post on a weekly basis


    Comments from: Paul Peck- Owner at Peck Drywall and Painting

    In Conclusion: I highly recommend this skim coating with the paint roller trick to any contractors or even Do it Yourself’ers for covering up an ugly texture, looking for a smoother finish on their drywall or plaster walls and ceilings, or even after removing wallpaper!

    I think this how to skim coat trick saved me several hours of work by not having to take the extra time to try and keep the mud thickness as consistent as possible which means less sanding and mudding.

    Tip: If you’re trying to cover up a knockdown or skip trowel texture, be sure to use at least a 1″ to 1 1/4″ roller cover when applying the first skim coat. Then a 3/4″ nap will work fine for the second skim coat of all purpose joint compound to the wall or ceiling or skim coating.

    Proudly servicing these areas on the Space Coast: Melbourne-Melbourne Beach-Palm Bay-Indialantic-Indian Harbour Beach-Vero Beach-Satellite Beach-Viera-Cocoa Beach-Rockledge-Merritt Island-Cape Canaveral-Suntree-Port St. John-Cocoa-Titusville

    Good luck with your skim coating project! -Paul

    Checkout one of my latest videos below:

    In this video tutorial I’m going to show you how to apply a skim coat to your walls for fresh new look.


    DIY Skim Coating- In this video I’m gonna show you how to mix the skim coat and also all of the tools needed to for mixing an all purpose joint compound for skim coating.

    Have questions about how to skim coat and the materials that you see in the video?

    Please feel free to ask Your Questions in the Comment Section of my video on YOUTUBE
                                HERE—>https://youtu.be/NZyY96BISXQ


    Here’s the tools I used to get the job done in this skim coating by hand video:

    Goldblatt Mud Mixing 3/8″ drill bit- http://amzn.to/2khx0WG

    Dewalt 20-Volt Lithium Ion Drill/ Driverhttp://amzn.to/2kJ2wtg

    WallBoard Bucket Scoop- http://amzn.to/2jtimXV

    Goldblatt Pro Mud Pan and Knife Set- http://amzn.to/2kIqlWc

    Werner Bench Ladder- http://amzn.to/2kJor3v


    Cool Drywall Tool Review and Demonstration- Drywall Cutting Can Lights

    In this drywall tool review and demonstration video I’ll show you how to use a can light drywall tool. It’s great for DIYers, handyman and even contractors will benefit from this must have magnetic drywall measuring and locating tool.


    The Center Mark by Calculated Industries is a great tool for marking and cutting the drywall around Can lights with a Roto Zip spiral cut saw. For remodels, new construction and ceiling repairs.


    No measuring required!


    The Center Mark is super easy to use!

  • 1) Simply screw in the magnetic post right in the can light before you put your drywall up

  • 2) Now put your drywall into position

  • 3) Next take the locator magnet and find magnetic post under the drywall before you make your cut

  • 4) Now plunge the Roto Zip or spiral cut saw into the drywall about an inch away from your Center Mark magnet toward you.

  • 5) Once you hit the metal rim of the can light, pull the cutting bit out.

  • 6) Now return the bit on the other side of the can light metal rim and follow the can light outer rim around the can light and you’re done!

  • My conclusion and drywall tool review after trying the Center Mark Drywall Tool for the first time. Is that whether you’re a DIY’er, handyman or even a remodeling contractor or drywall contractor. This product will be the fastest way and most precise way to marking and cutting the drywall around can lights on the new construction, remodels and home improvement projects.


    So with the Center Mark by Calculated Industries, You can save time and money by reducing the number of miscuts around can lights. All of this means you make more money while also getting a better end result.

    And did I mention that there is No Measuring Required!!

    The tools that I recommend precision marking and cutting are the Center Mark Drywall Tool for can lights and also the Blind Mark Magnetic Locator Tool for cutting out all sizes of electrical boxes.
    -~-Calculated Industries Center Mark Drywall Recessed Lighting Cutout Locator Tool-~- http://amzn.to/2kgNkrC
    -~-Calculated Industries Blind Mark Drywall Electrical Box Locator Tool-~- http://amzn.to/2kzlLWw

    For more Drywall Tool Review Videos, How To Videos and Project Videos
    Visit my –> Youtube Channel


    Drywall Art Sculpture- Taking my shark sculpture to another level

    I’ve been creating drywall art sculptures of ocean scenes and 3D waves on the walls of homes, restaurants and doctors offices here in Brevard County, Florida for several years now. But, I had an idea of being able to take these drywall art sculptures from just walls and turn them into a framed, hand painted fine art sculpture that can be custom made and shipped to order anywhere in the US or around the world. These framed wall sculpture paintings can be hung on any wall without the sculpture artist having to be on site to create a custom wall sculpture.

    The drywall art sculpture and painting process

    Here’s a few photos of the drywall art sculpture as it goes through it’s transformation from just a sculpture to a framed and ready to hang piece of unique art.

    Sculpting my shark  drywall art sculpture

    Sculpting my shark drywall art sculpture with my Marshalltown drywall sculpting tools

    Shark sculpture ready to be primed with Kilz

    Shark sculpture ready to be primed

    The entire shark sculpture was primed with a spray can of Kilz and the ocean blue water background painted

    The entire shark sculpture was primed with a spray can of Kilz and the ocean blue water background painted to a point where I can blend it more with the shary once the shark is painted

    Background covered and protected - Ready to paint the shark

    Background covered and protected – Ready to paint the shark

    Shark hand painted

    Shark hand painted with acrylic paint

    Shark sculpture ready to blend and touch up

    Shark sculpture ready to blend the backgound water in with the glow of the light hitting the shark

    Shark sculpture clear coated with a gloss sealer

    For the wet water effect on the shark sculpture, I clear coated it with 5 coats of gloss polycrylic sealer

    My completed hand painted and framed shark sculpture

    My completed hand painted, backed and framed shark sculpture

    3D sculptured shark painting

    Hand painted, backed and framed shark sculpture

    The shark sculpture wall hanger is 19″ x 46″ in size

    Completed drywall art shark sculpture

    Completed drywall art shark sculpture

    Custom masonite backing

    Custom masonite backing

    Custom wire hanger

    Professional wire and hangers