Brevard County Water Damage Drywall Repair

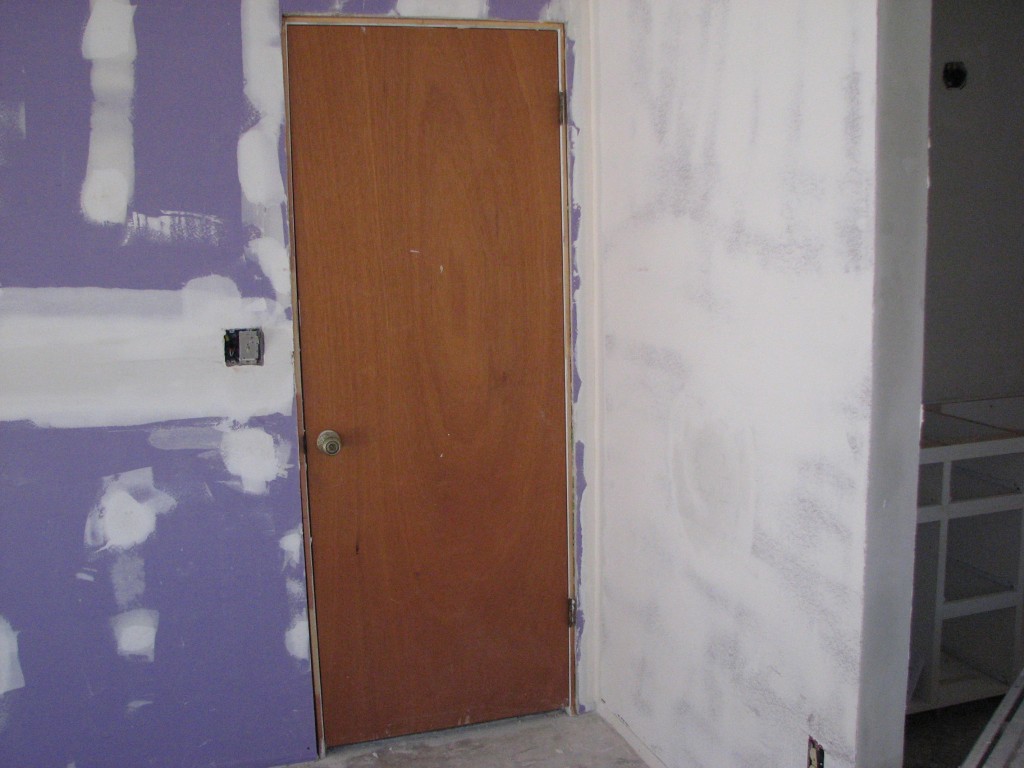
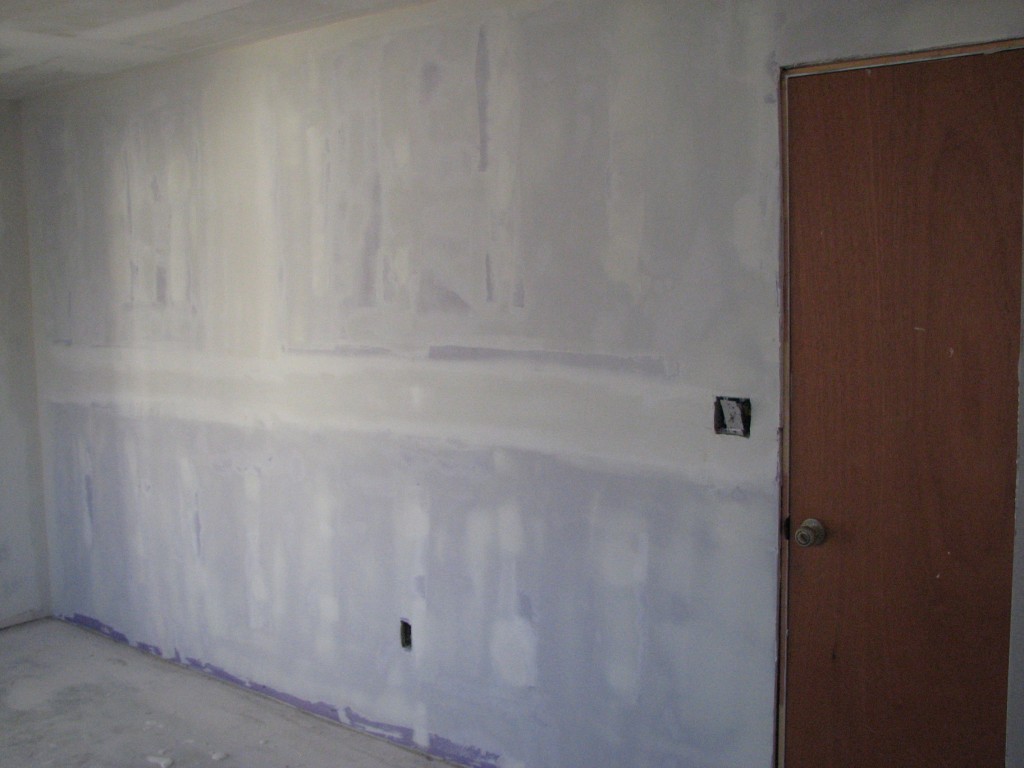
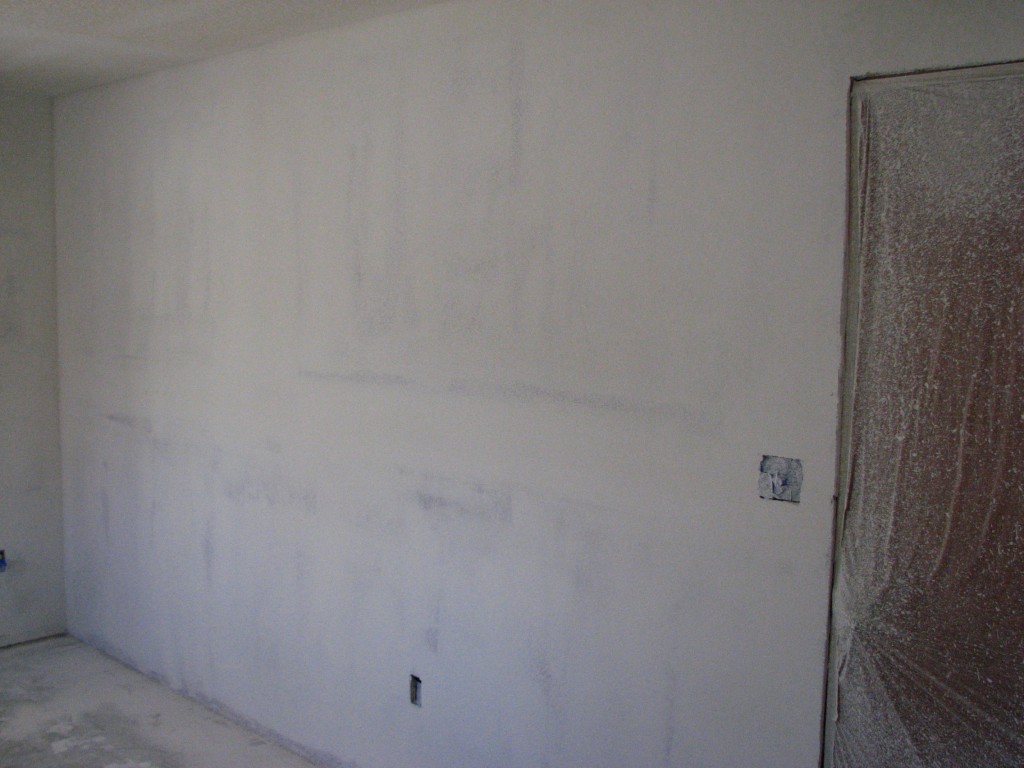
On this Brevard County water damage repair project video, I show you the whole process of doing a water damage drywall repair from start to finish. When
the plumbing leak happened the homeowners cut out the area of drywall that had been damaged by
the water. After they did that they realized that it might be a little bit bigger
project than they really could handle.


In My Youtube video I’ll show you how I do the drywall finishing on this water damage drywall repair from start to finish. There is also a link within in the video of me applying a orange peel texture to this same repair.

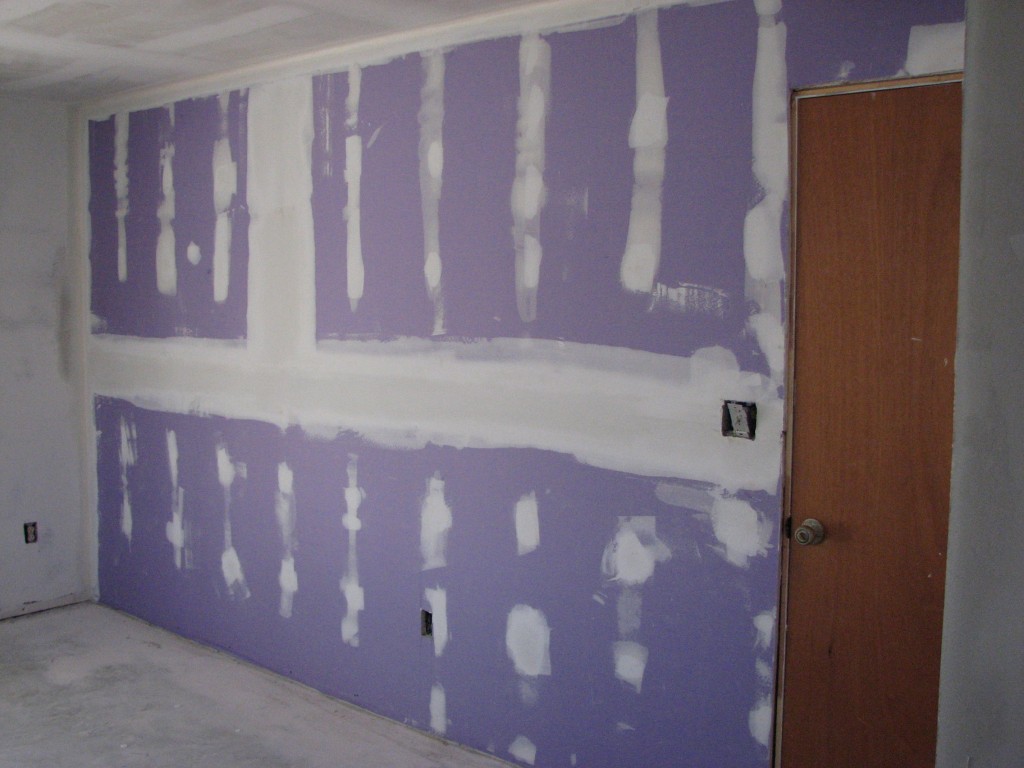
1) The first thing I needed to do was square up the drywall because when they cut it out it was kind of crooked and just passed a couple studs.

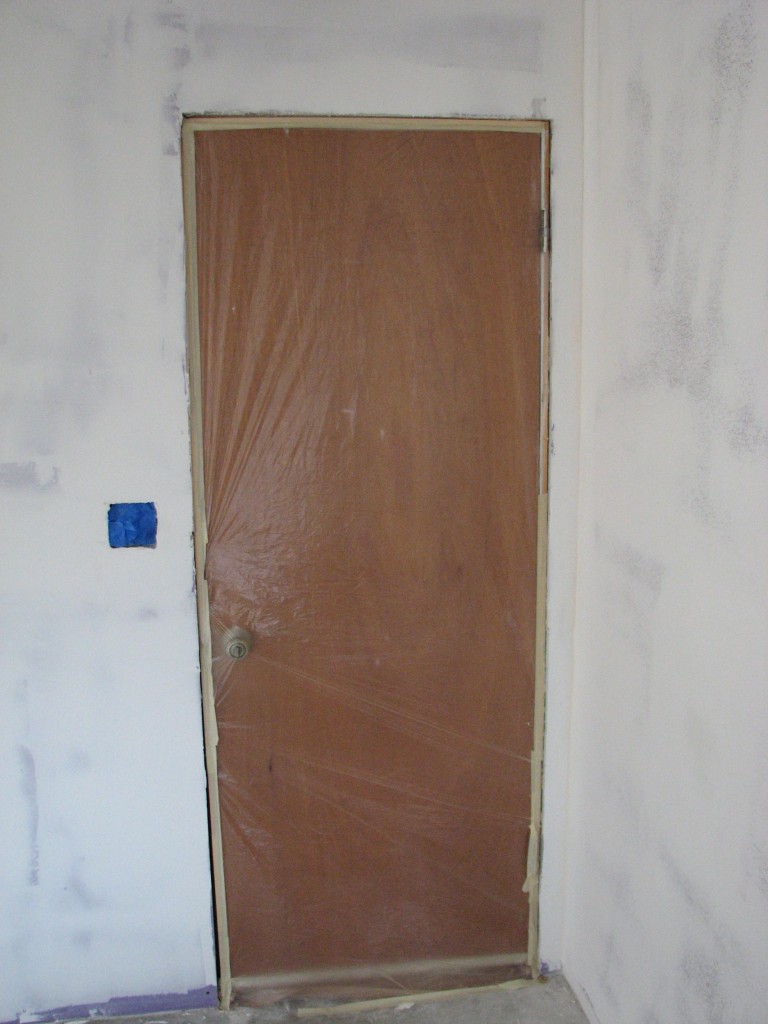
2) Next, I added a couple of one by four furring strips to be able to attach the new drywall too.

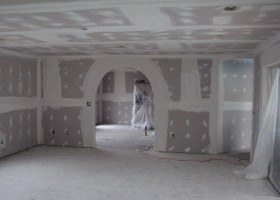
3) I then added two pieces of 1/2″ drywall to the repair areas.

Drywall tip: when doing these types of wall
repairs always add a screw into the existing drywall that was not cut out to
secure it so it will not crack overtime

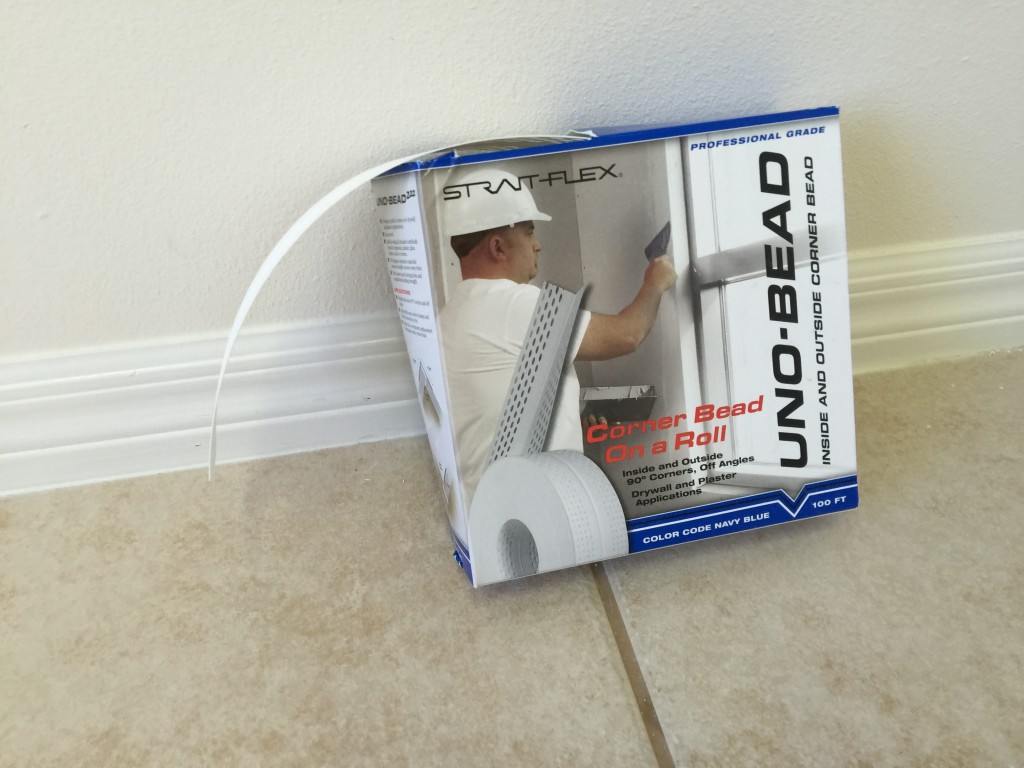
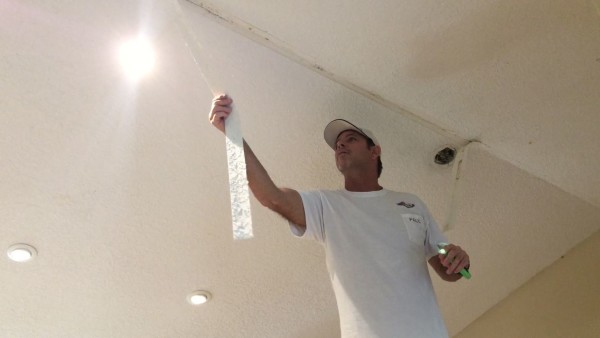
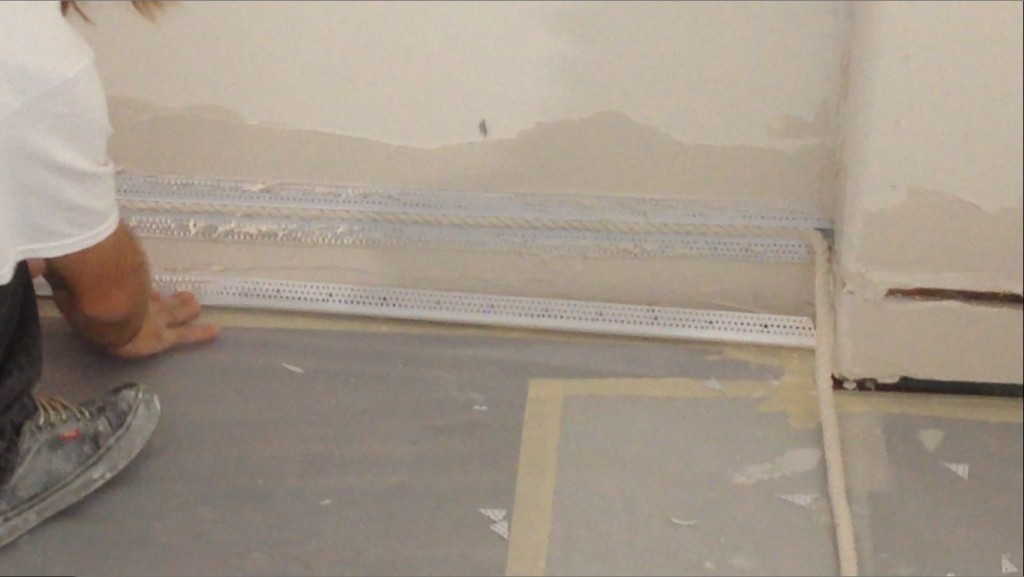
4) I added fiberglass mesh drywall tape to all of the seams except the one corner where I like to use paper tape to get a nice crisp defined corner.

Drywall tip: when using fiberglass mesh drywall tape always use a setting type of joint compound this means it comes in a powder form and is much stronger than the all-purpose joint compound that comes in a 5 gallon bucket.


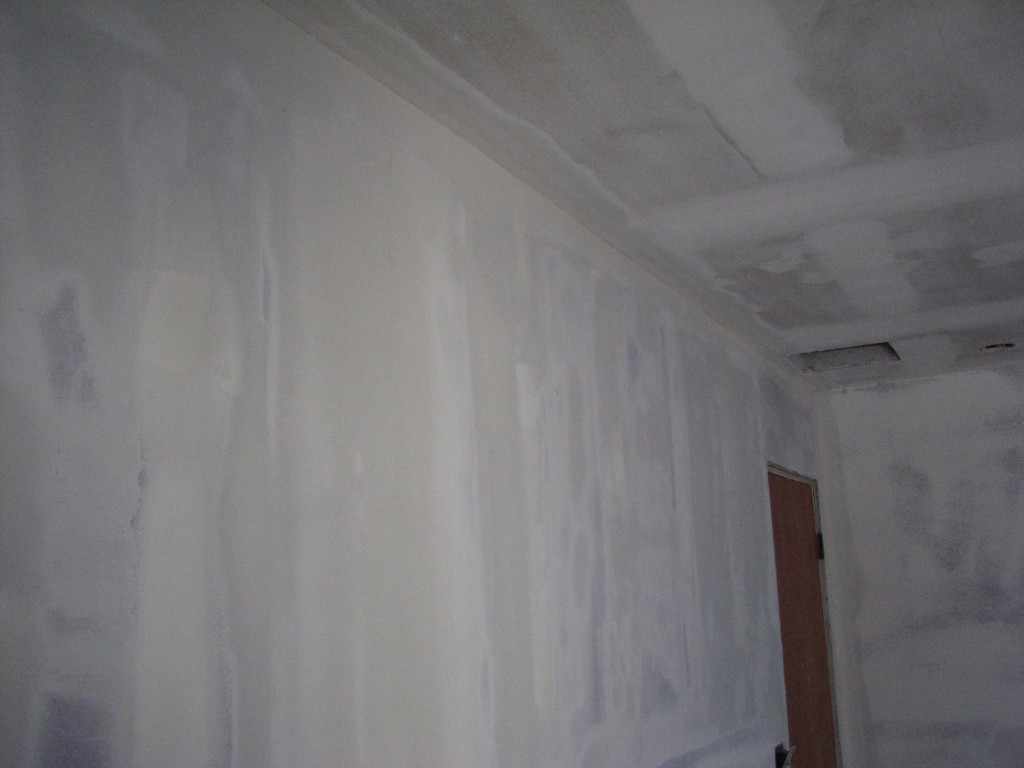
5) Mix The setting type of joint compound and apply it with a 6 to 12 inch drywall taping knife trying to keep all edges smooth and not raised.

6) Scrape any high or raised areas on the drywall mud that you just applied using a 6 inch drywall taping knife.

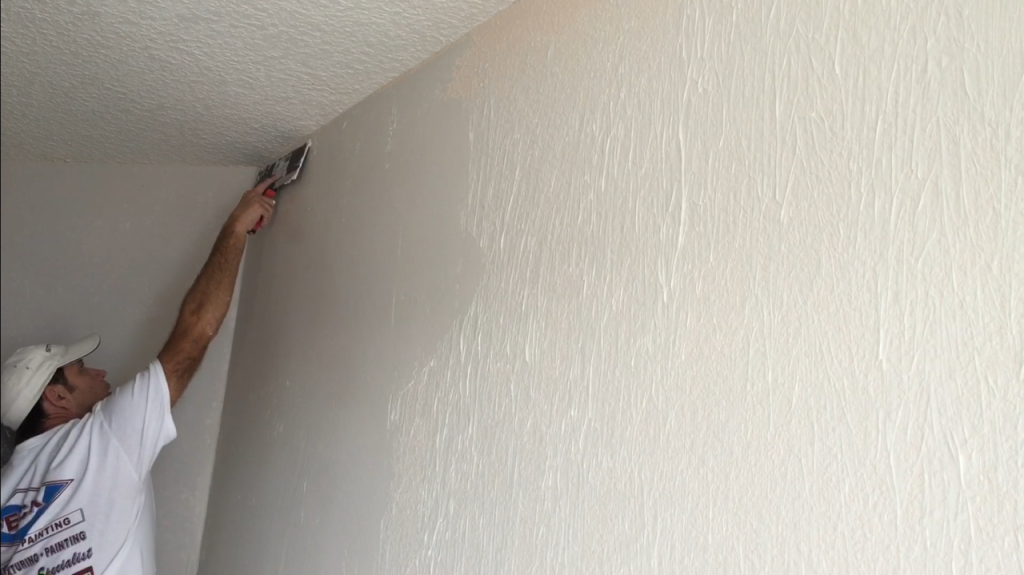
7) apply the second coat with a 12 inch taping knife depending on how soon you want this to be ready to texture and paint you can use the setting type compound or if you’re not in a hurry just use a all-purpose joint compound.

8) apply the third coat you really shouldn’t have to put much mud on just a thin layer of all-purpose joint compound.

Drywall tip: I like to use the all-purpose over the setting type compound for the final finish coat because it sends a lot easier than the setting type joint compound.

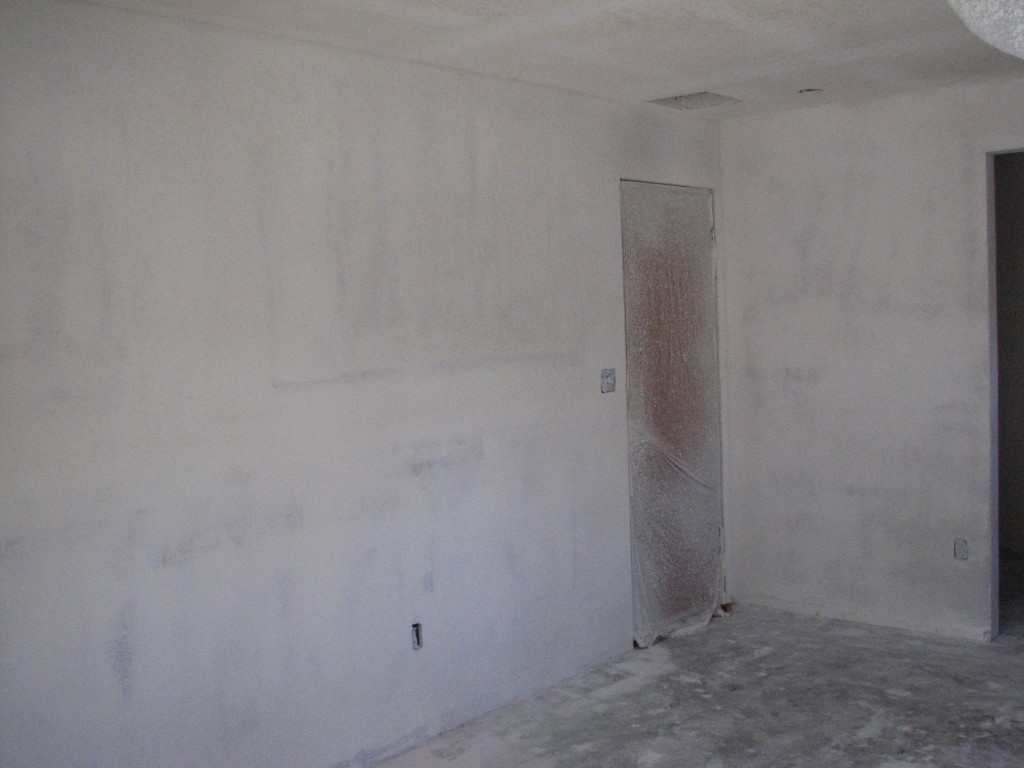
9) Using hand sander or sanding sponge Sand down any edges or bumps or humps on your mud work. And touch up any areas that look like they might just need a little bit of mud.

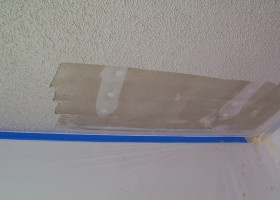
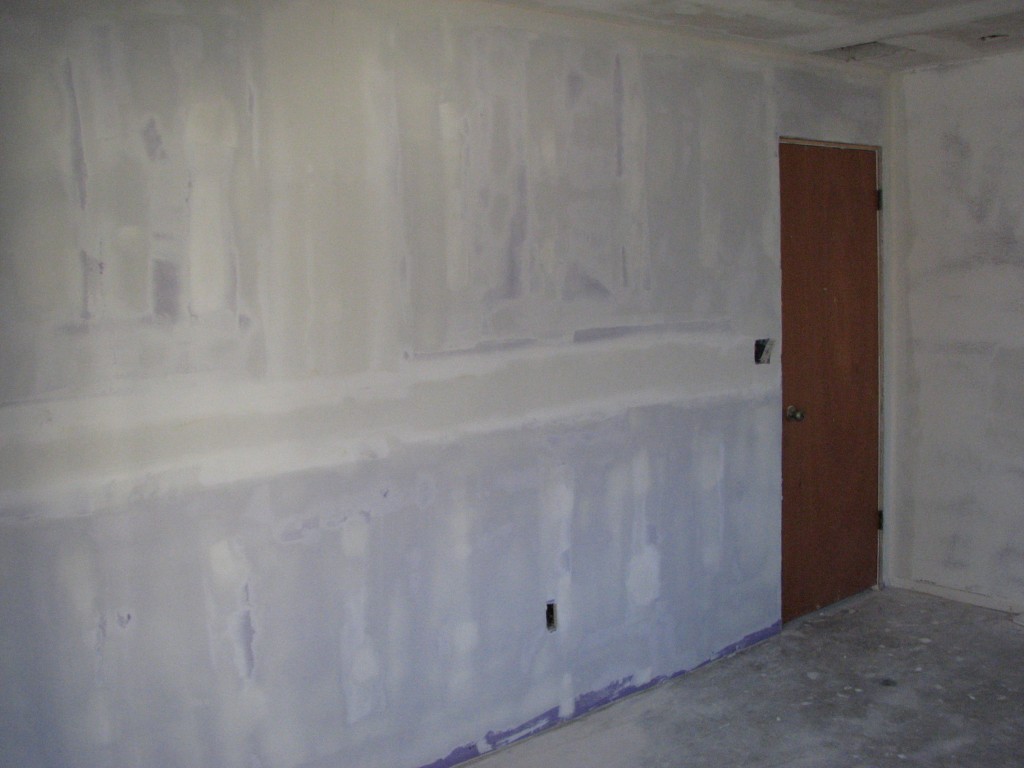
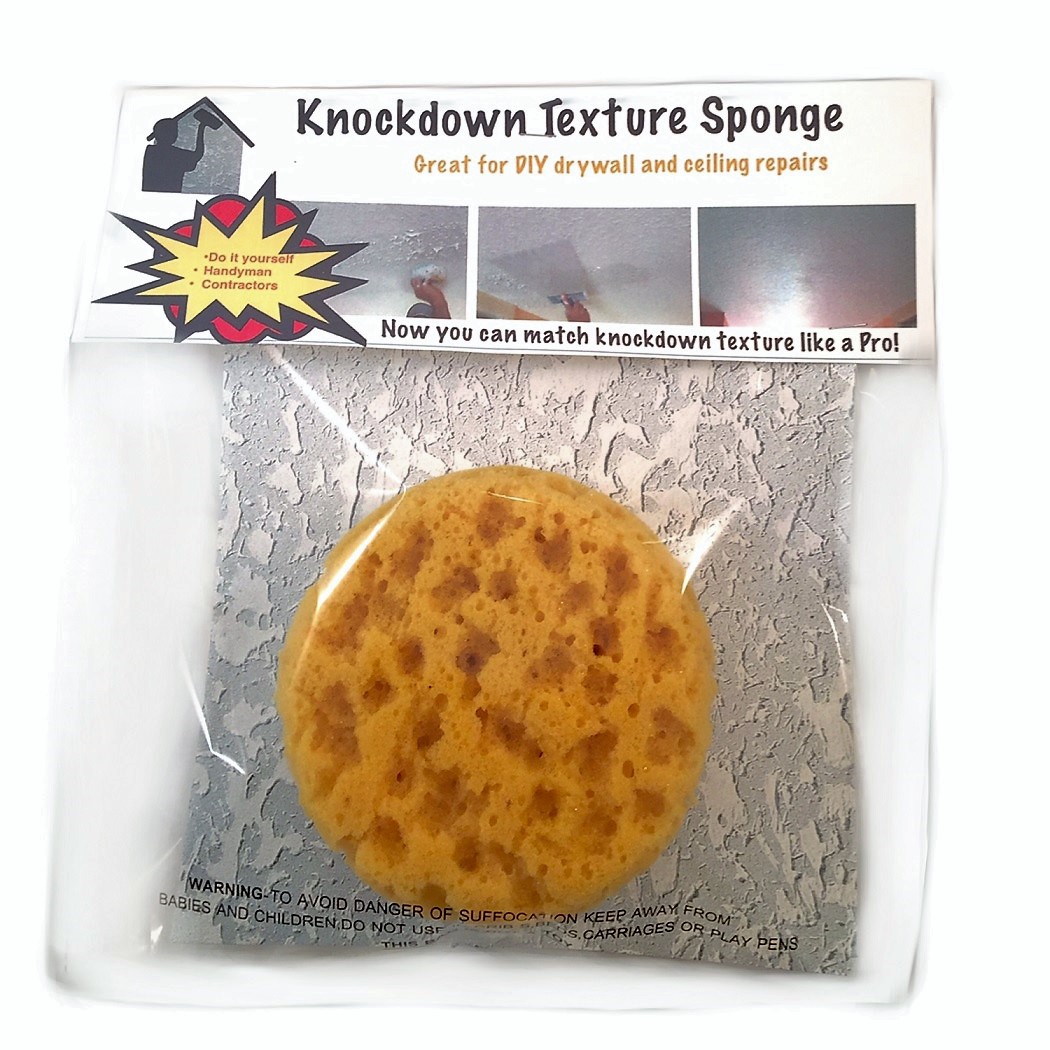
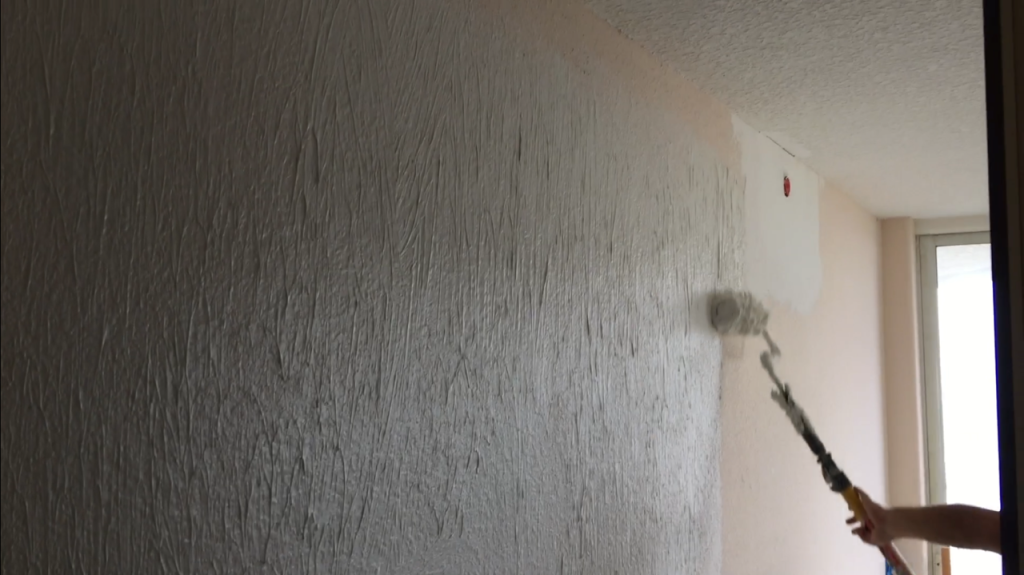
10) Next, I applied the orange peel texture to the repair walls and feathered it into the existing texture which makes it blend and not stand out like a repair any longer.

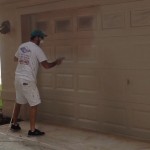
11) Lastly, prime the repaired areas with your favorite type of primer and then paint two coats and you’re done!

Painter tip: I like to use a primer called Zinsser 123 primer in these
types of repairs. Not only is it a great drywall primer, it also has a stain blocker in it
just in case any water stains that might show up from when the plumbing leak originally occurred. That’s my primer recommendation.

Good luck on your water damage drywall repair project!


Soundproofing an existing wall to help reduce noise from home theater

On this master bedroom and bathroom remodeling project in Merritt Island, FL I’ll be adding some sound reduction drywall w/ Green Glue compound and sealant to try and reduce the noise in a master bedroom coming from a home theater entertainment system on the other side of the existing master bedroom wall.

Soundproofing a wall

Gold Bond® BRAND 5/8″ SoundBreak® XP® Gypsum Board with Sporgard™

Do you have noisy neighbors or a kickin home theater system and want to reduce some of the noise?

I can help You with some of my state of the art soundproofing techniques and noise reducing products!

I’ll also be removing all of the popcorn ceiling texture, replacing a sheet of drywall on the master bathroom ceiling, skim coating all of the walls and spraying an orange peel texture to match the texture in the rest of the home.

The bedroom entry door and jamb will be replaced with a solid core door and the jamb will have to be custom made because the extra layer of drywall changes the width of the opening. Once the new door jamb is installed, I will apply the acoustical sealant around any gaps for added noise reduction.

Soundproofing shared wall between living room and master bedroom

Soundproofing shared wall between living room and master bedroom after I removed the popcorn ceiling texture

Soundproofing Contractor

The plan is to add a second layer of Gold Bond® BRAND 5/8″ SoundBreak® XP® Gypsum Board with Sporgard™ noise reducing drywall to the shared wall that all of the thumping bass and loud voices are being heard from.

Soundproofing with purple soundbreak 5/8"

Soundproofing with purple Soundbreak 5/8″ drywall

Perfect where sound transmission between rooms or dwelling units is a concern!

How to Tips for enhancing soundproofing on an existing wall:

1) The first step is to locate and mark all of the wood studs that we will be attaching the soundproof drywall to.

2) Add the appropriate mud ring extenders for the existing outlet and switch boxes.

3) Layout the wall for the least amount of drywall seams while staggering the drywall seams as well.

4) Cut the Soundbreak drywall to fit, keeping in mind that a 1/4″ gap around the whole perimeter of the wall will be needed in order to be able to apply the acoustical sealant.

5) Lay the drywall flat and apply the Green Glue compound- 2 tubes for a 4″x8′ sheet of drywall or 3 tubes for a 4’x12′ sheet of drywall.

soundbreak-xp-green-glue-compound

Applying Green Glue Noiseproofing Compound

Applying Green Glue Noiseproofing Compound


6) Next, I installed the soundproofing drywall with 1 5/8″ drywall screws with screw spacing in accordance with my local building codes. Repeat steps until all drywall is installed.

Installing Soundbreak XP drywall with Green Glue noise reducing compound

Installing Soundbreak XP drywall with Green Glue noise reducing compound


Installing Soundbreak XP with GreenGlue
Sound board installed

Sound board installed

Checkout——>My Amazon Top 100 Drywall Tool Picks

7) Once all of the soundproof drywall has been installed, fill the 1/4′ gap around the perimeter with the Green Glue sealant. Allow 48 hours for the sealant to dry completely before finishing the drywall with joint compound and paper or fiberglass mesh tape. Just like you would finish regular drywall.

Apply the Green Glue Noiseproofing Sealant in the 1/4" gap around the perimeter of the new drywall

Green Glue Noiseproofing Sealant


8) Finish the new soundbreak drywall just like regular drywall using joint compound and drywall tape.

Soundbreak drywall finishing- Level 3

Soundbreak drywall finishing- Level 3

Sound dampening drywall finishing

Sound dampening drywall finishing

Soundproofing- Mud work

Soundproofing- Mud work

9) 8) Wall skim coated to a level 4 finish

soundproofing drywall skim coated

soundproofing drywall skim coated

soundproofing drywall skim coated-2

soundproofing drywall skim coated-2

soundproofing drywall skim coated-3

soundproofing drywall skim coated-3

sound dampening drywall- level four finish

sound dampening drywall- level four finish

soundbreak xp drywall- level-four finish

soundbreak xp drywall- level-four finish

10) Lastly, I applied an orange peel texture to match the existing textured walls of the home.

master bedroom remodel- soundproofing- orange peel texture-1

master bedroom remodel- soundproofing- orange peel texture-1

master bedroom remodel- soundproofing- orange peel texture-2

master bedroom remodel- soundproofing- orange peel texture-2


Soundproofing products used on this remodeling project:

Gold Bond® BRAND 5/8″ SoundBreak® XP® Gypsum Board with Sporgard™– Has an acoustically enhanced, high density fire resistant Type X gypsum core encased in a heavy, abrasion and mold/mildew/moisture resistant, 100% recycled, National Gypsum PURPLE® paper on both sides. Used in the construction of high rated STC (Sound Transmission Class) wall assemblies, this 5/8″ thick gypsum board consists of a layer of viscoelastic damping polymer sandwiched between two pieces of high density mold resistant gypsum board, providing constrained layer damping.
5/8″SoundBreak XP panels may be used where Type X gypsum panels are specified in some fire-rated wall and floor-ceiling assemblies

Green Glue Noiseproofing Compound– Independent lab tests prove that using Green Glue Noiseproofing Compound dissipates up to 90 percent of noise. Green Glue is ideal for dissipating low frequency noise common with home entertainment and theater systems.

Green Glue Noiseproofing Sealant– Seals the cracks and gaps to prevent unwanted noise from entering a room. It is non-hazardous, has practically no odor, and it resists drying out or cracking with age.
Adding Green Glue Noiseproofing Sealant to your soundproofing project can reduce noise transmission by 100 times or more. Green Glue Noiseproofing Sealant exceeds LEED green building requirements and has been independently tested by Underwriters Laboratories for fire safety and environmental impact.


Painting Contractor License # PT393

Drywall Contractor License # RX11066969

Feel free to call or Email us for more information about soundproofing and noise dampening services!

Please give us a call for a prompt and accurate quote!

Melbourne/Viera: 321-777-9337

Merritt Island/Cocoa Beach: 321-453-6233

Titusville: 321-383-3574

Soundproofing Specialists here in Brevard County:
Soundproofing Contractor serving the Space Coast since 1995

Soundproofing Company serving the Space Coast since 1995

Proudly servicing these areas of the Space Coast: Melbourne-Melbourne Beach-Palm Bay-Indialantic-Indian Harbour Beach-Satellite Beach-Viera-Cocoa Beach-Rockledge-Merritt Island-Cape Canaveral-Suntree-Port St. John-Cocoa-Titusville


How To and Product Review – Strait Flex Uno-Bead

Strait Flex Uno-Bead - Corner bead on a roll

Strait Flex Uno-Bead – Corner bead on a roll


In this product review and demonstration video, I will be using the Strait flex Uno-Bead for the first time ever. This will enable you to see how easy the Strait Flex Uno-Bead is to work with without ever have used it before. Or what might be a bit of a learning curve when it comes to using a product you have never used before. Thanks for watching and if you have any questions about the Strait Flex Uno-Bead please feel free to ask me in the comments section of my video on Youtube.

I’ll be replacing the old corner bead from a closet modification with the Strait Flex composite corner bead on a roll. The closet had already been taken apart by the homeowner that had just purchased this home.The plan was to make a computer/gaming area for their son where the closet was. Since their new to them home was having several remodeling projects going on anyways they wanted to have me take care of this extra job while I was there.

My conclusion after trying Uno-Bead for the first time on this remodeling project is that whether you’re a contractor, handyman or even a home improvement DIY’er. This product will be a fast and easy way to install corner bead on new drywall and drywall repairs. And the Strait Flex Uno-Bead is much stronger the traditional corner beads which means it’s great for drywall corners in high traffic areas.

Another benefit is Uno-Bead requires less joint compound than the traditional metal corner bead or vinyl corner bead. Which speeds up drying time as well. So you can save time, the amount of materials needed to finish outside 90 degree drywall corner. All of this means you make more money while also getting a better and stronger end result. Also since this corner bead product comes on a roll, it’s easily stored eliminating the need to have a special place to store it from getting damaged before getting to the job where you’ll be doing your drywall finishing.

I would definitely use Strait Flex Uno-Bead Again again!

Here some stats about Strait Flex Uno-Bead 222:

  • This composite corner bead provides outside 90 degree corners for drywall, plaster and EIFS applications and perfectly replaces damaged metal corner bead.
  • Works on all inside and outside corners
  • Drywall, thin coat plaster, EIFS and kitchen remodels, bathroom remodels, home renovations and new construction.
  • High traffic areas where bumps and dents commonly occur.
  • Reduces waste and is easily transported.
  • Uno-Bead 222 is sized to be a permanent replacement to damaged corner bead.
  • Installs using all standard methods: Drywall compound, Plaster, EIFS, glue, staples, nails or screws.
  • Available in 2.22″ and 3″ widths.
  • Mold proof, Rust proof and Alkali resistant.
  • Slots insure quick drying time and unmatched bonding strength.
  • PVC/Nylon composite material ensure straight corners every time and prevents mold and rust.
  • Vaulted Ceiling Tape Joint Repair-Knockdown Texture Sponge

    In this video blog I’ll be demonstrating how to apply an all purpose joint compound with my Knockdown Texture Sponge on a vaulted ceiling repair. The ceiling repair is the entire 36′ paper tape joint right at the vault of the open plan ceiling.

    Over time a lot of homes vaulted tape joints end up separating due to a few different factors:

    Vaulted Ceiling Tape Joint Repair Texture Sponge

    Vaulted Ceiling Tape Joint Repair


    1) These type of ceilings are exposed to excessive heat because of how close the vaulted ceiling is to the actual roof.
    2) Sometimes when the drywall was installed at the vaulted ceiling the drywall hangers leave to big of a gap at the vault.
    3) Another common mistake during the construction phase of when the drywall ceiling was initially installed without using the correct amount of fasteners which lead to the ceiling sagging over time and popping the tape joint at the vaulted ceiling.
    4) Other times there is no framing member to attach to at the top section of the vaulted ceiling.


    These are just a few of the reason why a vaulted ceilings tape joints fail.

    After applying a Straight Flex specialty tape for a nice crisp line along the vault and three coats of mud and a little fine sanding, it was time to use the knockdown texture sponge to blend the existing knockdown texture on this vaulted ceiling repair.

    I must say this knockdown texture sponge works great for matching and blending the knockdown texture. I’ve been using one for a several years now and they work great for tape joint repairs and small drywall repairs.


    Whether you’re doing drywall repairs on the wall drywall or plaster ceiling repairs you can match your existing knockdown texture with the new knockdown texture Sponge

    The knockdown texture sponge is perfect for matching knockdown texture on wall or ceiling repairs and can be purchased from The Texture Master

    Knockdown Texture Sponge- By: The Texture Master


    Buy One Now! @
    www.texturemaster.com/knockdown-texture-sponge/


    Start matching knockdown texture like a Pro!


    For those DIY and How To Fans out there

    I’ve found in my over 20 years in business as a drywall contractor and painting contractor, that using my knockdown sponge texturing technique along with my knockdown texture sponge. I can match most knockdown textures on wall and ceiling repairs that also need knockdown texture patch matched to an existing texture.


    Knockdown repair tools you will need to match your knockdown texture on your vaulted ceiling:

  • 1) My Knockdown Texture Sponge
  • 2) All purpose joint compound
  • 3) Drywall Mud pan drywall Hauk
  • 4) 6″ and 12″ Taping knife or lexan knockdown paddle

  • How to skim coat using the paint roller trick

    In this Blog video two part series I’ll show you how to do the first coat and second skim coats on a wall to get rid of an ugly poorly done knockdown texture. This how to skim coat trick is a great way for anyone from DIYers to contractors to apply a skim coat to drywall and plaster walls or ceilings.

    Skim Coating to get rid of ugly texture

    I’ll be using the paint roller method with a 1 1/4″ roller nap (cover) and I thinned down the all purpose joint compound with water.

    How to skim coat dtywall with the paint roller method

    How to skim coat dtywall with the paint roller method

    For skimming I’m using a 14″ drywall taping knife and mud pan to smooth out the mud that was applied.

    Skimming out the rolled on mud with a 14" drywall taping knife

    Skimming out the rolled on mud with a 14″ drywall taping knife

    How to skim coat- Paint roller trick on Youtube (Part 1)

    How to skim coat- Paint roller trick (Part 2)

    This How to Skim Coat Trick is a must when skim coating walls and ceilings for DIY’ers!

    Once the first skim coat is complete, let the joint compound dry for 24 hours. Day 2- scape any high spots with your 6″ drywall knife and then apply another skim coat to the area. This skim coat will be much easier and smoother than the first skim coat and it will also dry a lot faster too.

    Once the second coat is dry:
    1) Sand entire wall with 100 grit sandpaper
    2) Remove sanding dust from walls by using a half of a bucket of water and a yellow grout sponge rinsing the sponge often in the bucket of water.
    3) Prime with a quality latex acrylic primer.
    4) Paint on two coats of a quality paint and you’re done!

      Subscribe to my Youtube Channel

    to see more of my videos that I post on a weekly basis


    Comments from: Paul Peck- Owner at Peck Drywall and Painting

    In Conclusion: I highly recommend this skim coating with the paint roller trick to any contractors or even Do it Yourself’ers for covering up an ugly texture, looking for a smoother finish on their drywall or plaster walls and ceilings, or even after removing wallpaper!

    I think this how to skim coat trick saved me several hours of work by not having to take the extra time to try and keep the mud thickness as consistent as possible which means less sanding and mudding.

    Tip: If you’re trying to cover up a knockdown or skip trowel texture, be sure to use at least a 1″ to 1 1/4″ roller cover when applying the first skim coat. Then a 3/4″ nap will work fine for the second skim coat of all purpose joint compound to the wall or ceiling or skim coating.

    Proudly servicing these areas on the Space Coast: Melbourne-Melbourne Beach-Palm Bay-Indialantic-Indian Harbour Beach-Vero Beach-Satellite Beach-Viera-Cocoa Beach-Rockledge-Merritt Island-Cape Canaveral-Suntree-Port St. John-Cocoa-Titusville

    Good luck with your skim coating project! -Paul

    Checkout one of my latest videos below:

    In this video tutorial I’m going to show you how to apply a skim coat to your walls for fresh new look.


    DIY Skim Coating- In this video I’m gonna show you how to mix the skim coat and also all of the tools needed to for mixing an all purpose joint compound for skim coating.

    Have questions about how to skim coat and the materials that you see in the video?

    Please feel free to ask Your Questions in the Comment Section of my video on YOUTUBE
                                HERE—>https://youtu.be/NZyY96BISXQ


    Here’s the tools I used to get the job done in this skim coating by hand video:

    Goldblatt Mud Mixing 3/8″ drill bit- http://amzn.to/2khx0WG

    Dewalt 20-Volt Lithium Ion Drill/ Driverhttp://amzn.to/2kJ2wtg

    WallBoard Bucket Scoop- http://amzn.to/2jtimXV

    Goldblatt Pro Mud Pan and Knife Set- http://amzn.to/2kIqlWc

    Werner Bench Ladder- http://amzn.to/2kJor3v


    The Rope Trick – Trim Tex Architectural Reveal Bead Installation

    Reveal Bead – Tips and Tricks

    In this Blog video I’ll be demonstrating the rope trick on some inset baseboard using Trim Tex Reveal Bead for a 1/2″ reveal and Super Seal Gasket L Bead Tearaway for where the inset baseboards meet the porcelain tile floor. I’ll be installing the reveal bead by setting it in mud using USG Easy Sand 90 minute setting type joint compound w/ Trim Tex Powdered Mud Max joint compound additive. I’m also bedding in fiberglass mesh drywall tape over of the beads in the special blend of mud.

    Reveal Bead Rope Trick on Youtube

    The rope trick is perfect for protecting the reveal from getting joint compound in the reveal of the bead when doing drywall or any type of drywall art wall finishing.

    The Rope trick is a must when doing reveal beads!

    Once the rope is pulled out from the first coat I’ll be doing two more coats of the Mud Max 90 without the rope. Because with the rope trick the mud is very close to being flat along the top and bottom of the architectural reveal bead. I chose to use the architectural reveal bead because it creates the sharpest cleanest aesthetic reveals. The regular reveal bead has has more of a rounded profile along the top and bottom of the reveal. Both of these types of 1/2″ reveal beads or any reveal beads for that matter can utilize the rope trick to keep mud from getting in the reveal while doing the first mud set and taping coat.

    The Rope Trick using Trim-Tex Architectural Reveal Bead on an inset baseboard project

    The Rope Trick using Trim-Tex Architectural Reveal Bead on an inset baseboard project

      Subscribe to my Youtube Channel

    to see the progress of the inset baseboards on this luxury condominium renovation!

    Comments from: Paul Peck- Owner at Peck Drywall and Painting

    In Conclusion: I highly recommend this rope trick any drywall or stucco contractors installing any type of reveal bead!

    I think the rope trick saved me several hours of work by not having to take the extra time to try and keep as mud mud as possible from getting into the reveal bead and also the time to clean out the reveal after the first coat. Because it would be virtually impossible to keep mud out of the reveal while doing the first coat of Mud max 90.

    Tip: Keep a five gallon bucket filled halfway up with water while your pulling the rope out and you can clean it off easily in the bucket wit a rag.

    PS: Our record for the most continuous amount of rope pulled was the full 50′ of rope that we had.
    Can you beat that Record???

    Cool Drywall Tool Review and Demonstration- Drywall Cutting Can Lights

    In this drywall tool review and demonstration video I’ll show you how to use a can light drywall tool. It’s great for DIYers, handyman and even contractors will benefit from this must have magnetic drywall measuring and locating tool.


    The Center Mark by Calculated Industries is a great tool for marking and cutting the drywall around Can lights with a Roto Zip spiral cut saw. For remodels, new construction and ceiling repairs.


    No measuring required!


    The Center Mark is super easy to use!

  • 1) Simply screw in the magnetic post right in the can light before you put your drywall up

  • 2) Now put your drywall into position

  • 3) Next take the locator magnet and find magnetic post under the drywall before you make your cut

  • 4) Now plunge the Roto Zip or spiral cut saw into the drywall about an inch away from your Center Mark magnet toward you.

  • 5) Once you hit the metal rim of the can light, pull the cutting bit out.

  • 6) Now return the bit on the other side of the can light metal rim and follow the can light outer rim around the can light and you’re done!

  • My conclusion and drywall tool review after trying the Center Mark Drywall Tool for the first time. Is that whether you’re a DIY’er, handyman or even a remodeling contractor or drywall contractor. This product will be the fastest way and most precise way to marking and cutting the drywall around can lights on the new construction, remodels and home improvement projects.


    So with the Center Mark by Calculated Industries, You can save time and money by reducing the number of miscuts around can lights. All of this means you make more money while also getting a better end result.

    And did I mention that there is No Measuring Required!!

    The tools that I recommend precision marking and cutting are the Center Mark Drywall Tool for can lights and also the Blind Mark Magnetic Locator Tool for cutting out all sizes of electrical boxes.
    -~-Calculated Industries Center Mark Drywall Recessed Lighting Cutout Locator Tool-~- http://amzn.to/2kgNkrC
    -~-Calculated Industries Blind Mark Drywall Electrical Box Locator Tool-~- http://amzn.to/2kzlLWw

    For more Drywall Tool Review Videos, How To Videos and Project Videos
    Visit my –> Youtube Channel


    How to spray popcorn ceiling texture on a drywall ceiling repair

    On this popcorn ceiling repair project, I’ll demonstrate how to spray and blend popcorn ceiling texture on an actual ceiling repair that had water damage from a roof leak in Merritt Island, Florida. I’ll be using my GoPro while shooting the video.

    This will give you a unique perspective of how I spray and feather and match popcorn ceiling texture with a hopper and compressor.

    Prep- After I moved a few things out of the work zone, I covered the floor with 2 mil plastic and in order to contain all of the dust from the ceiling repair and the popcorn ceiling spray texture, I created a plastic bubble going from the ceiling to to the floor by using .31 mil plastic.

    Next, I scraped back the area of the ceiling where the popcorn texture had the water damage from a roof leak that had occurred while these homeowners were getting a new roof installed.
    After scraping back the popcorn texture, I primed the area with a can of Kilz stain blocking primer. This helps the popcorn ceiling texture get maximum adhesion to the existing popcorn ceiling and also will prevent any water stains to bleed through where the new popcorn texture meets the old popcorn.

    Next, I sprayed the popcorn ceiling texture using my smaller hopper and 15 gallon compressor since it’s just a small ceiling repair area that needs to be sprayed with the popcorn ceiling texture. I first concentrate on going around the perimeter of the ceiling repair. Then, I move on to spraying the main part of the popcorn ceiling repair. Lastly, I blend the popcorn texture into the old popcorn texture from the repair line out lightly feathering at the very end to create a gradual fade into the ceiling repair.

    Good luck with your popcorn ceiling repair and texture matching project!

    If you have any questions be sure to subscribe to my Youtube Channel and the ask your question in the comments section of this video.